Removing Constraints That Block Creativity

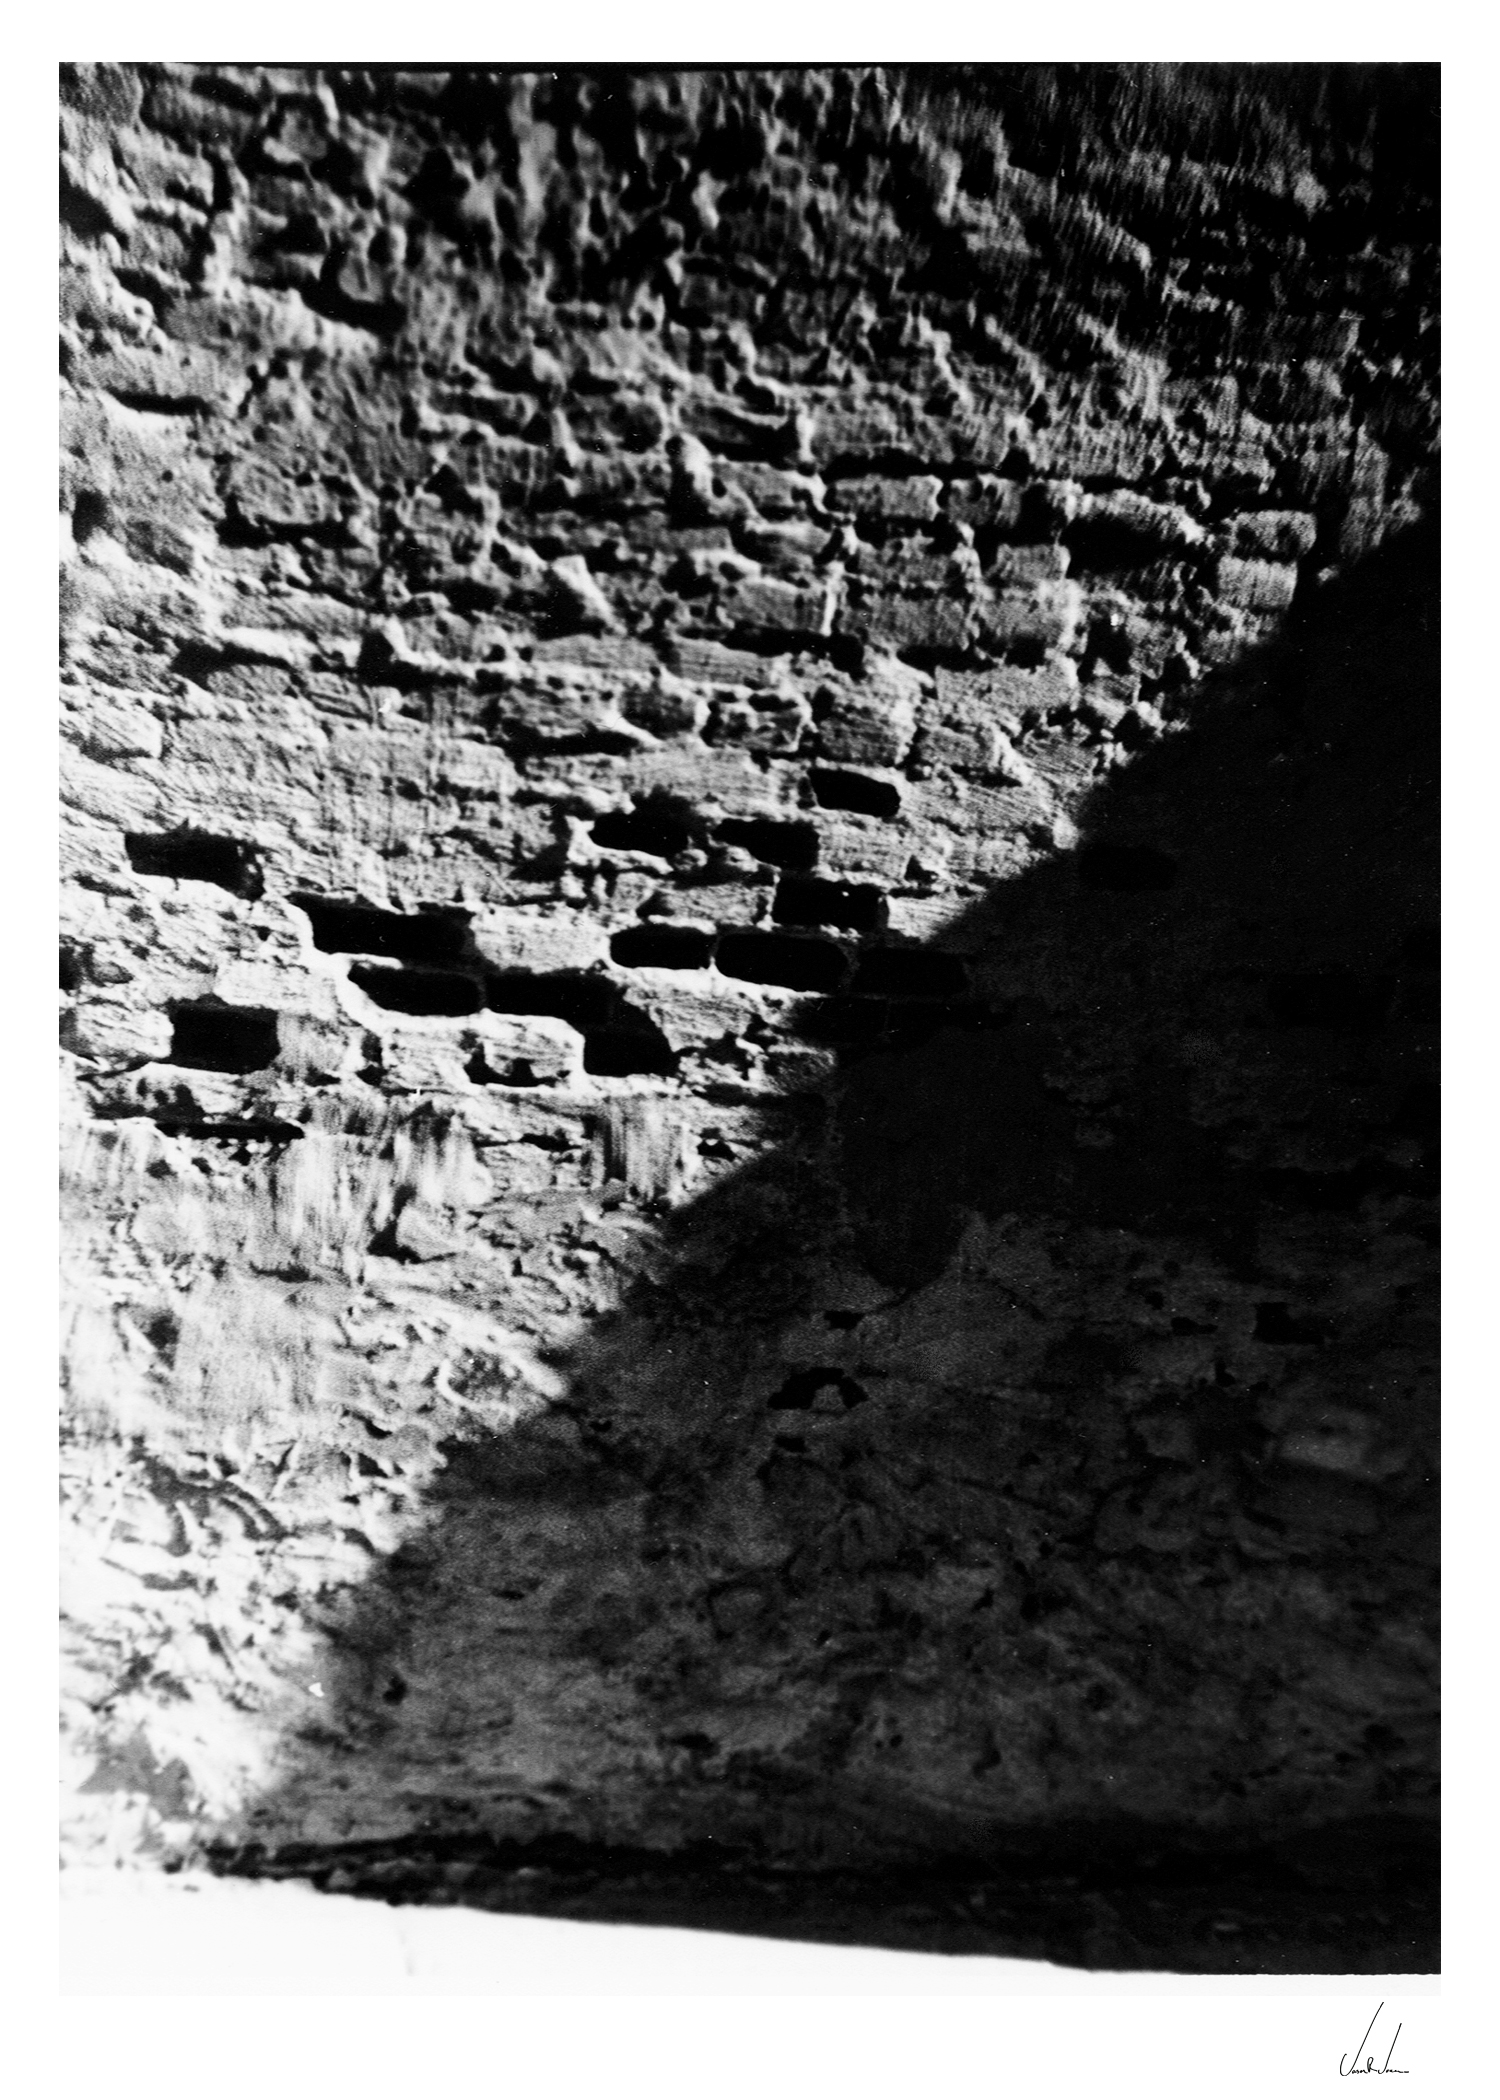
Hudson Hornet, Ypsilanti, Michigan - 1994, Jason Robert Jones

Hudson Hornet, Ypsilanti, Michigan - 1994, Jason Robert Jones


Every now and then the elasticity of our perception is put to the test as it is stretched a little bit further over the drum of our personal identity.  I believe that I have recently enter into a new stage of personal growth and development as an artist as the signs that point this out to me have been knocking louder and louder in the cave of my skull. As creatives we tend to hold very strong opinions and adhere to very ridged concepts and practices, which we accumulate over the course of time through numerous channels. This of course seems counter intuitive to the very definition of creativity none the less we gather these thoughts, opinions and habits like a snowball grows in size barreling its way down hill until we hit a fence and what we identify with as our selves, our creative process and approach is challenged to its very core.

 When we first started out on our creative journey we approached the act much like a child who has discovered snow for the first time. They are mesmerized by its beauty and in the way it floats lightly in the air like a feather. That it’s cold to the touch and that it becomes wet when held in the hand.  It doesn’t occur to them that its just water, a liquid in its solid form, all that they know is that it’s magical, beautiful and above all fun! Only after time, do they develop certain thoughts, beliefs and opinions regarding the nature of snow. Its dangerous to drive in, its only good for winter sports, it signifies the end of the seasons of growth and abundance, and once those opinions and beliefs are in place it’s very difficult to break free from their constraints.  As creatives we first approach our art with the same unbridled enthusiasm and innocents as a child who knows no boundaries or limits on possibility. We meet our work with open minds and hearts, pouring all of our creative juice into what we do as if from an endless Decanter of wine. Neither tools nor technique dictate our approach, we employ whatever means available to get our ideas out; our vision portrayed our masterpiece composed. Whether we employ a Roland or a Steinway makes no difference as long as the music is made.  

 At some point however we begin to become very selective over how much and under witch circumstances we pour wine from our decanter. We take a very narrow and specific approach to our work and this is largely influenced by rules we are taught, standards we choose to adhere to and the image/Branding we wish to portray. It becomes our identity and at some point it begins to corral us and places constraints upon our creative freedoms becoming a block on what’s possible because it acts as a set of blinders disabling us from the flow of imagination and experimentation outside of our adopted boundaries. 

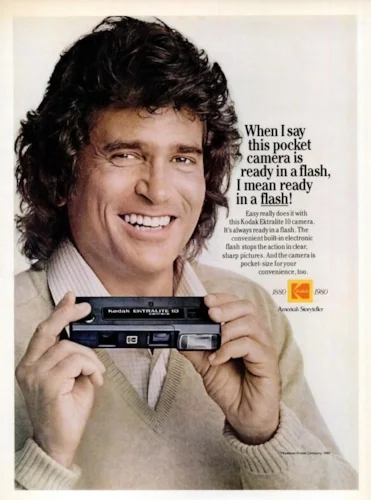
Kodak-Ektralite-1980.jpeg

Like so many creatives my journey began as a child when I became fascinated with cartoon characters, goblins, dragons and the like and with the direction of my father picked up a pencil and began to sketch. My interests and skills grew as did I, and art became an outlet, passion and pastime throughout Grade School and into High School. Through the tutelage of various art teachers and my father, my skills and knowledge of the rules and principals of art grew, my work improved and with the completion of each piece I aimed to better its predecessor. Enter High School Introduction to Black and White Photography, this was really the first time I picked up a camera with serious intention to treat the medium as a creative outlet. I was given a Pentax ME Super 35mm camera and a set of 4 lenses that originally belonged to my grandfather and for me at that time it was like hitting the lottery! Previous to that I had owned a Kodak Ektralite 110 camera, so you can imagine my enthusiasm when I was given the Pentax, it might as well had been a Hasselblad for that matter. Sorry Michael Landen, no offense!


It was with that camera and Kodak black and white films that I really set foot in the arena of photography and the more I shot with it the more experimental my images became. Of course there were certain assignments that we were required to work with such as shape and form, shadows and silhouettes, double exposures, sepia toning and the like, it was all great fun and I really got a lot of exposure to the world of photography. Of course in those days it was all film and light sensitive photo papers, we shot developed and printed our own work. I worked with chemicals to develop, stop and fix the film, dunked it into a water bath and hung it to dry. I made prints on 5x7 Kodak glossy and mat papers using my developed negatives and an enlarger. And finally I viewed the results of my efforts in the final print, which sometimes left a lot to be desired. It may seem like a lot of work compared to today’s digital process but like that child playing in freshly fallen snow it was magical, it was fun!

I continued to shoot with my Pentax for the next 10 years with varying frequency, as my chosen carrier path took me in a slightly different direction, but it was always there when I needed to feel that freedom and fun again, a creative release from the more technical job I had fallen into. In 2003 I began to really get the photo bug again and decided to look into one of those new fangled digital cameras everyone seemed to be using. By then digital had come a long way and had become quite mainstream. The idea of instant gratification coupled with the ability to work in the digital environment, i.e. Adobe Photoshop was very enticing to me so I splurged and purchased a Pentax K20 with a kit lens. It was exhilarating to have the ability to get instant feedback on my exposures and with a virtually endless limit on the images I could take, provided I had enough memory cards, I could shoot to my hearts content and not spend a single minute thinking about the cost of film or the associated processing and print expense.

 I shot concerts experimenting with various shutter speeds for effect, I shot cityscapes, I took it along on walks in the woods and captured wildlife images, ( I make it a point to never say “Shot Wildlife” ), and I had a blast all the while just making images. 2003 quickly gave way to 2010; my how time does fly and I found myself a 34-year-old man who had just become a father. This was to prove a turning point in my life not only as a new father but in my passion for photography as now more than every I wanted to do nothing more than make images. It first started with my daughter, she was amazing, small and still, sleeping quite a bit in those early days. When she was awake her big bright blue eyes captivated me and I was inspired to pick up my Pentax and make photographs of her. It had been 17 years since I had any training or education in the art or tech of photography and I was egger to build upon my basic knowledge and skill level. The first set of books I picked up were Scott Kelby’s The Digital Photography Books 1 and 2. By the time I passed those books on they were well creased and quite used, they had become, for me the Bible of digital photography.  I discover Joe McNally, Moose Peterson, Joel Grimes, I purchased book after book and watched hundreds of hours of training videos. I listened to podcasts and searched forums I was a photo junkie. I practiced on my daughter and I got better, took the camera on family trips and shot boats in the harbor, lighthouses, and wildlife and got better. I soon grew hungry for better, more professional gear and by the end of 2011 had purchased a full frame Nikon D700 and three lenses. I also knew the importance of a steady camera so I purchased a Gitzo tripod and a cable release; I was really going places now as I had high-end gear and the knowledge of how to use it! I was interested in portraiture work but had also begun to grow more interested in the landscape so I split my time working with both. I ran a small portrait studio out of my home and I ventured out into the landscape on trips with my father and my family.

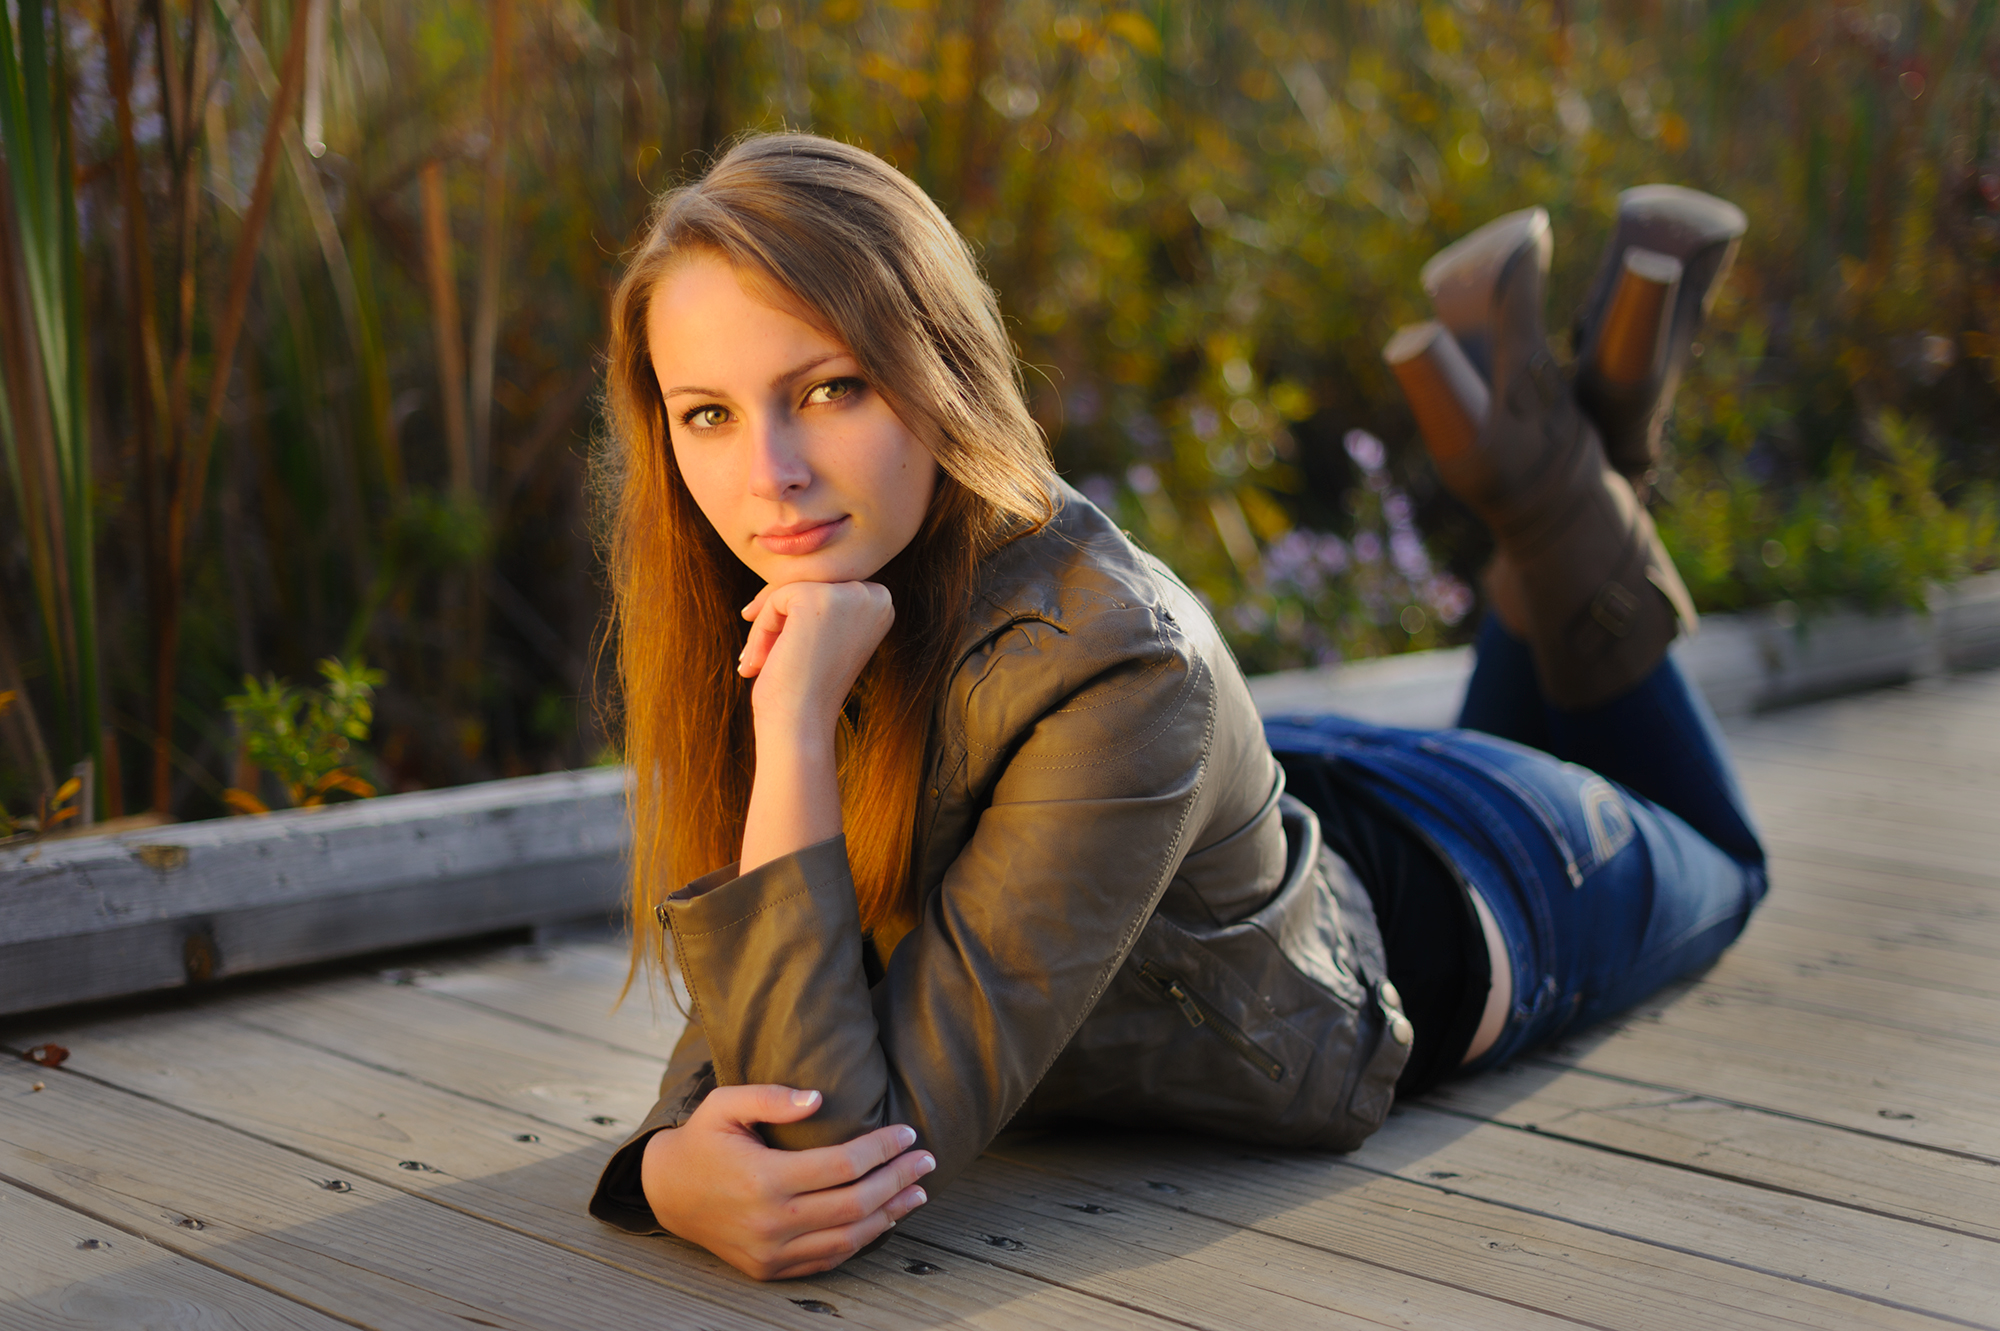
Portrait Client, 2011

Portrait Client, 2011

Coral Pink Sand Dunes State Park, Utah - 2012

Coral Pink Sand Dunes State Park, Utah - 2012

Me at White Pocket in Arizona circa 2012

Me at White Pocket in Arizona circa 2012

 Another interesting thing began to develop in the fall of 2011. I started attending art festivals and really paying attention to the work of the various landscape photographers on hand. It was at one particular festival that I met C.W. Banfield and saw his large format landscape photographs. There was so much detail and he was able to print at enormous sizes, it captured me. From that moment on I became obsessed with large format and film and began to seek out the masters of the medium. I discovered Clyde Butcher, David Muench, Fatali and the like. Then one day I walked into a local bookstore and happened to notice a photography book on display that was comprised entirely of landscape images from my home state of Michigan. I picked the book up and began to read about the photographers that co produced it, Ron Leonetti and Christopher Jordan. I found that the images in the book were captured exclusively on both large and medium format film and for me that sealed the deal. I bought the book, went home and purchased my first film camera since my old Pentax ME Super, an Ebony SVTE 4x5 field camera, ( now a remnant of days gone by ) . I had now entered the elite world of the large format film photographer and I was quite proud of myself, never mind I had yet to make my first exposure.

 This is the point in the article where I begin to tie in the backstory to the theme and my sole point of this writing. There were a few distinct factors, which lead me down the path toward working in large format film and they were. Firstly I had begun to grow dissatisfied with both the quality and the sheer multitude of images I was producing while working in digital. What originally drew me to digital, the seemingly bottomless amount of images I could produce in a single outing was now a big turn off. I would return from a trip and sift through the hundreds of images I had made and find very few that actually appealed to me. I was producing quantity not quality and I attributed at lease part of this to not having much in the way of restraints on pressing the shutter button. Secondly I found that everywhere I went there were hordes of other photographers with their Nikon D700’s or their Canon 5D Mark II’s and all the images began to look the same to me. Exposure blending, HDR, focus stacking, Nik effects and Lightroom presets, were commonplace and I didn’t want to be just another frequency in the digital noise that was being produced. Photography had become an extremely commercially marketed product and the masses we in on it. Everyone was “A Photographer” from your next-door neighbor’s niece in high school, to your doctor to the mailman and it was only getting more saturated by the day. I wanted to produce fine art. I wanted to separate myself from the crowd. I wanted my work to get better and I wanted to find a niche, style and brand that would be distinguishable from the constant buzz of the extremely fast growing consumer driven industry that had seemed to materialize over night. My goal was to now work exclusively in film and I moved into this practice completely by the end of 2013, abandoning my D700 for my Ebony 4x5. I stopped producing portraits and sold off most of my digital gear and went full speed ahead into film and landscape work with the sole purpose of slowing down, making quality images and building a brand based on high quality carefully crafted work.  The process was slow and I learned quickly it was both more difficult and more costly to work with film but I was insistent on staying the course, I was in it for the long haul not instant gratification. In time my work showed promises and I felt I was on the right road. I was starting to produce the type of images I wanted to make and I truly enjoyed the process in which I was making them. My style began to develop and the accuracy in which I made exposures grew tighter and tighter. I was a large format landscape photographer damn it and proud of it!

10206160940357504.jpg

 2013 became 2015 and by now I had a nice little portfolio displayed on my website and finally enough work to think about approaching a gallery for representation. My geographical location had changed as well as I was able to convince my wife to move 230 miles northwest to an area in Northern Michigan that was steeped in natural beauty, a popular tourist destination and a place where I hoped to be able to sell my work. Something began to stir in the back of my mind however that even though I had achieve much of my goals by moving exclusively to large format film and I had a small collection of quality images, it was still in fact a small collection. I wanted to produce more work but if you have every worked with a view camera before you will know that you don’t amass a large collection of images very rapidly. On any outing your lucky to make 4 exposures and with the price of film increasing and the cost to have it professionally scanned looming over my wallet I felt I had to hold back on my image making. While I welcomed this concept at first it began to limit my play and experimentation and I sought to find a way to produce more images while still retaining my core principals and values to work exclusively with film and maintain a carefully thought out process before pressing the shutter. In November of 2015 I picked up a Mamiya 7ii - 6x7cm rangefinder system and three lenses and moved almost exclusively into this format for the next two years. My switch up proved to be beneficial as with the Mamiya I was still required to carefully compose a well thought out composition while taking great care to correctly expose my Fujifilm Velvia color slide film, the film I chose to work almost exclusively with, however I was a bit more freed up to quickly recompose and shoot again as the light changed and as something else caught my fancy. Not to mention 120 film was easier to find and much more economically forgiving on the pocket book. Not only was I able to produce more images from an outing but my work was beginning to improve yet again as I was free to experiment more with possibilities for composition all due to the compact and more manageable size and function of my camera.

“Life In Slow Motion” - Mamiya 7II, Fuji Velvia 50, Sleeping Bear Dunes National Lakeshore

“Life In Slow Motion” - Mamiya 7II, Fuji Velvia 50, Sleeping Bear Dunes National Lakeshore

Mamiya 7II, Sleeping Bear Dunes National Lakeshore

Mamiya 7II, Sleeping Bear Dunes National Lakeshore

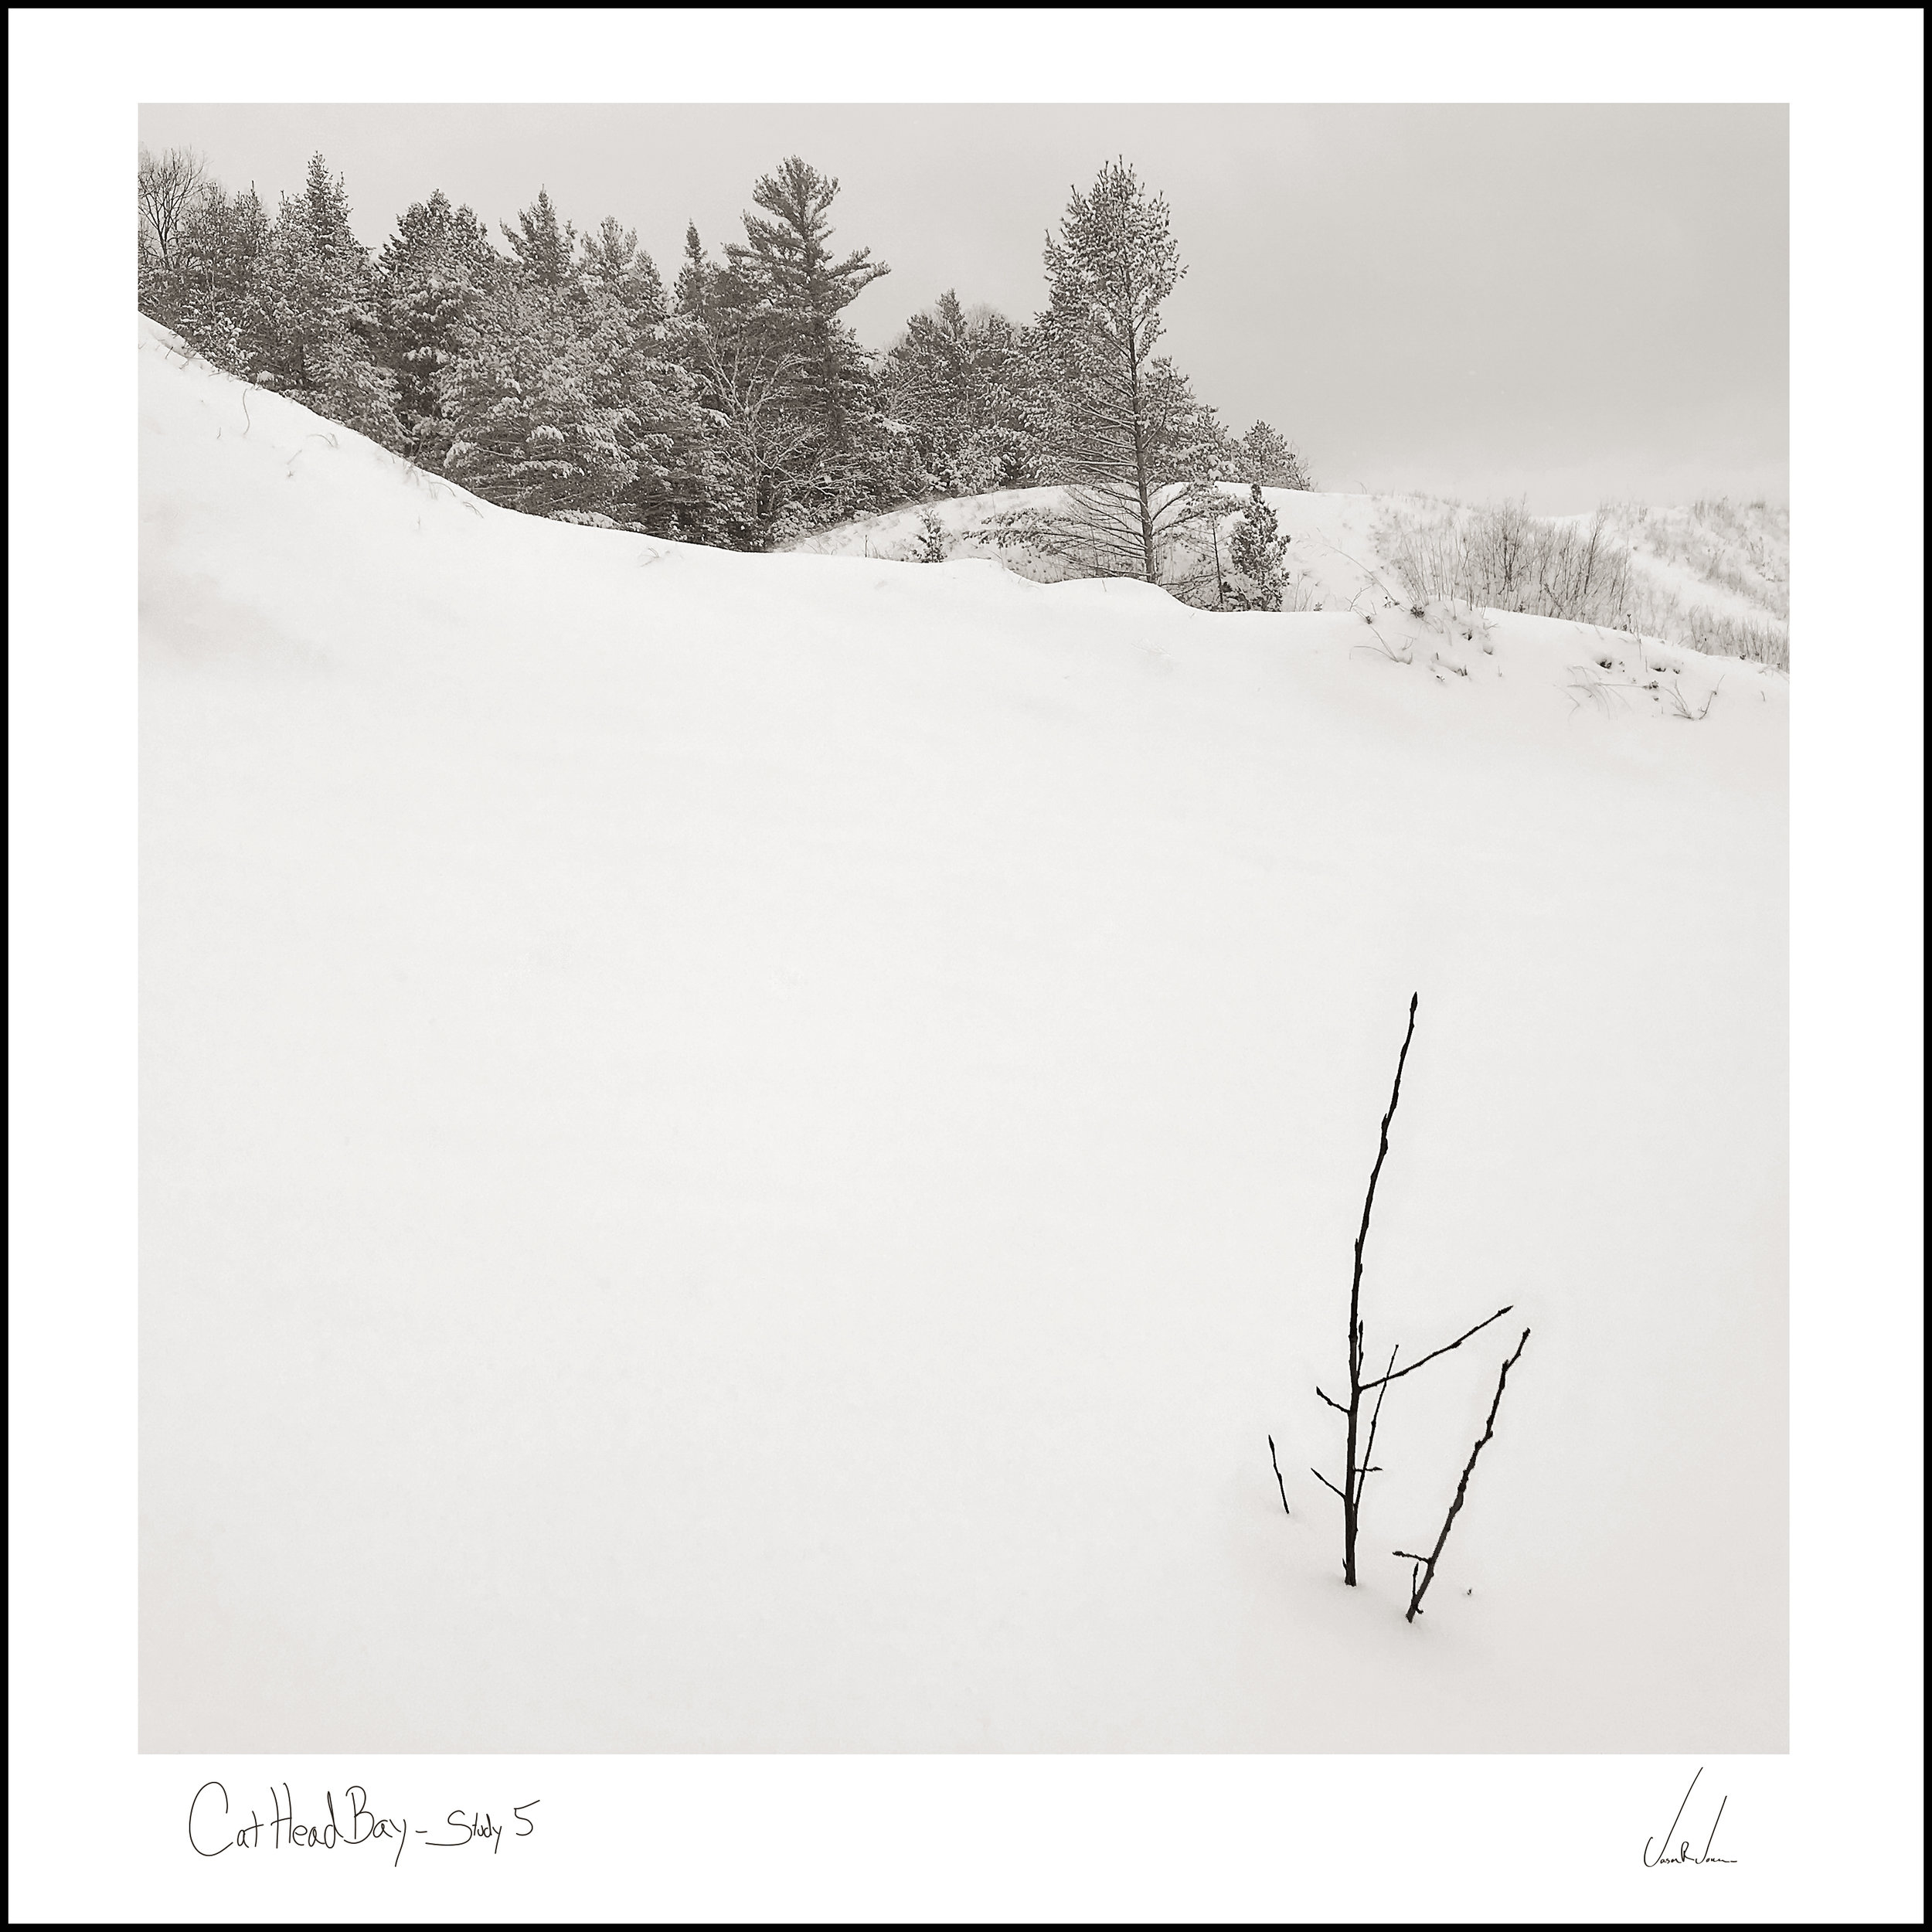
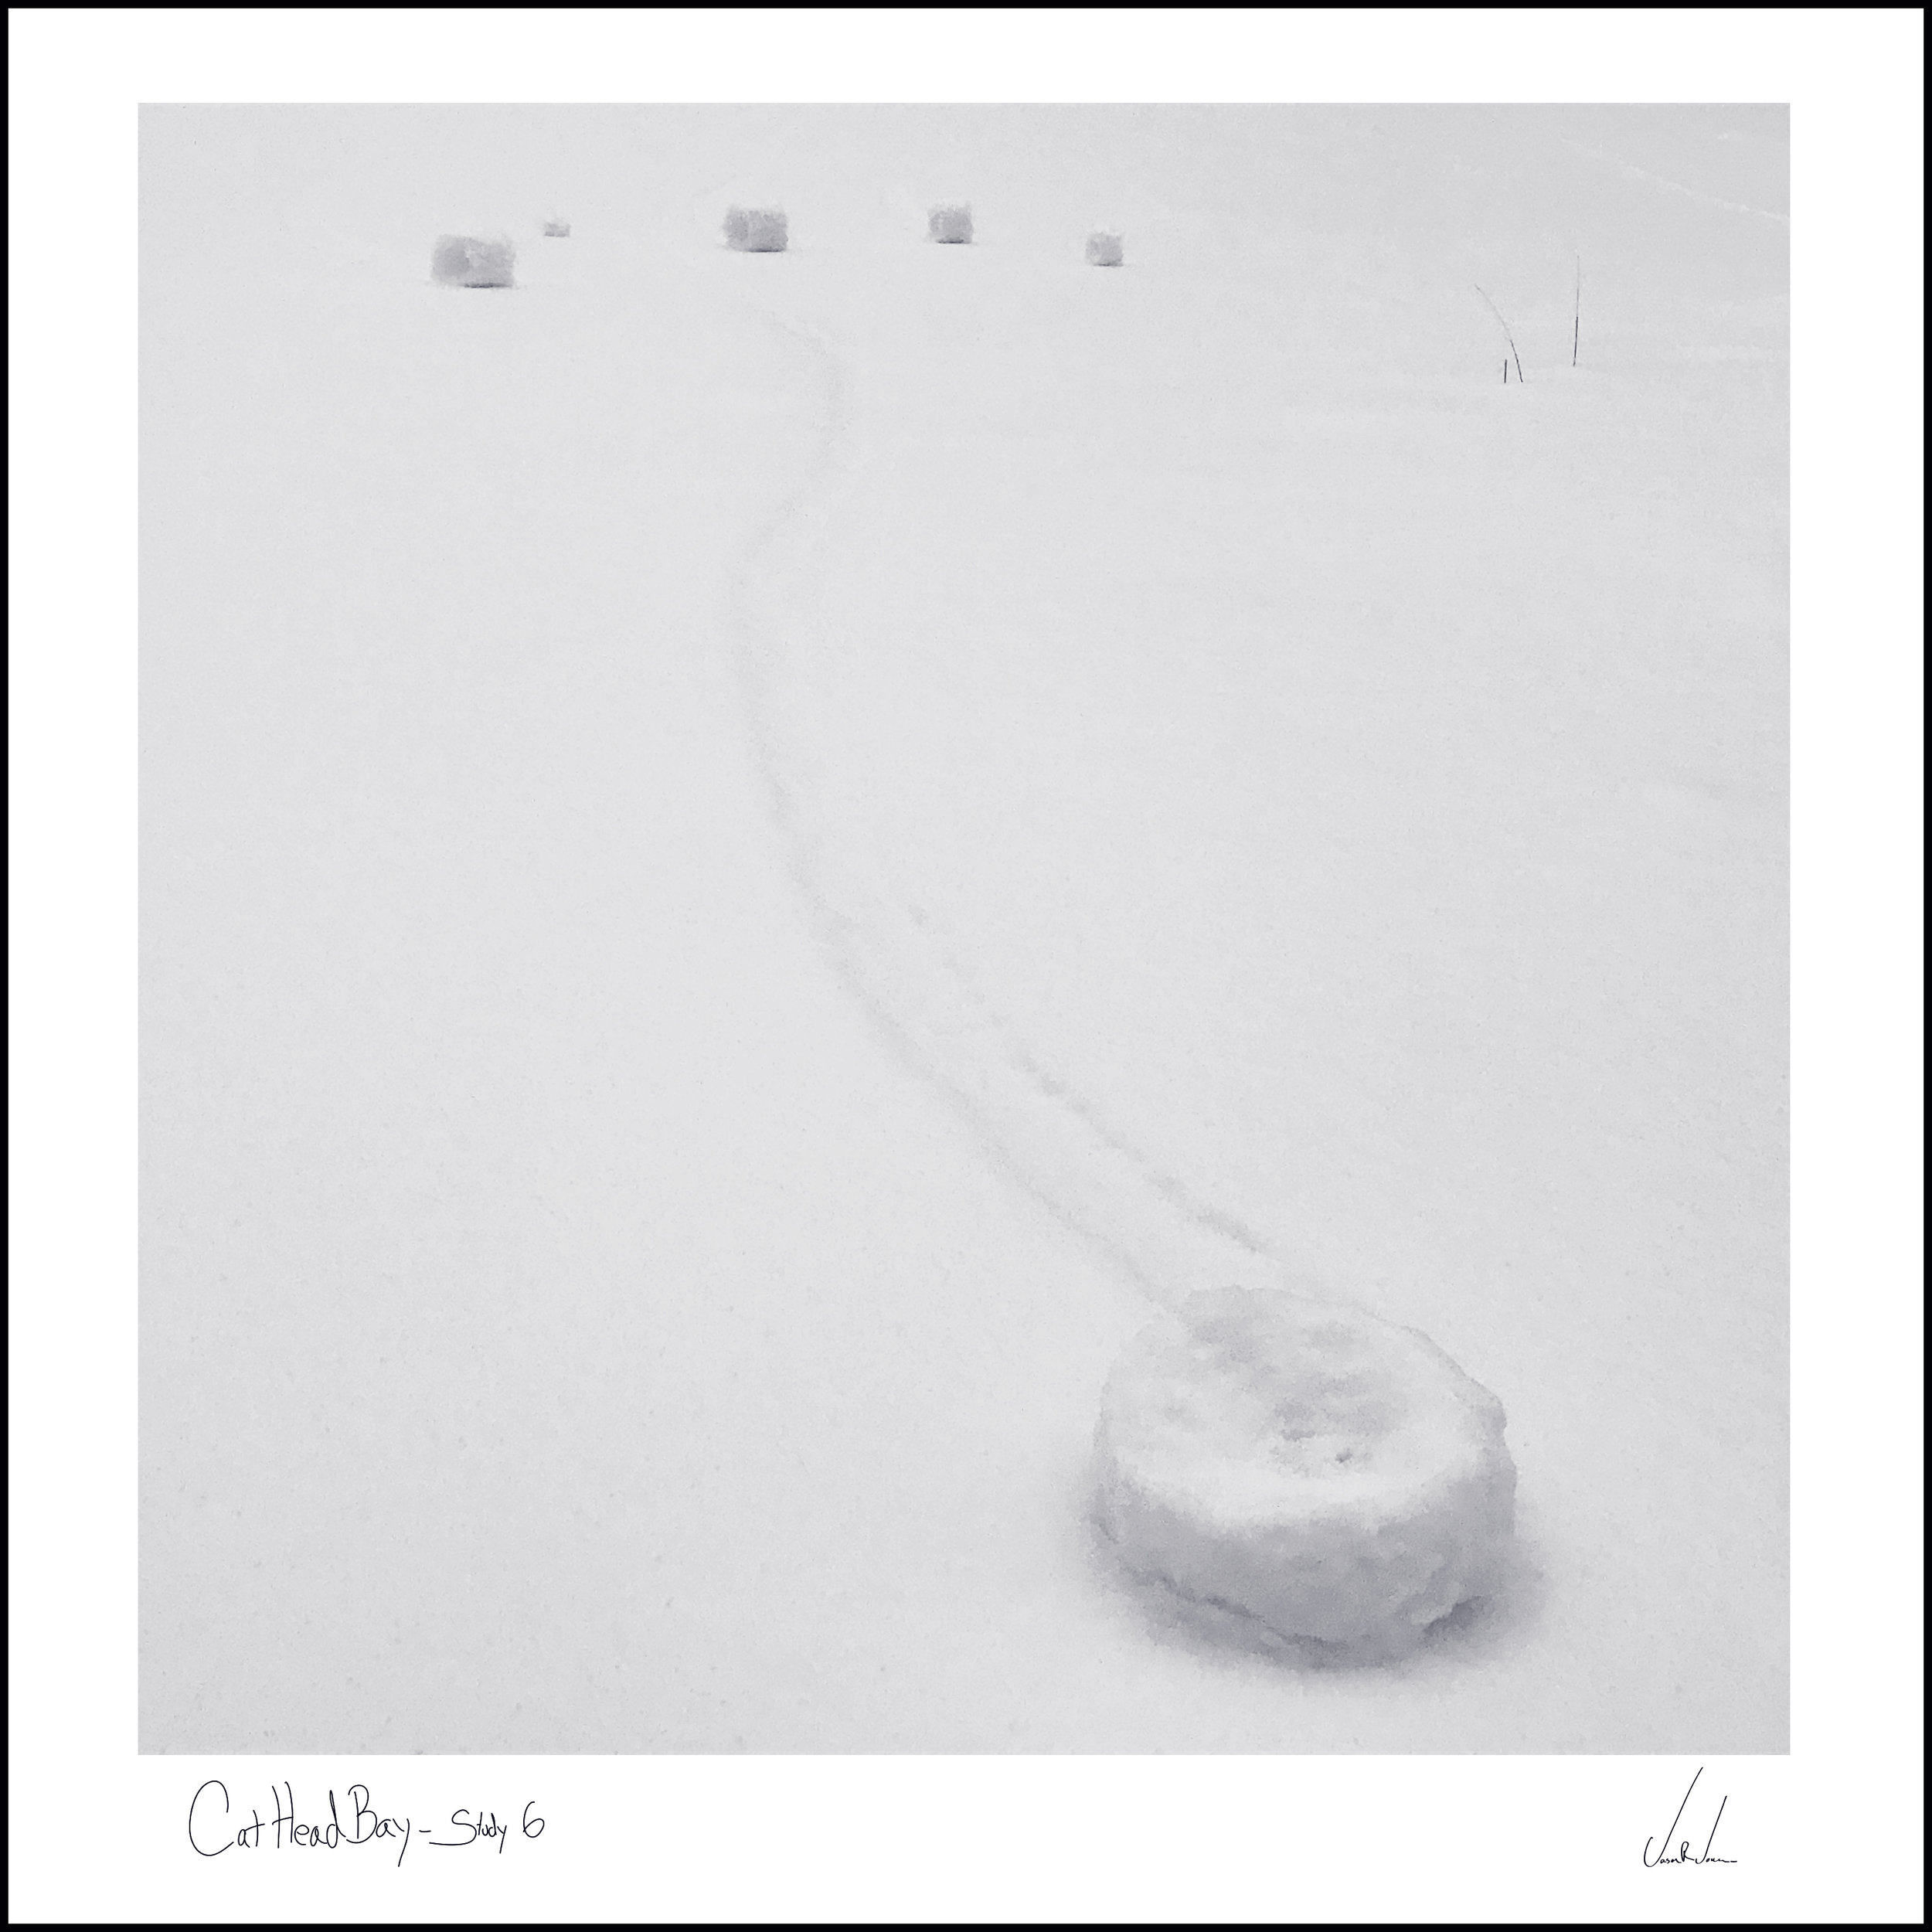
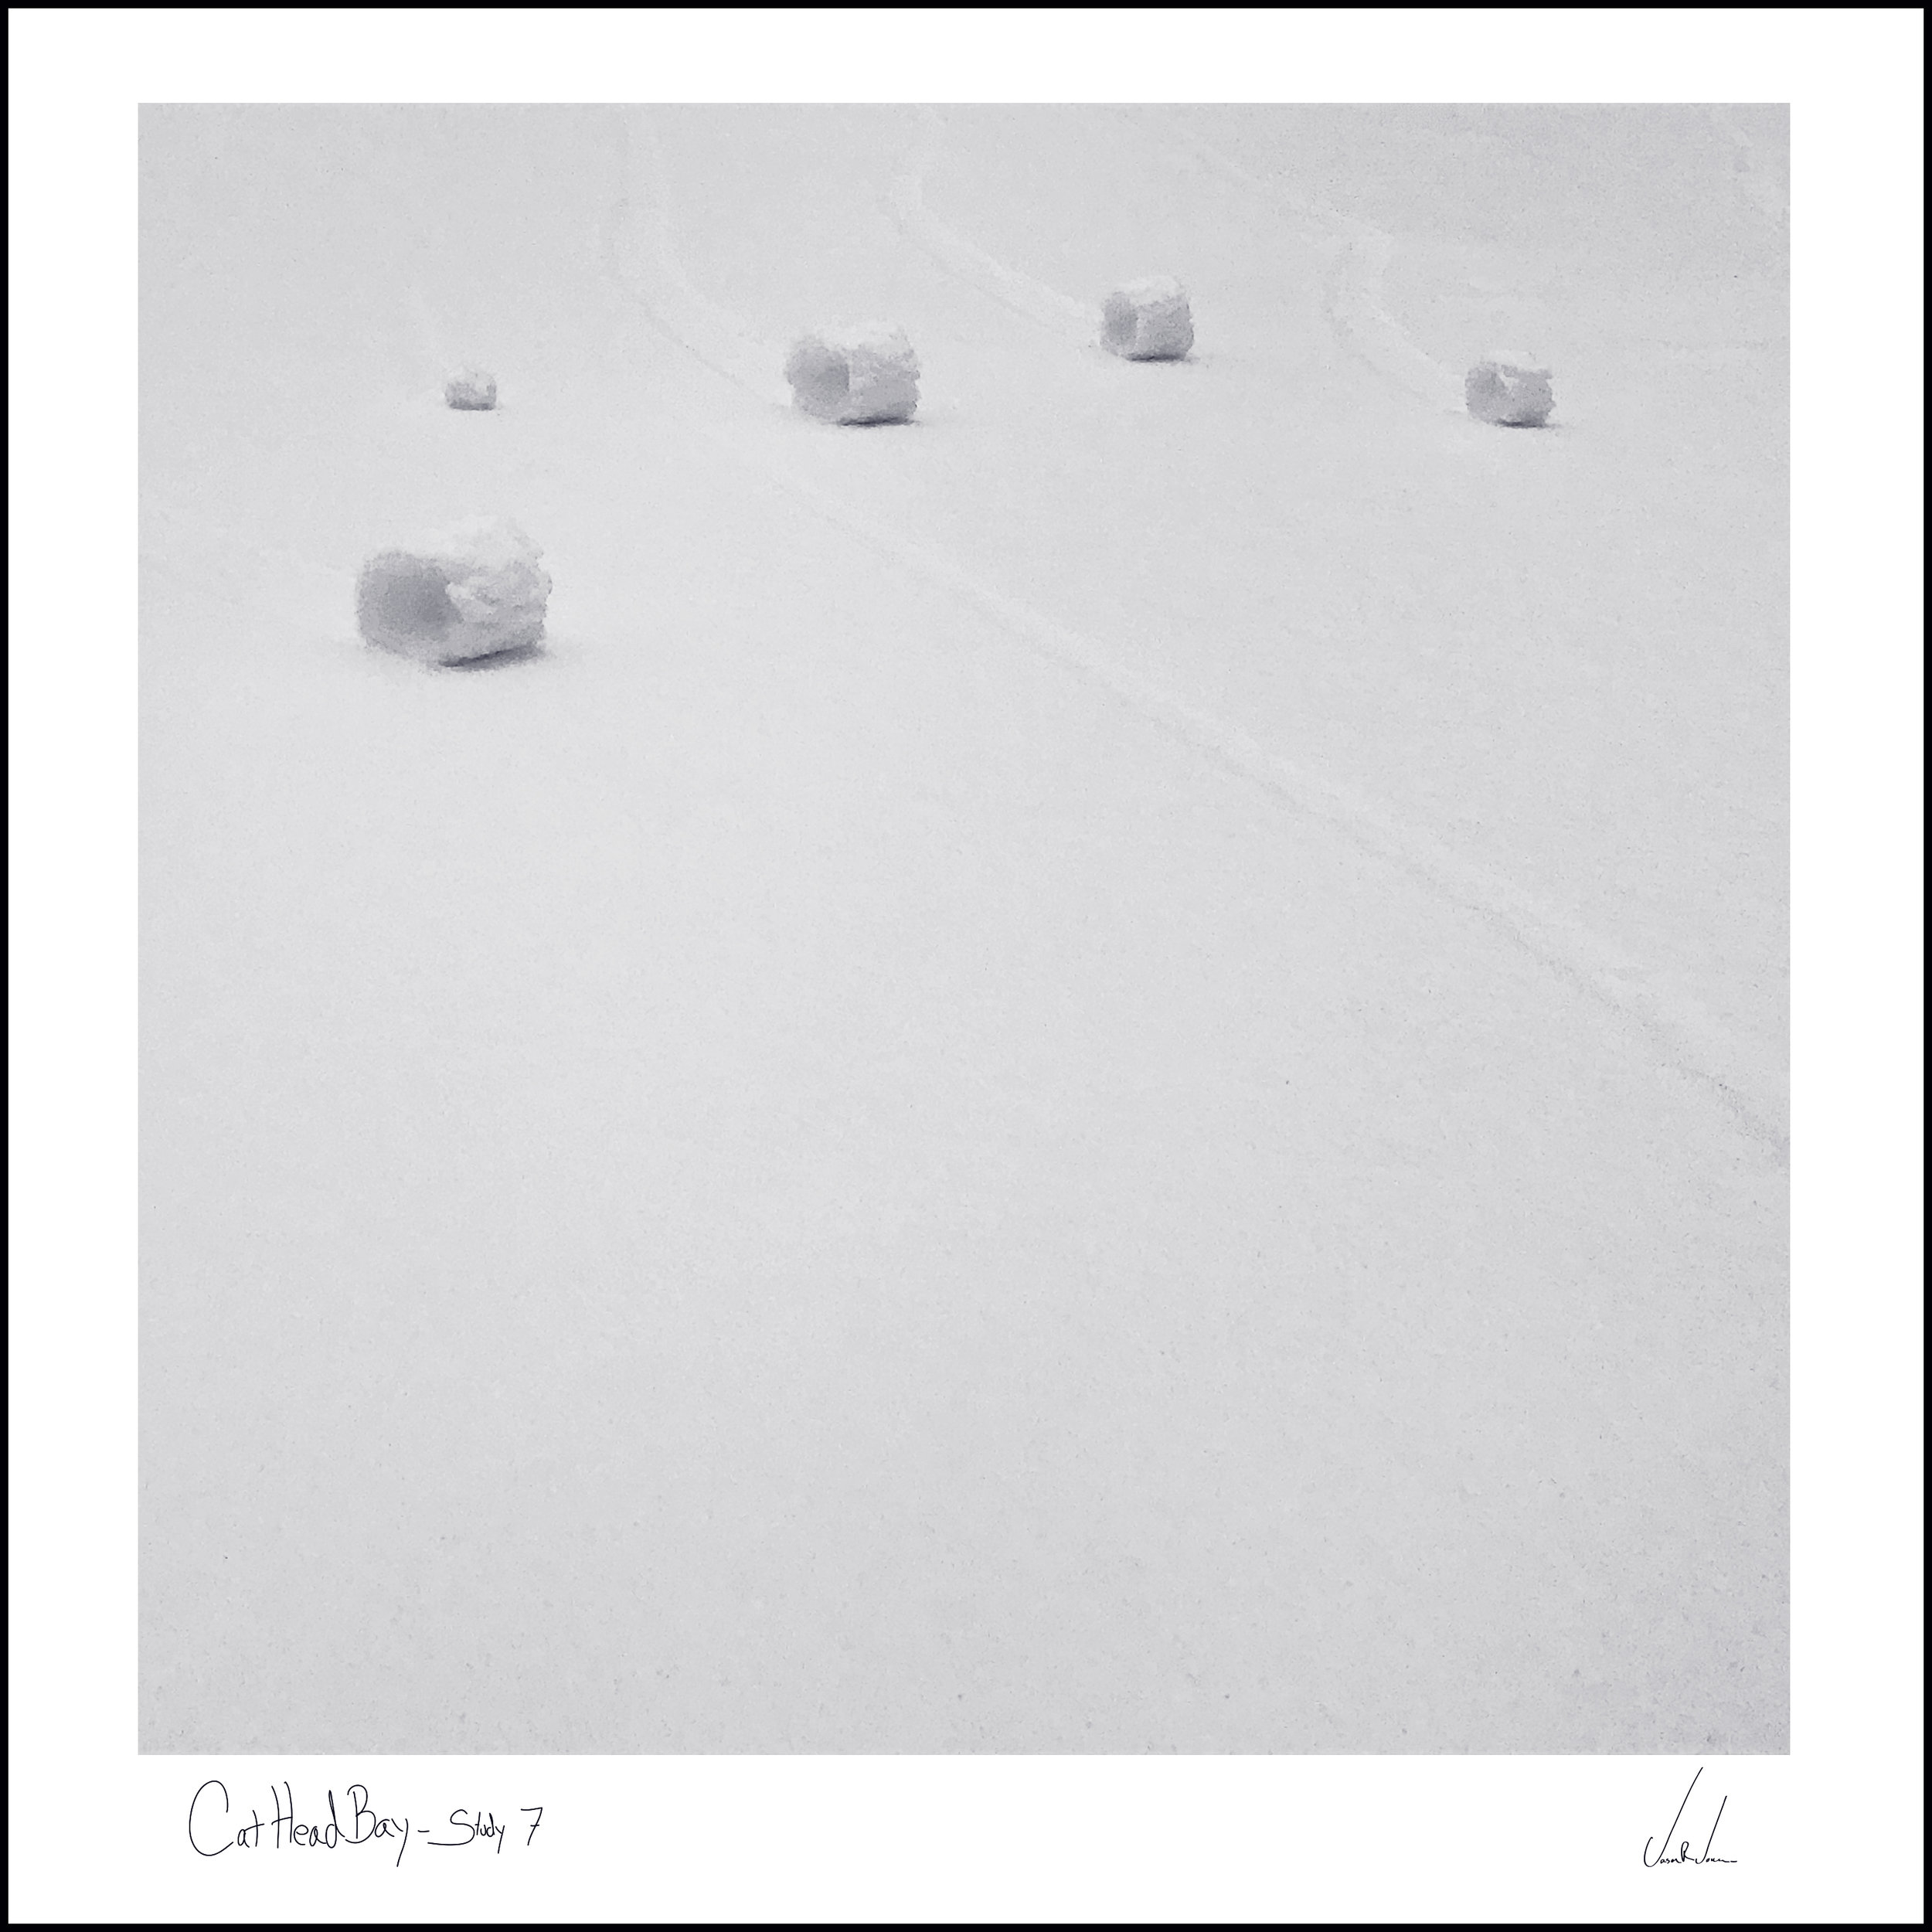
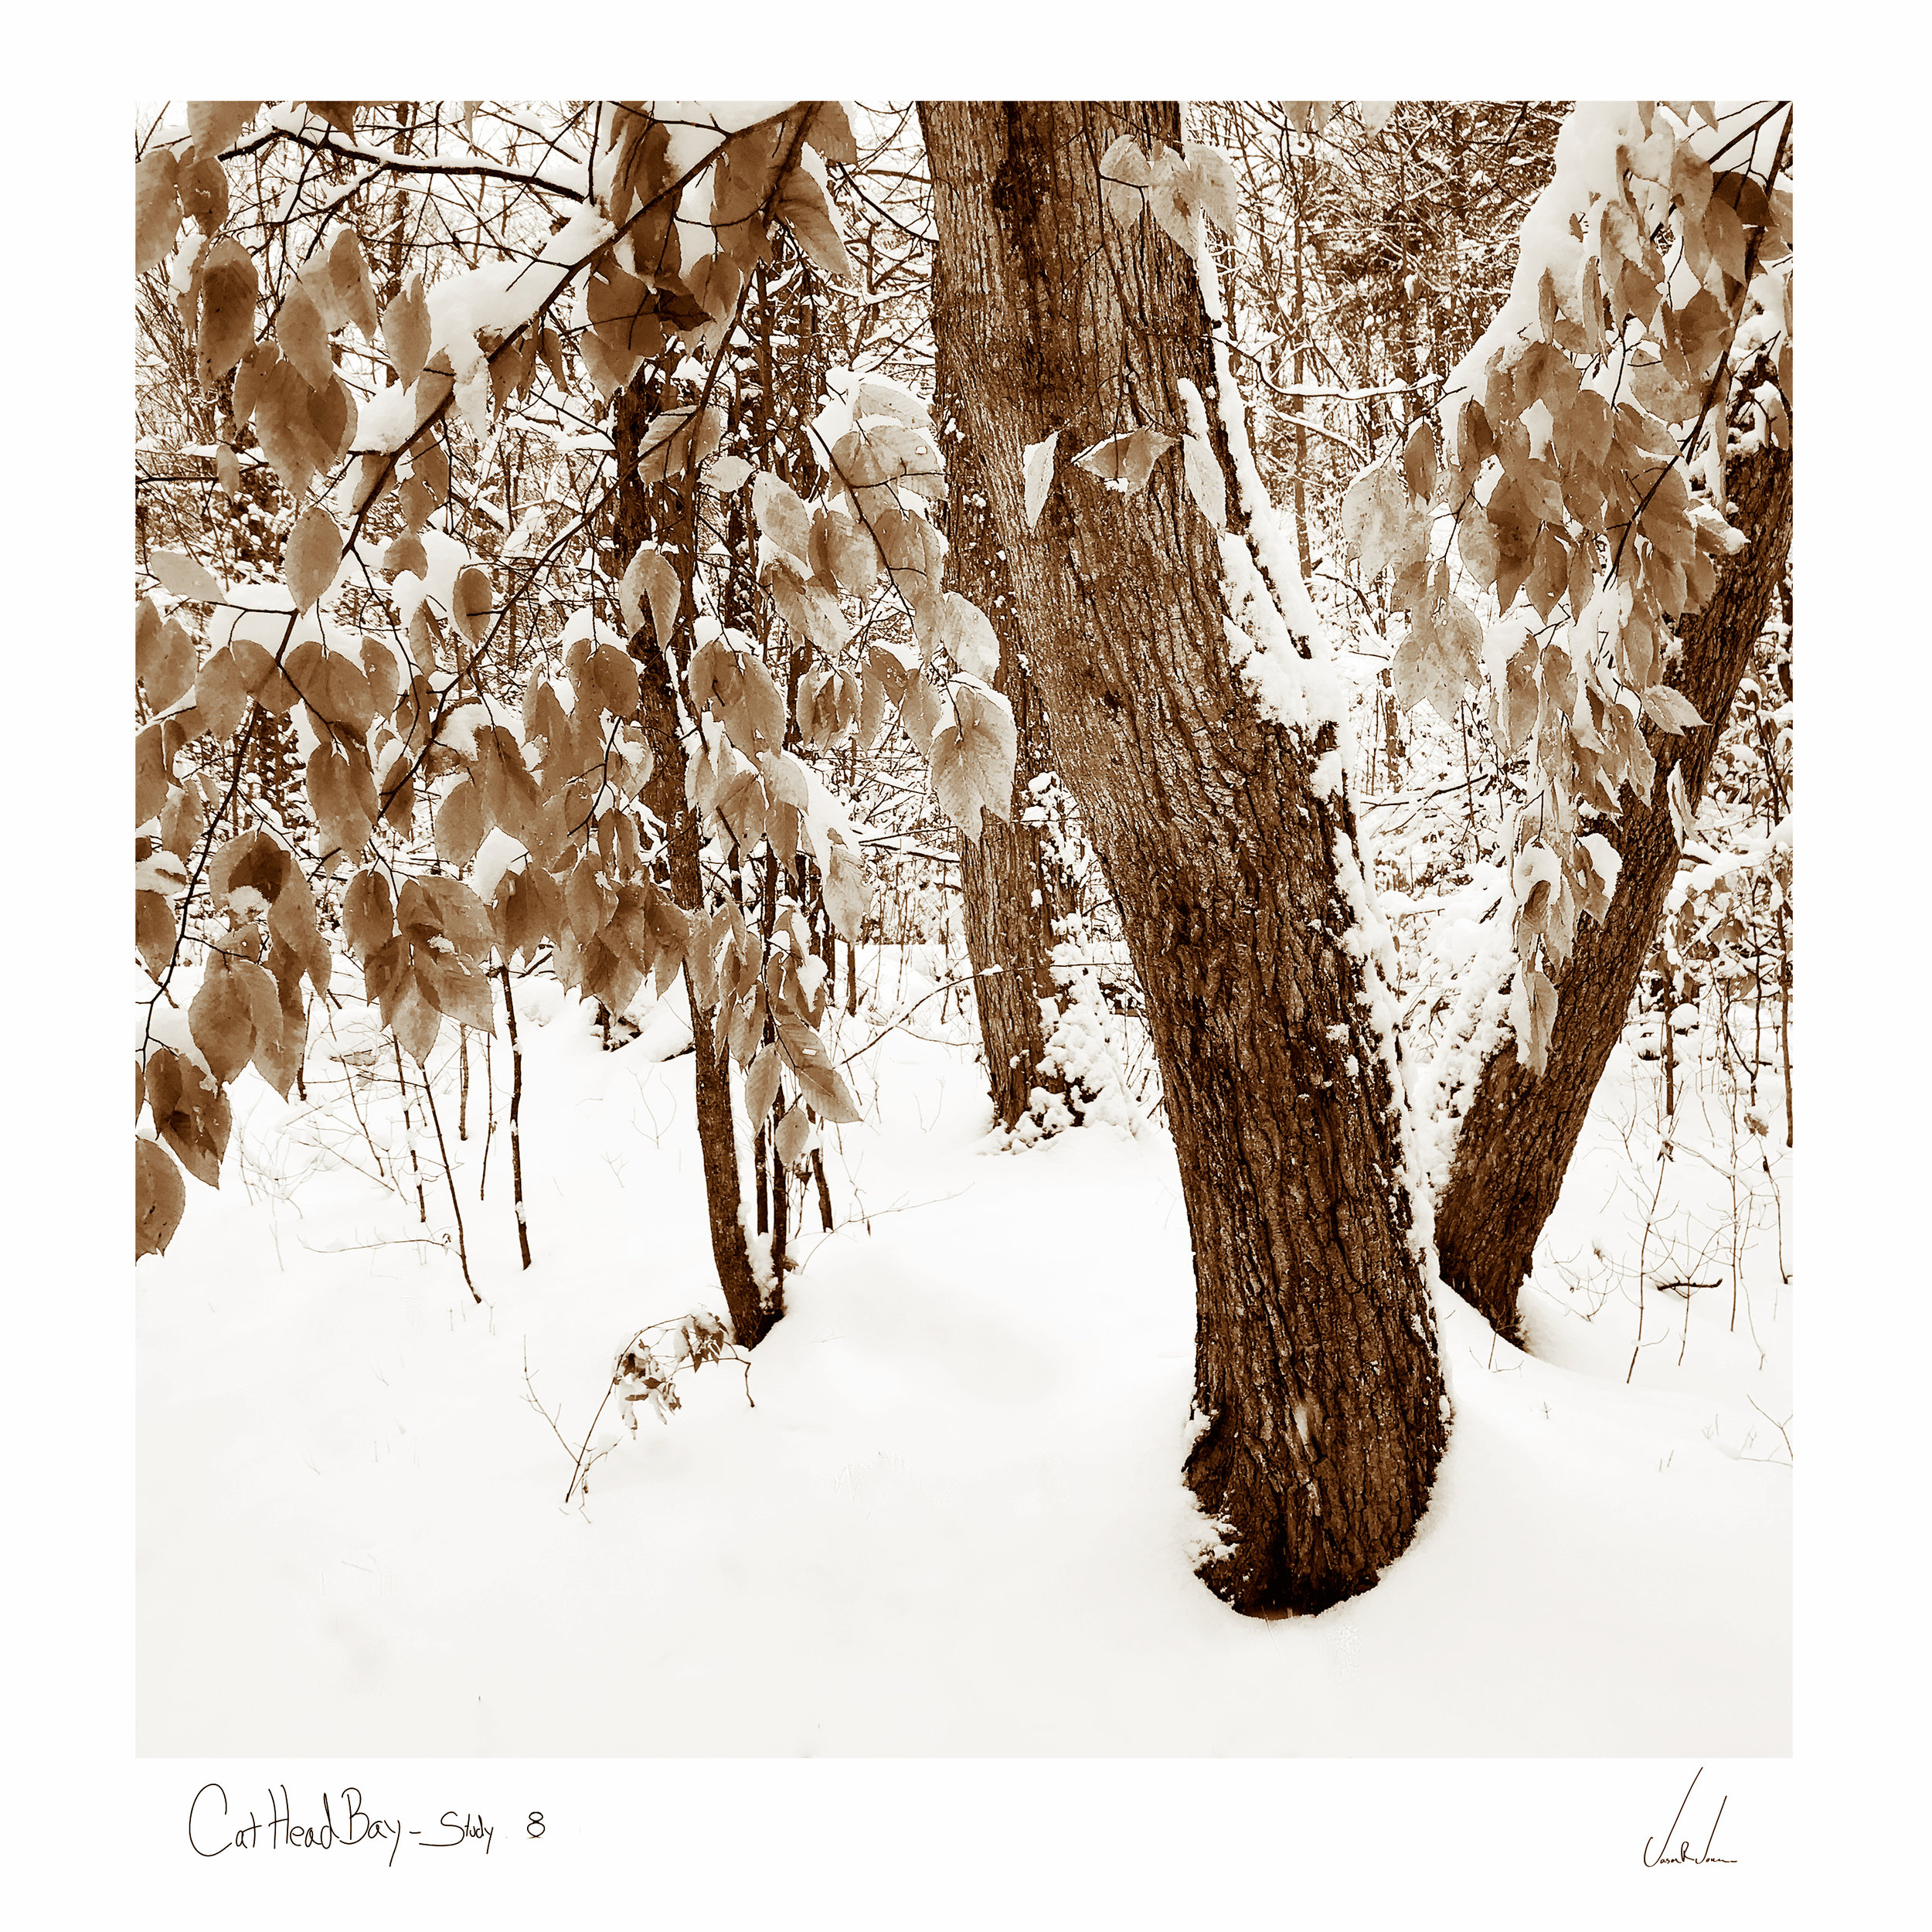
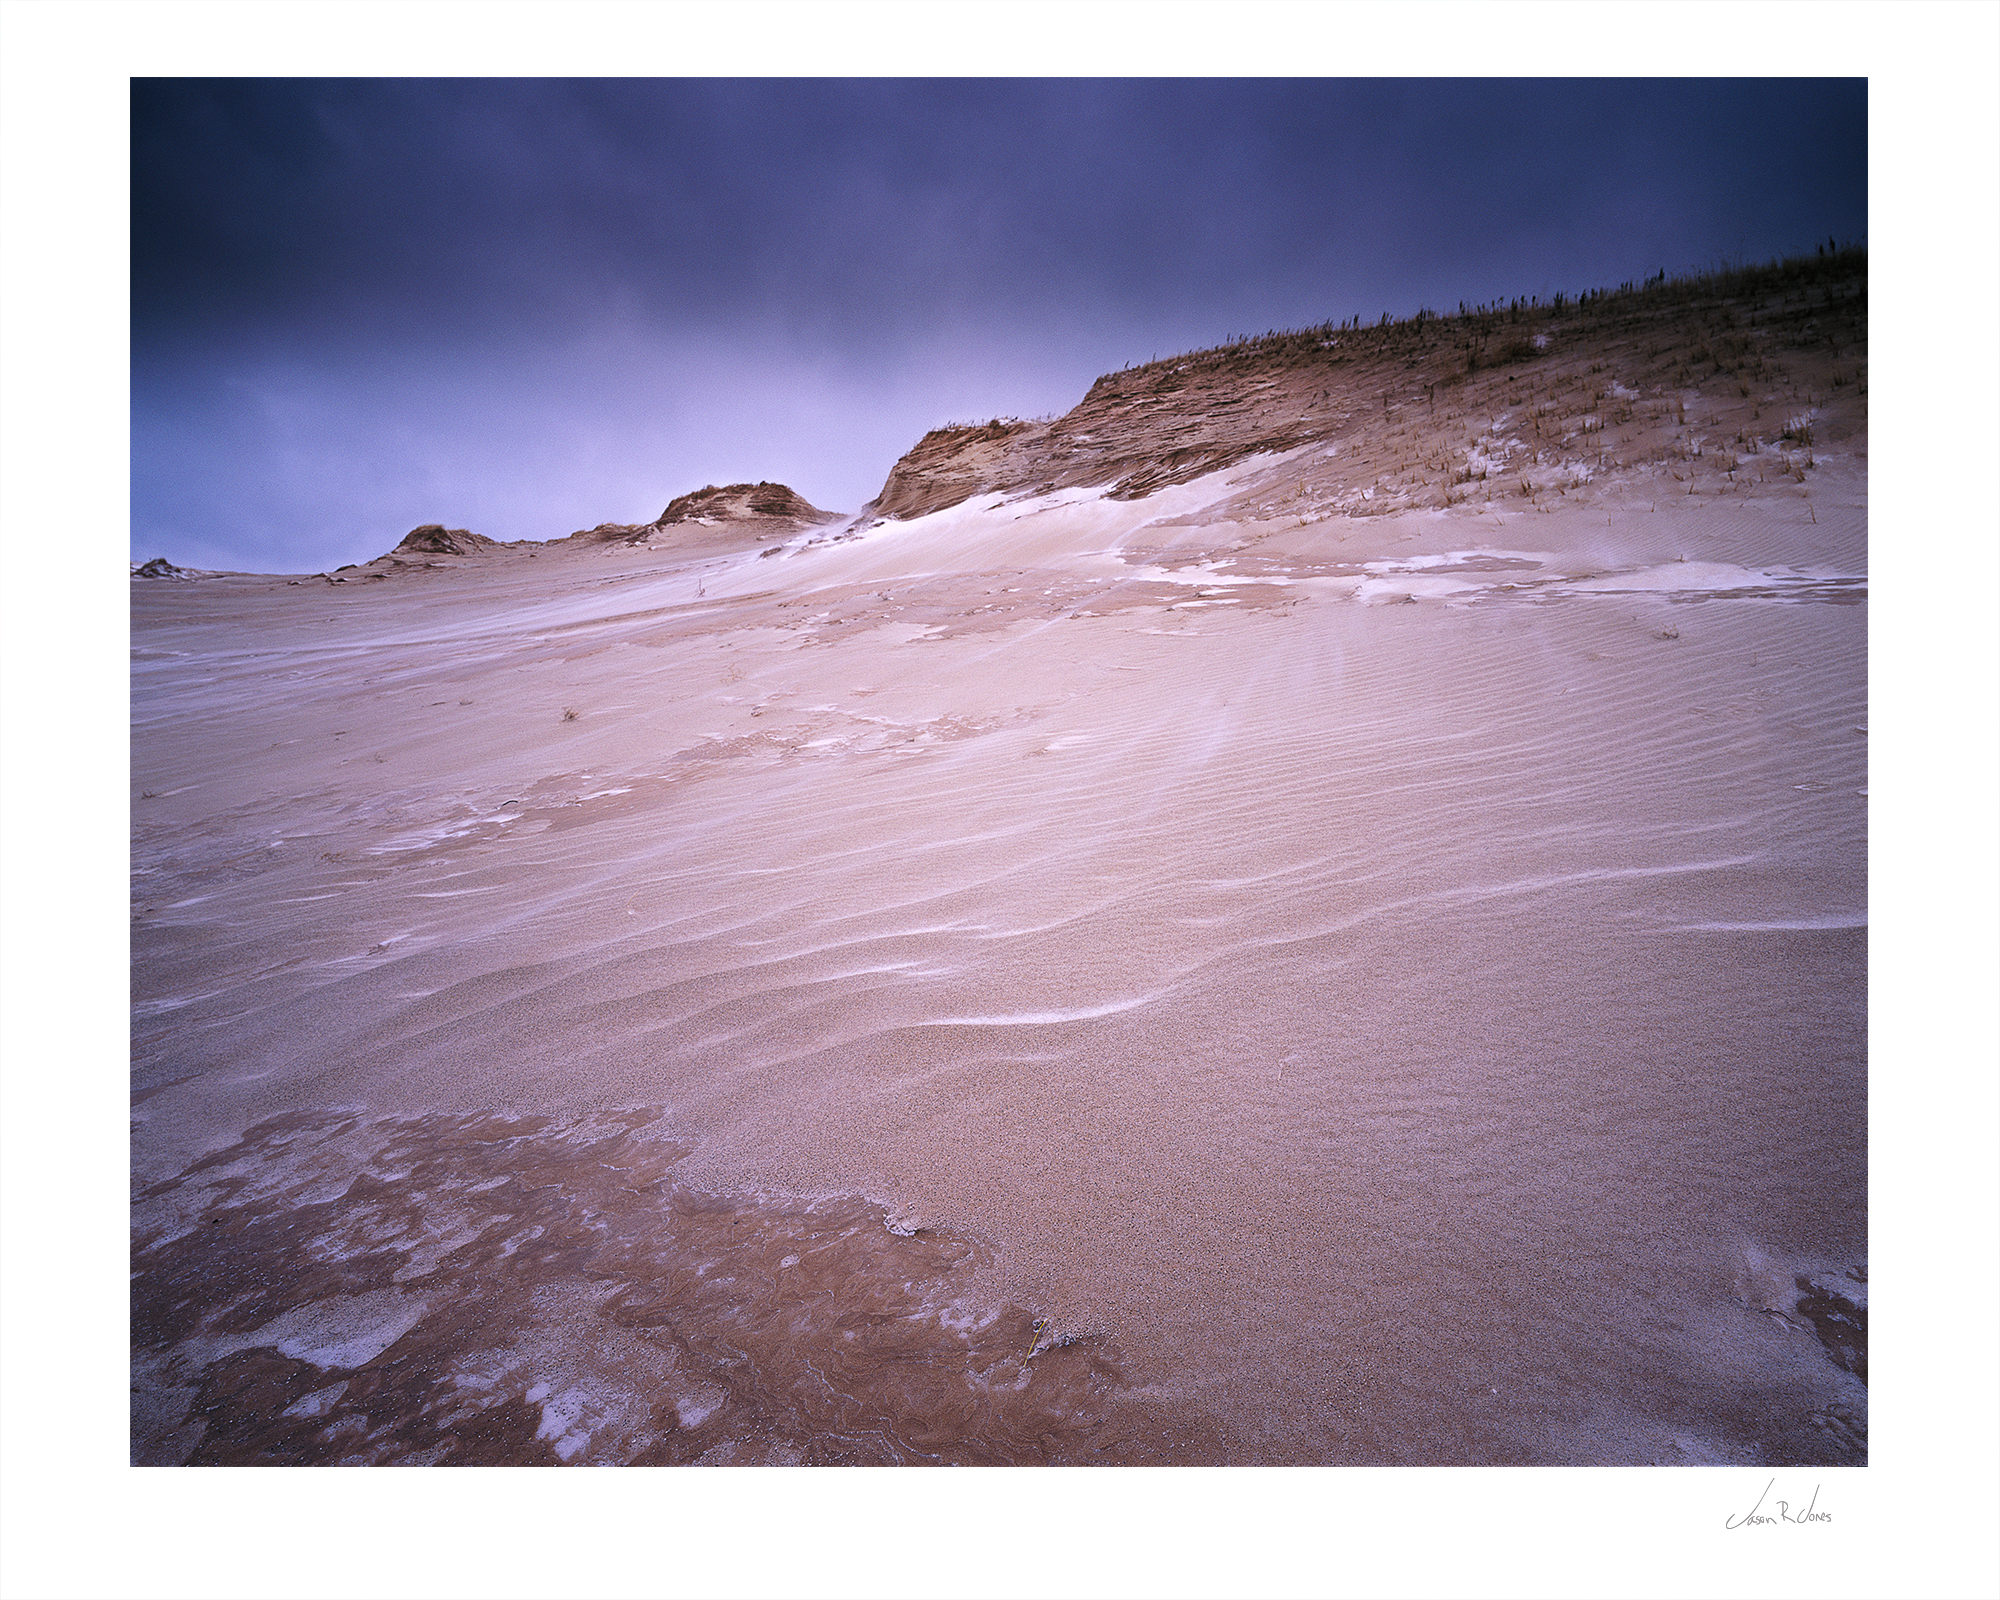
 Its now nearly 2019 and not much has change in terms of my approach and workflow. I have recently picked up a Hasselblad 501c as I have taken an interest in the 6x6 square format. I have also begun to experiment more with black and white film as Michael Kenna has had some recent influence over me. What has changed however has been my philosophy specifically toward maintaining a very narrow mindset on the way and which tools I employ to produce my work. In fact I have committed what I hold to be the “Cardinal Sin” in my image making process, I will explain.  As I mentioned I have taken a keen interest in the square format as well as working in black and white. One morning on a mid November day in Northern Michigan my Wife, daughter and I awoke to a fresh blanket of white powdery snow. It was so beautiful and me being recently inspired by Michael Kenna and his minimalistic style suggested we all head out for a nice brisk hike to Cat Head Bay, a perched dune playground on the northern most tip of the Leelanau Peninsula where we live. Apart from the exercise and immersion into nature I had a selfish reason for the hike, which was to experiment photographically with minimalism in the freshly fallen snow. Now my family knows me very well by now and sometime I’m met with resistance if they know my sole purpose is to drag them along while I obsess over the landscape through the lens of my camera so I deliberately left the hassy at home. I did however take the one device that is accepted and almost expected to be carried by every sing bipedal organism with an enlarged prefrontal cortex, my iPhone. Now I have certainly taken many shots with this device in the past and even use it as a compositional and conceptual tool in my work but I would never do the unthinkable and try to pass of the results as fine art or serious photography that is simply unheard of and preposterous. It could ruin me! How could I ever take myself seriously as an artist, image maker, or fine art photographer if I were to give legitimacy to anything produce from an iPhone capture?  How indeed!

Well the images I made that day while hiking with my family at Cat Head Bay have turned out to be some of my favorite work produced to date and I was so pleased with the results it inspired me to go back and work on several images I have made with my iPhone in the past. I of course took them all into Photoshop and processed them the same way I would a large format scan but that’s not the point. The point is I like these images, I’m proud of these images and for once in my life I’m glad I decided not to take myself and my process so seriously and just have fun and make images regardless of the camera or the capture method I employed.

 So this is the point of this long-winded article you have hopefully found yourself at the bottom of and that point is to HAVE FUN! Don’t take yourself, your work and your process too seriously as doing so will impose constraints that block creativity. Let yourself be open for experimentation and don’t get hung up on the how’s and whys of the process just have fun and try new things because in the end it’s about the art that you make not how the art gets made. I of course ran right out the next morning by myself with the Hasselblad to try to retake every image I made the day before on my iPhone, (old habits die hard) but that never really works out like you plan. That day had come and gone, the landscape had changed. Someone had been out walking their dog and there where tracks all over the place. The tide had come in and washed all the snow from the beach and it was warmer and there had been a bit of a melt. I did manage to finish a roll of Kodak T-max 100 however and I hope to get some good images out of it but to be honest I am truly happy with what I had achieved the previous day with my iPhone.

 So I decided to do the unthinkable, I added a gallery titled “The Unthinkable Gallery” to my website to help remind me to not take myself so seriously, to give light to the work I had made with my iPhone and to stand as testament to others that in the end it’s about the art that you make not how the art gets made. 

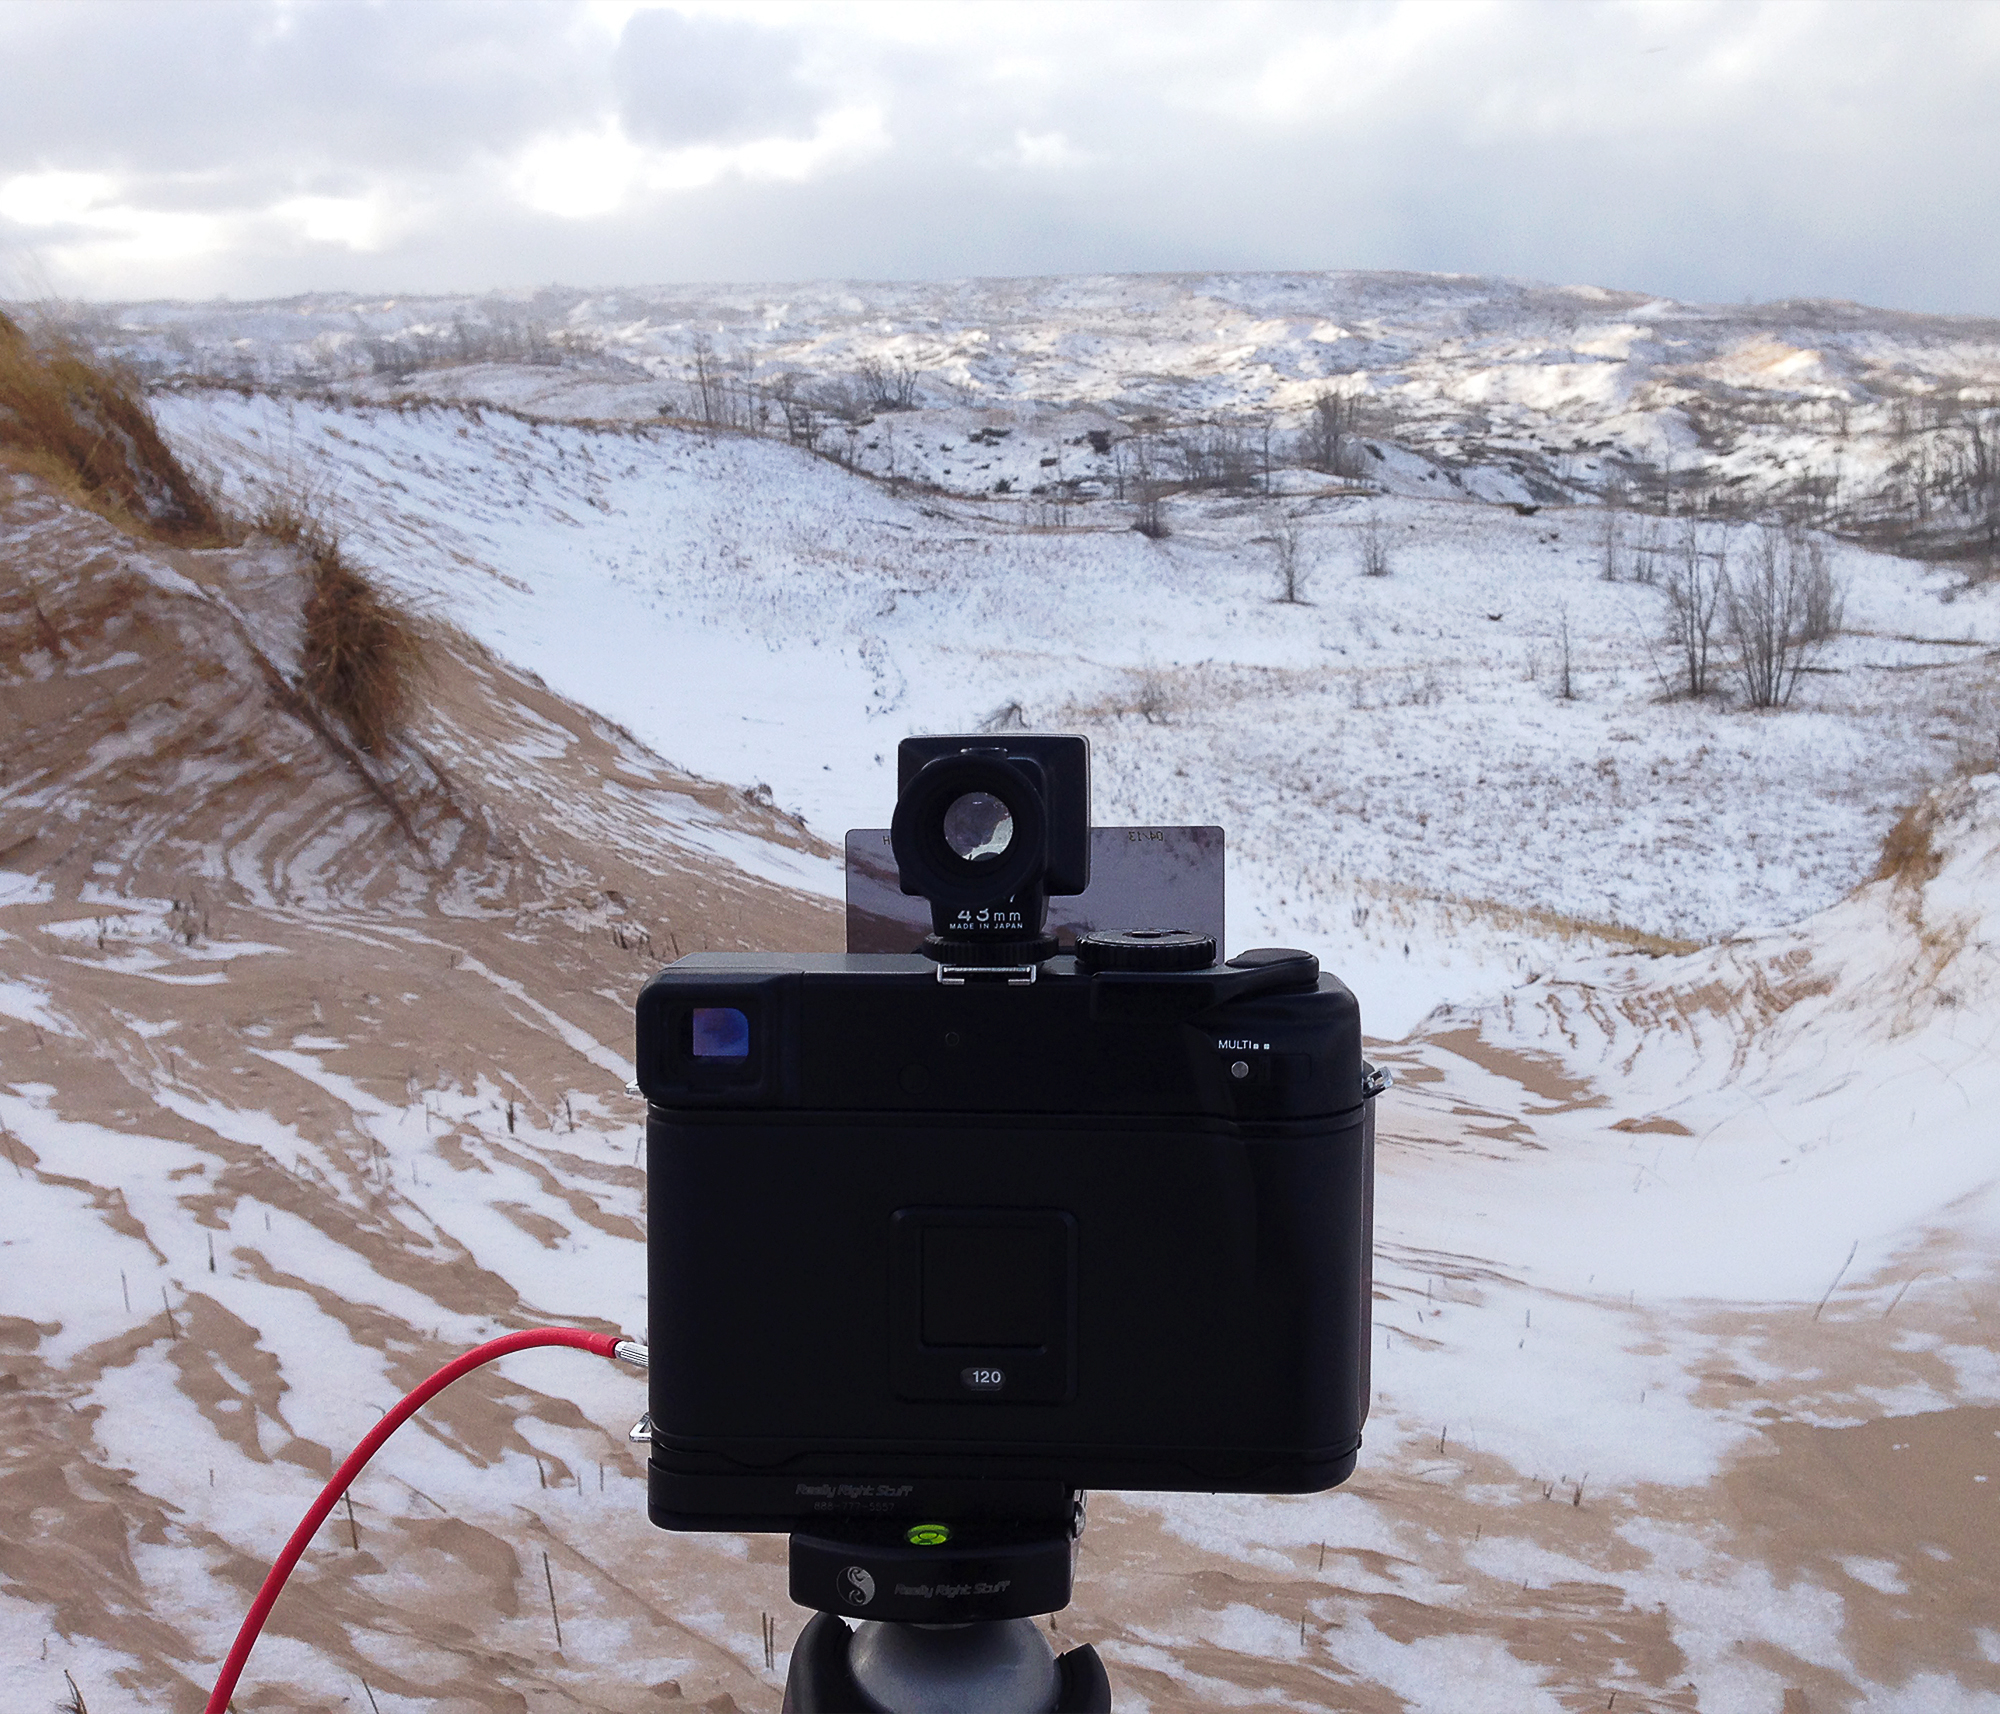
My Mamiya 7II Rangefinder Hack

As see on my YouTube Channel I wanted to shre a video I produced last year that shares a handy hack when placing grad filters on a rangefinder system.

As promised I share my hack for perfect grad filter placement on a rangefinder system. Muisc by: Vi​Ri​On: Sure Shot Rmx (Remastered) - FREE D/L https://soundcloud.com/virion/sure-sh... Lee Rangefinder Face Blades for 100mm System: https://goo.gl/KjehMS Link to my online gallery: https://www.jasonrobertjones.com/prints/ Help support my dream: https://www.patreon.com/jasonrobertjones My Favorite Gear List!!!!!

minimalism

lately I have found myself at a crossroads in my photographic journey, and it is a welcomed divergence from the course I have been on since I began shooting large format film. In the course of an artist lifetime, so long as one continues to create, there will be moments in which personal perceptions and tastes will evolve and new direction will be taken. This process is essential to the personal growth and development of not only the artist but the resulting art. generally these periods are brought on by the times, new influences and new discovery but are also born out of necessity for the artist to remain both relevant and inspired. If there are long periods of no growth or evolution in ones work and in ones self, both the work and the artist become stagnant and as a result cease to inspire as well as find inspiration. Over the years I have been inspired and influenced by many artists and works of art, whether that was in my early years producing pencil drawings or more recently through the camera, I don’t believe there is or ever has been an artist that worked completely in a vacuum and without influence. In my photography, influences have changed over the years but I have retained certain qualities from each and they along with my own personal style continue to compound and develop and this is what keeps me refreshed and inspired to go out and continue to produce new work.

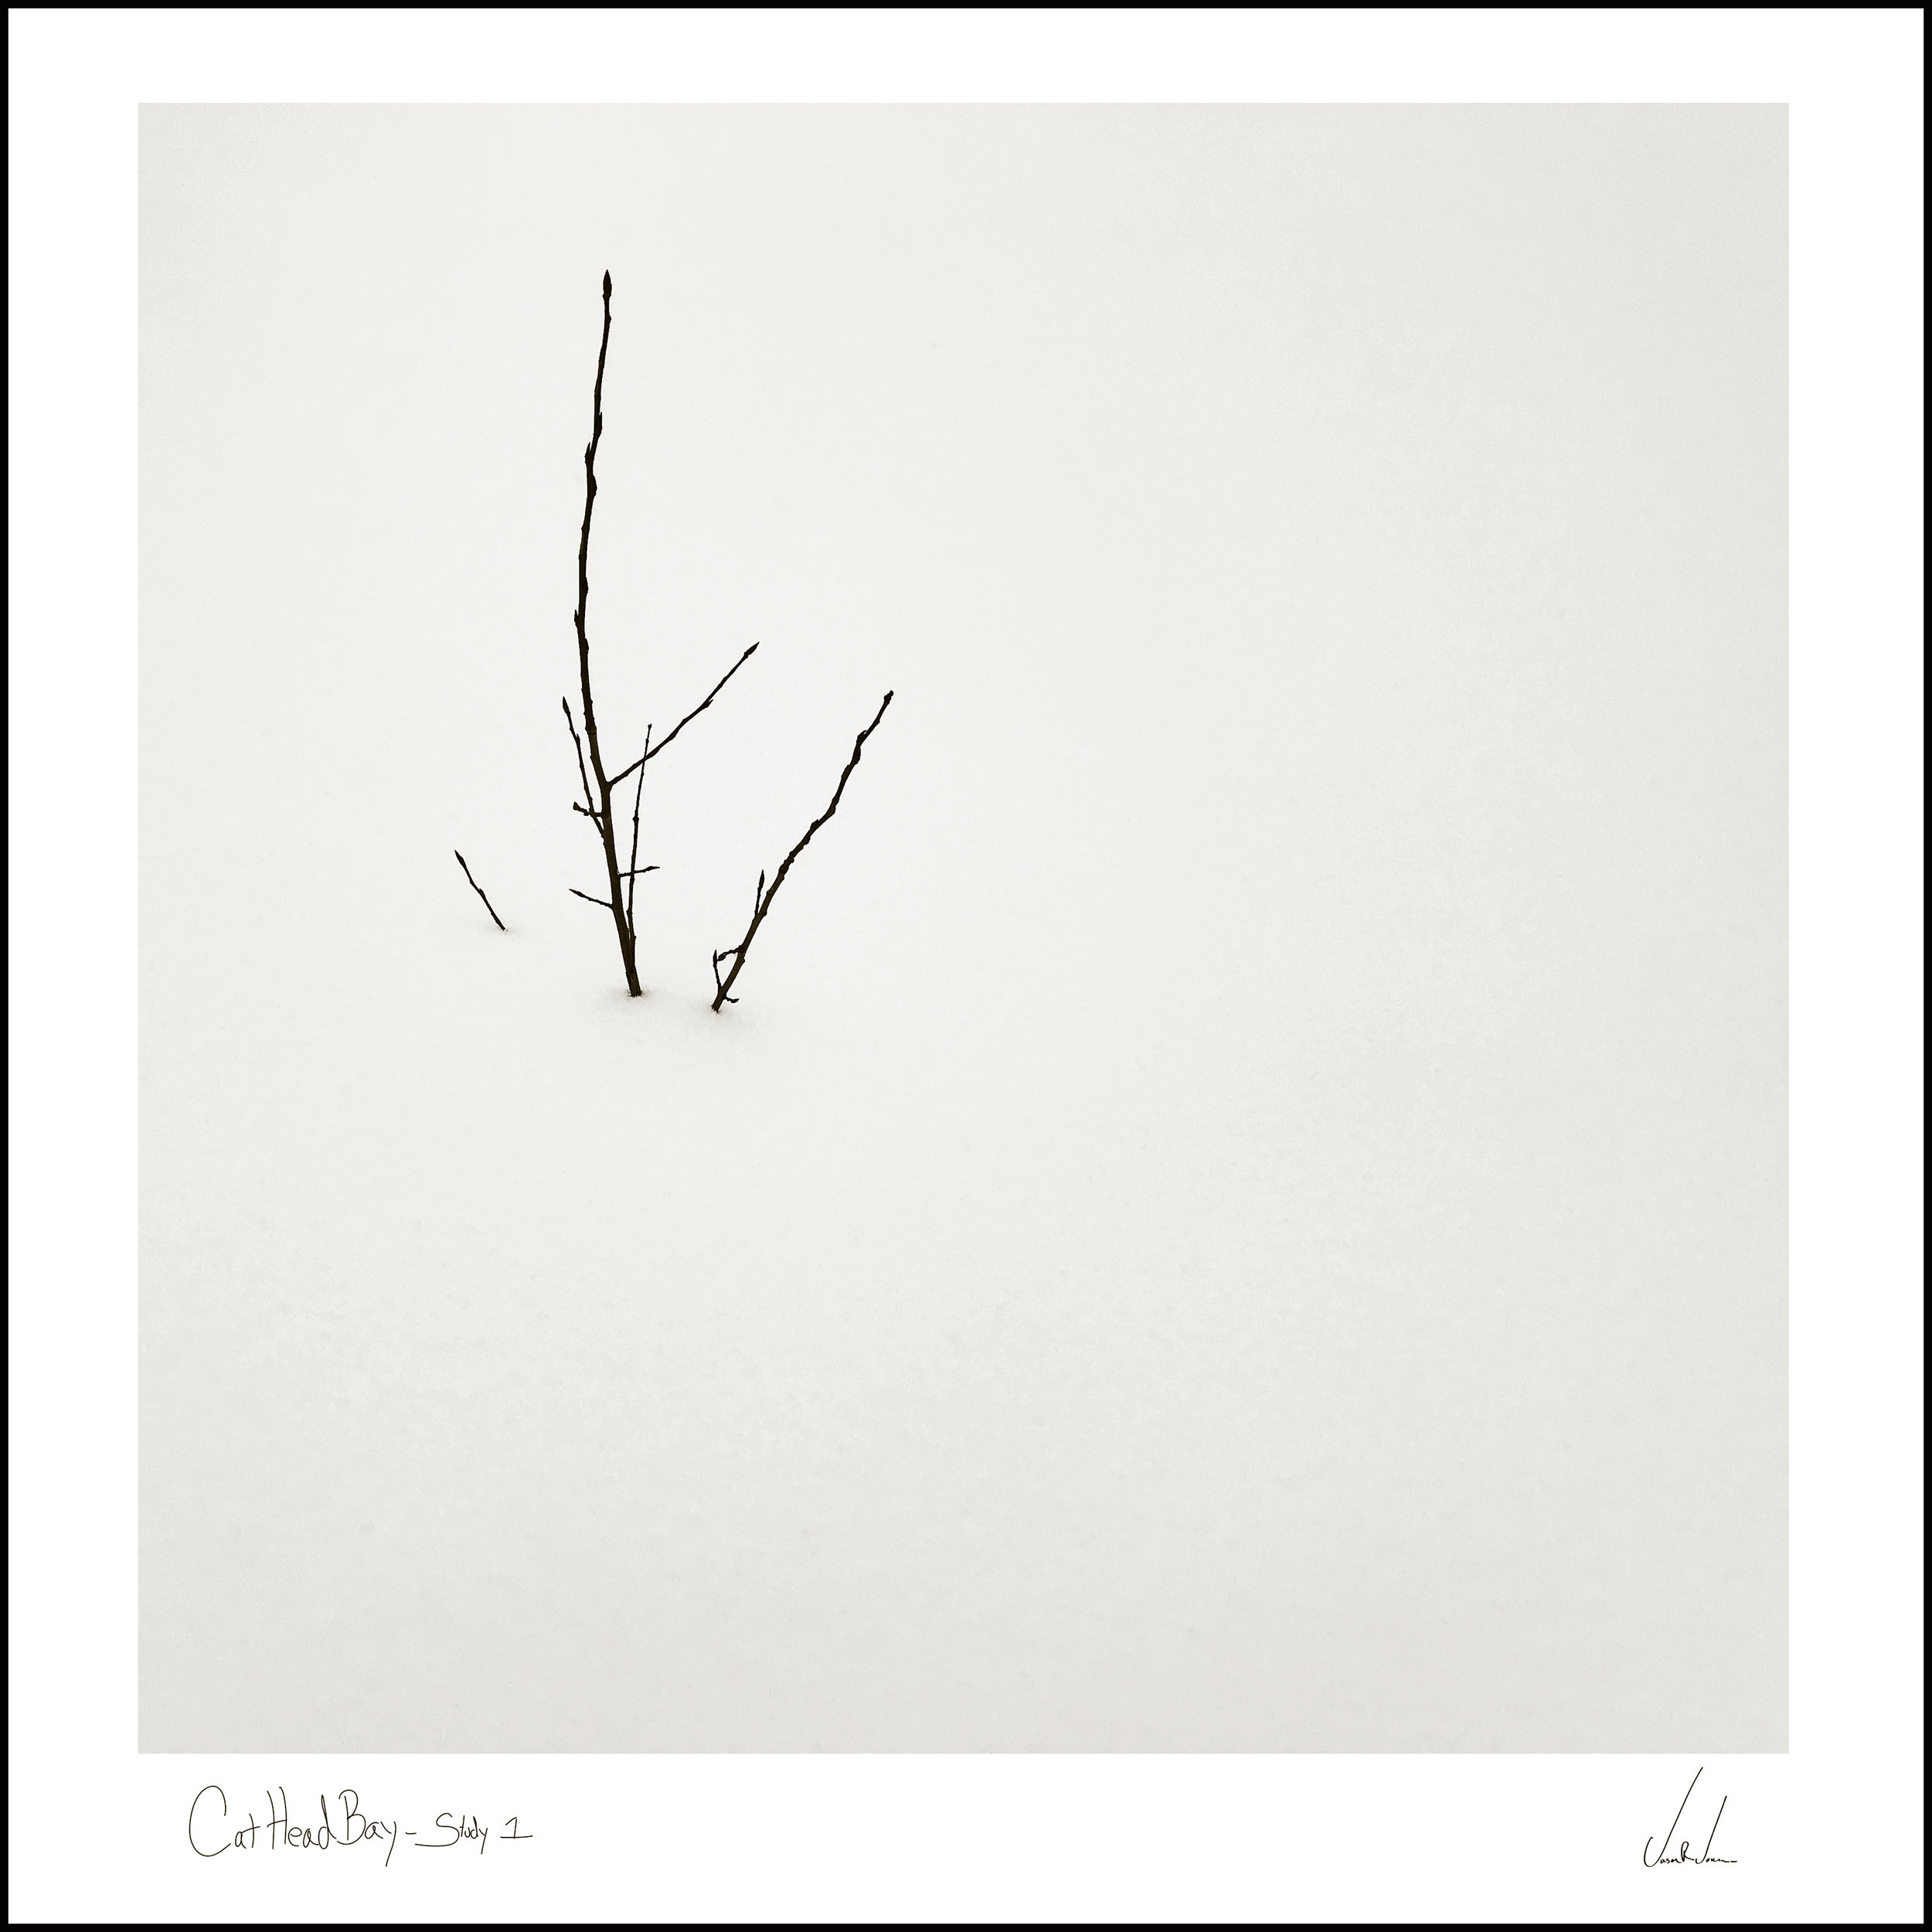
Cat Head Bay - Study 1, Leelanau Peninsula, Michigan

Cat Head Bay - Study 1, Leelanau Peninsula, Michigan

When I made the decision to return to film I was influenced by the work of a two photographers in general, one whom I had met through local art festivals and one whose work I was introduced to through a photography book I found at a local book store. Both of these photographers were from the Midwest, the region I too am from and both worked with large format color film and their primary subject was the landscape. I was inspired by the detail and look produced by large format and the vivid color and contrast of color slide film and the work of these two individuals inspired me to produce much of my early work. These photographers were C. W. Banfield and Ron Leonetti and their work and advice helped push me in a creative direction that I have followed since 2012. Along the way I have picked up new influences and these too have been instrumental the in development of my work and more recently I have found influence and inspiration in two photographers who like C. W. and Ron both shoot film however unlike my previous influences work exclusively with medium format film and in the 6x6 square format of the Hasselblad 500 series camera systems.

Cat Head Bay - Leelanau Peninsula, Michigan

Cat Head Bay - Leelanau Peninsula, Michigan

Whats also interesting is that while I have been influenced by the work of both of these men, at least one of them has also been greatly influenced by the work of the other, and whats also interesting to note is that we are all separated generationally by a period of about ten years. The photographers I am talking about are Bruce Percy and Michael Kenna and it is the latter who has had the most influence on the direction I am now taking in the work I am producing currently. While I have found a lot of inspiration in the work and teachings of both of these men, it is Micheal Kenna who is know for minimalism in his work as well as shooing almost exclusively with black and white film. Over the past two years I have become more and more drawn to the look and feel created by the 6x6 square format and in August of 2018, I picked up a Hasselblad 501c with an 80mm CF lens and an A12 back. I first used this camera on my September 2018 trip to Yellowstone where I shot it along side of my Mamiya 7ii 6x7 cm system however I decided to load the Hasselblad with black and white panchromatic film instead of my usual choice of Fujifilm Velvia 50, color slide film. The results were refreshing and for me held true to Micheal Kenna’s words that black and white unlike color is more of a suggestive media while color film can often leave little to the imagination as it is the way we see the world every day. I also find that black and white film has a certain romantic quality to it and I think this stems from the early days of photography and the periods of the 1920’s 30’s and 40’s when much of the iconic black and white images were produced. Michael Kenna came of age as a photographer in the 1970’s and this is also the time period when the minimalism moment in modern art was born so it is no surprise that he is one of its pioneers.

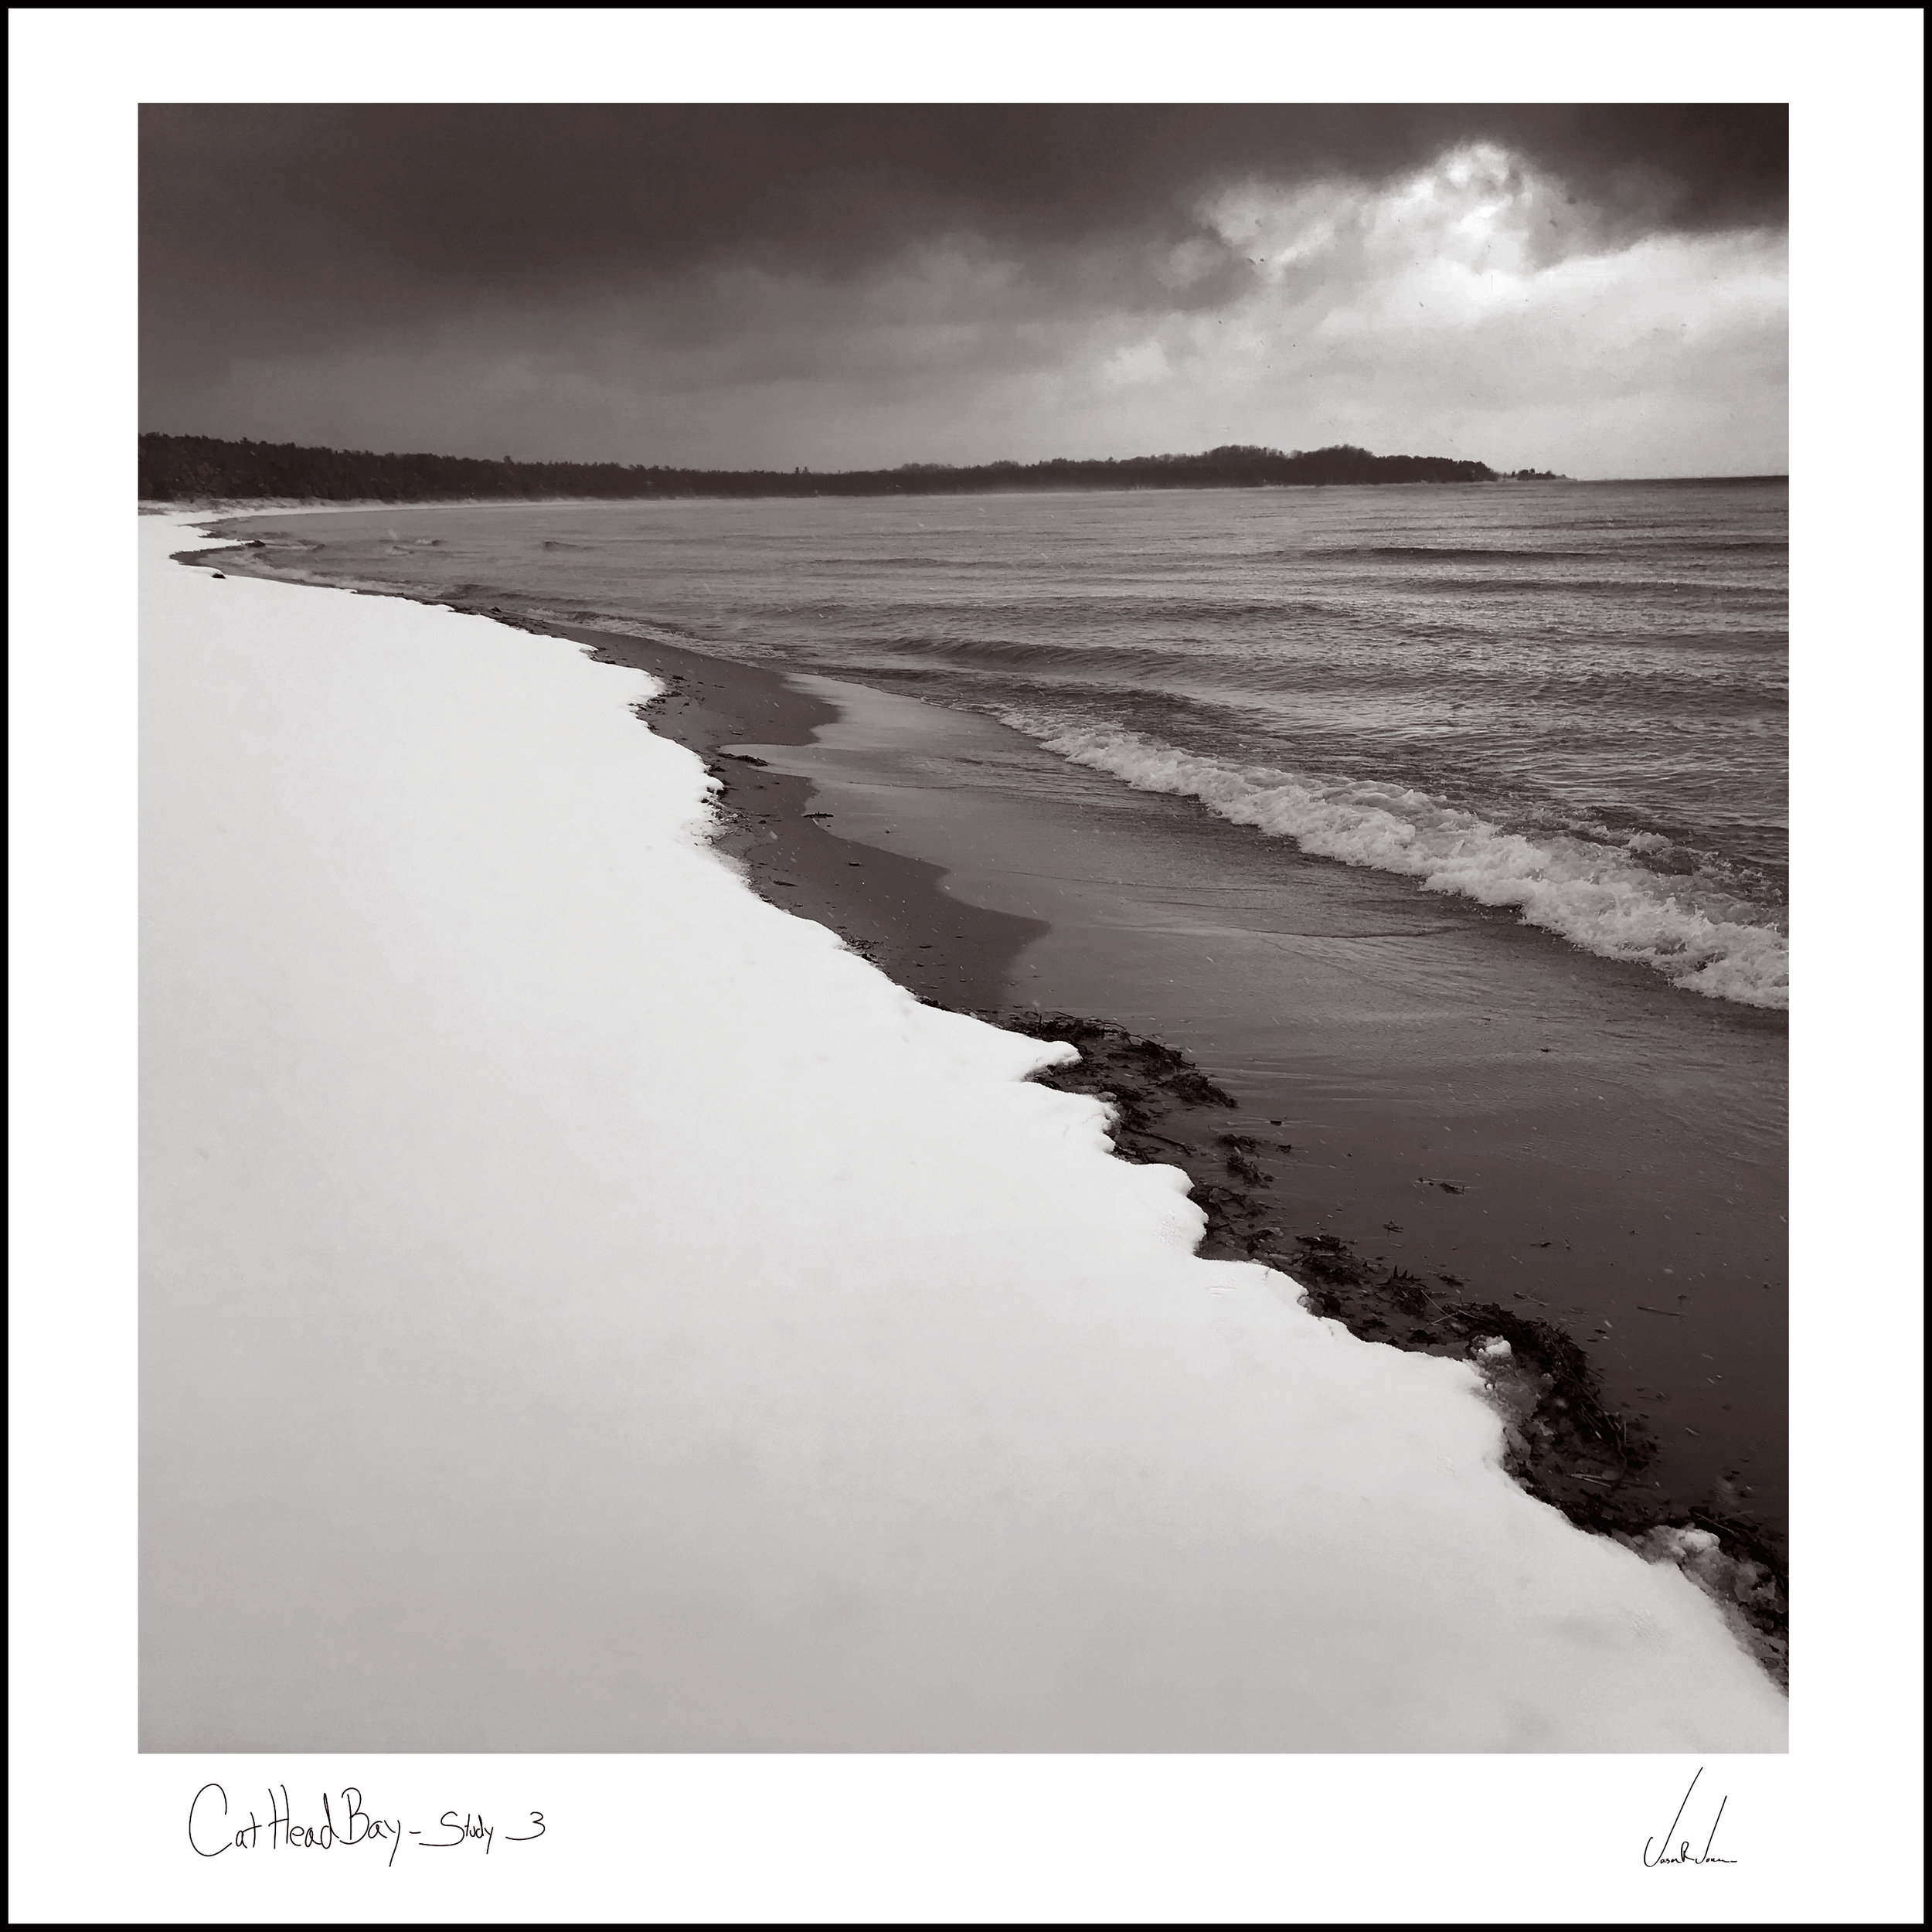
Cat Head Bay - Study 3, Leelanau Peninsula Michigan

Cat Head Bay - Study 3, Leelanau Peninsula Michigan

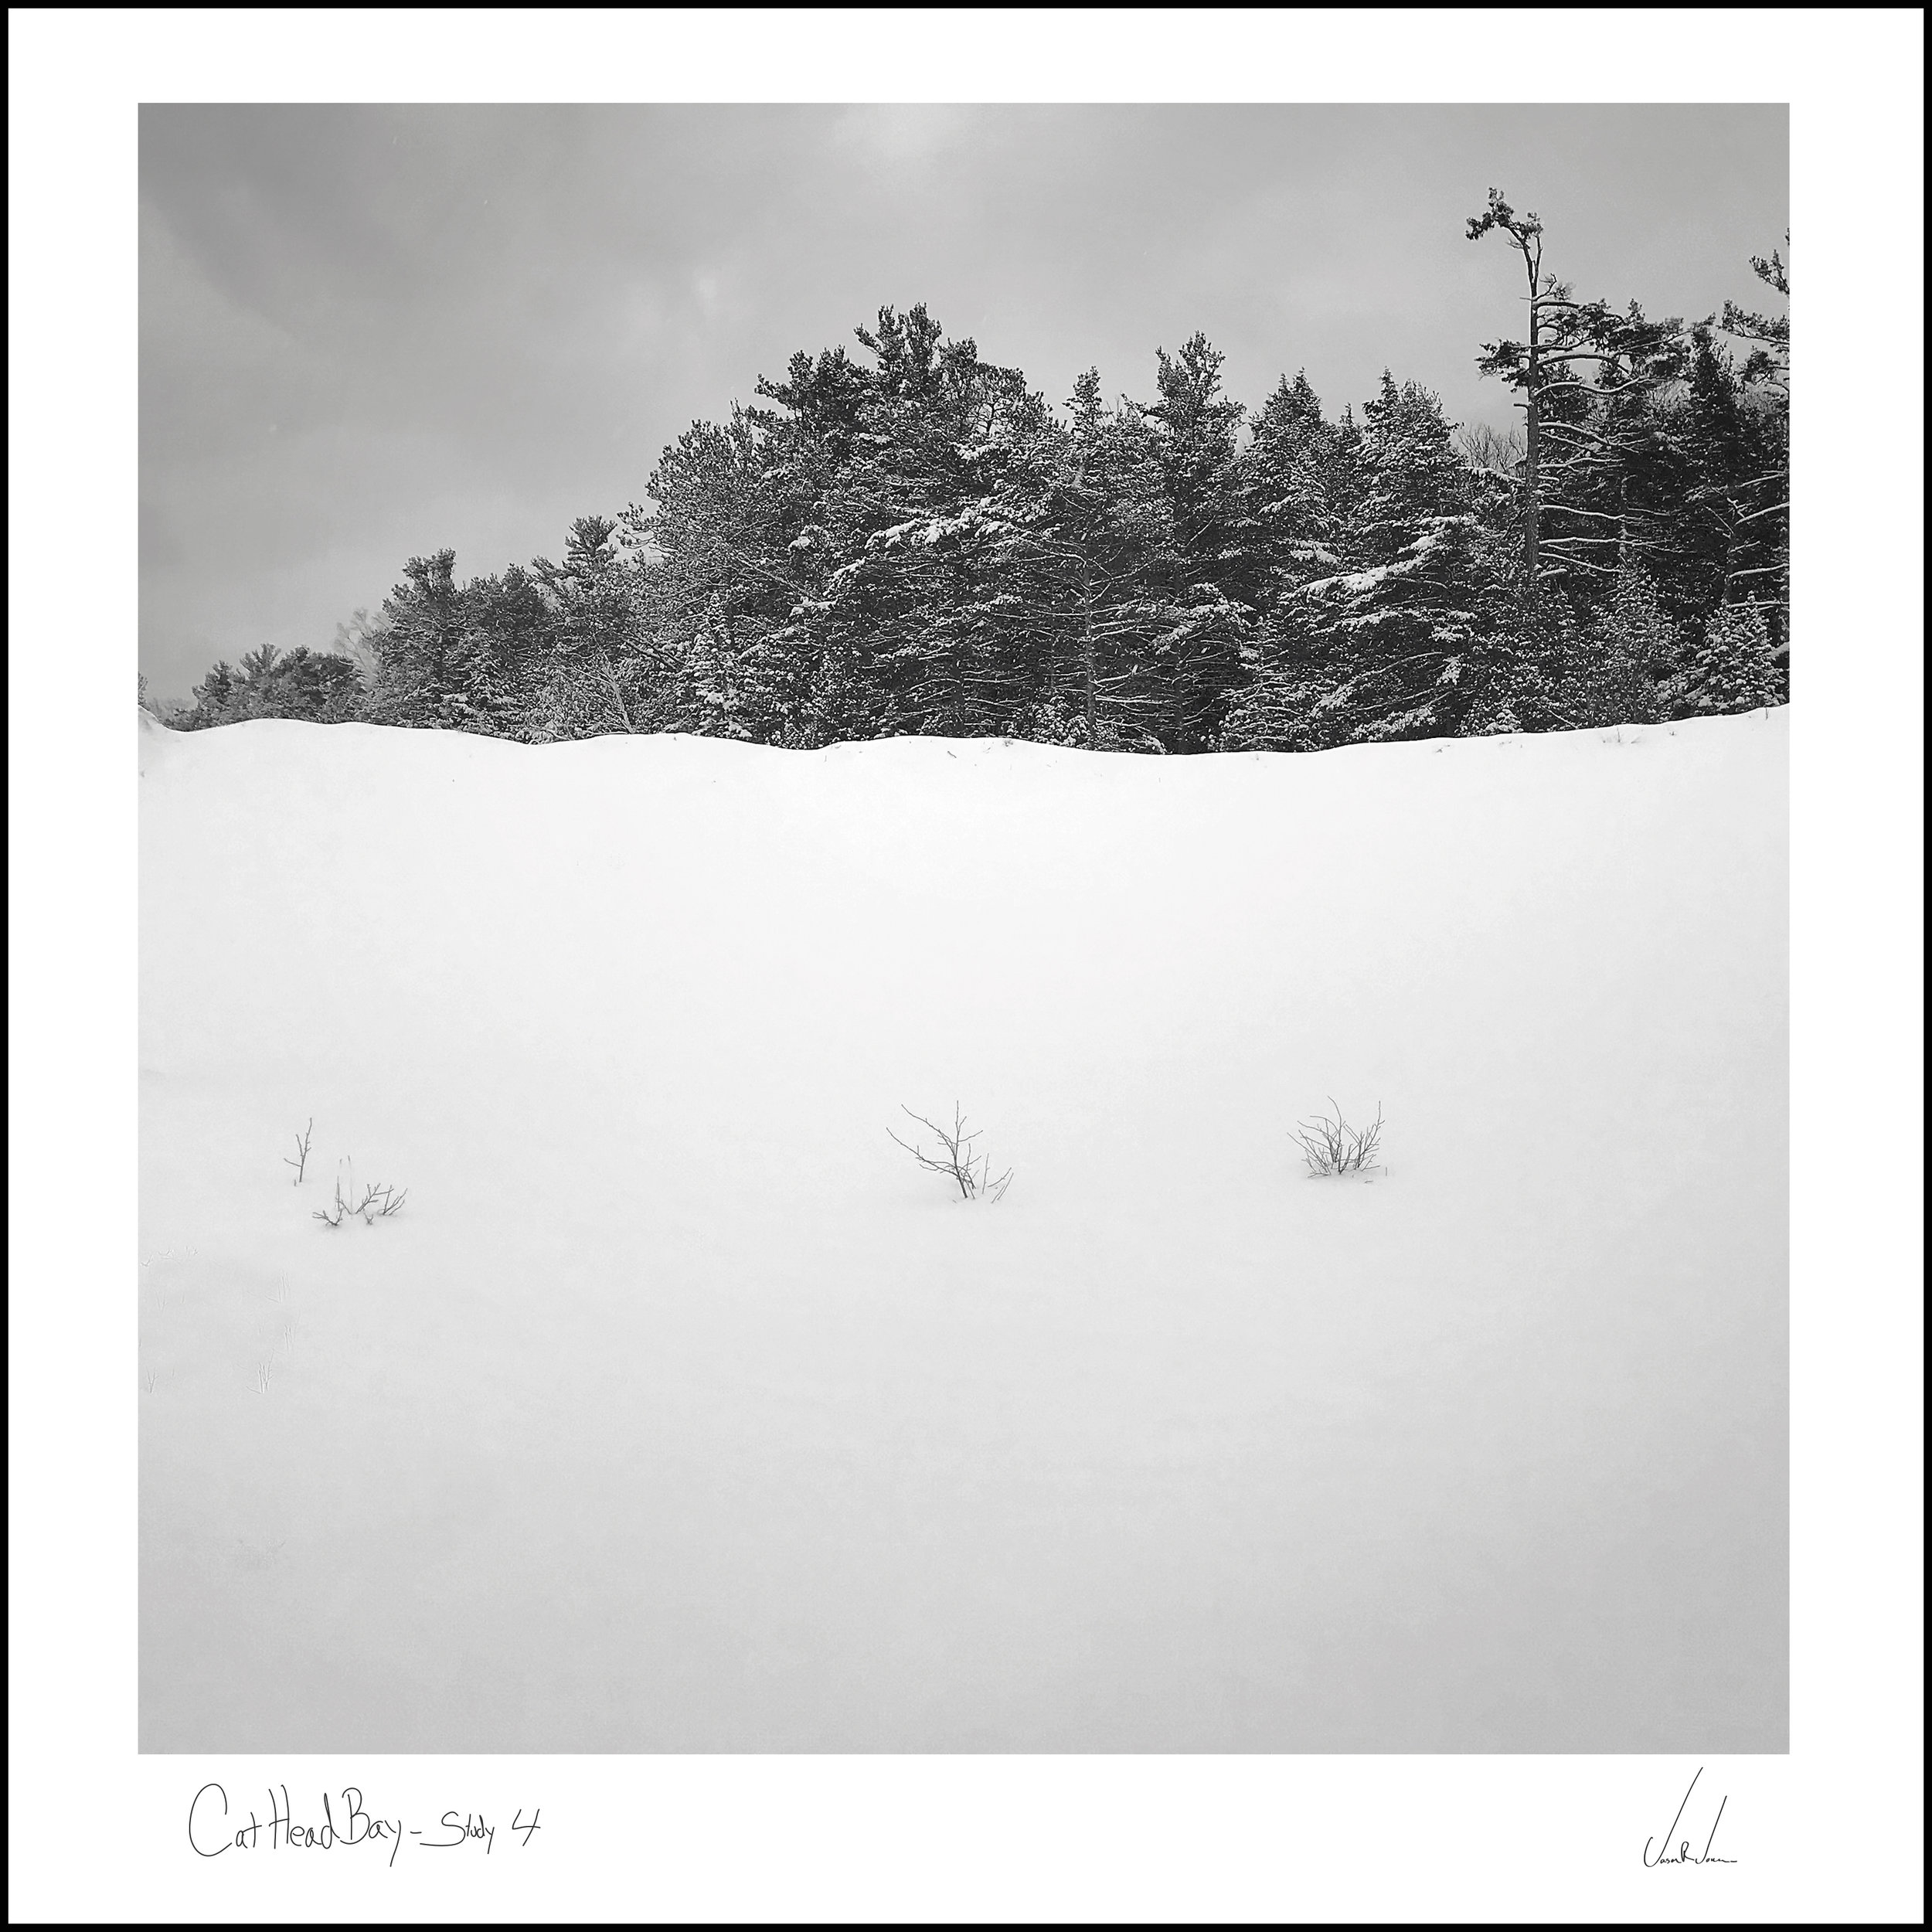
The collection of images you see here are part of a new direction I find myself taking and represents really my first attempt to add a minimalist quality to my work. The exclusion of color is also a departure from my previous work and takes me back to my roots in photography working with black and white 35mm film as a teenager. I welcome the abstruseness and open interpretive quality found with the use of black and white and look forward to experimenting with mood and tonal relationships that suggest mystery and space.

Cat Heady Bay - Study 4, Leelanau Peninsula, Michigan

Cat Heady Bay - Study 4, Leelanau Peninsula, Michigan

Cat Heady Bay - Study 5, Leelanau Peninsula, Michigan

Cat Heady Bay - Study 5, Leelanau Peninsula, Michigan

Cat Heady Bay - Study 6, Leelanau Peninsula, Michigan

Cat Heady Bay - Study 6, Leelanau Peninsula, Michigan

Cat Heady Bay - Study 7, Leelanau Peninsula, Michigan

Cat Heady Bay - Study 7, Leelanau Peninsula, Michigan

Without a doubt I will continue to discover new influences as I trace the steps of those who came before me and incorporate these influences with those that I have previously discovered all melded with my own personal style. I am grateful to these artists that have left their mark on me and empowered me to experiment, grow and produce my own work and I find inspiration and excitement in the prospect of the work that has yet to come. Here’s to the journey!

The loss of artistic possibilities

Its important for me to stay focused and in pursuit of my artistic goals and visions and one way that helps keep me on task is to listen to motivational audio books wile I am traveling. I am a big fan of Audible and have accumulated a pretty substantial library over the years. Recently I completed a book titled “Art & Fear” by Ted Orland and David Bayles, 3 hours and 8 minuets, narrated by Arthur Morey. “Art & Fear explores the way art gets made, the reasons it often doesn't get made, and the nature of the difficulties that cause so many artists to give up along the way”. Its very well written and I highly recommend either picking up a hard copy or downloading the audio book.

art_and_Fear.jpg

While I found many useful and inspiring points in this book one statement in particular really resonated with me. In chapter 5, about 16 minuets in, the authors begin to talk about the evolution of art and how it was directly influenced by the tools and technologies that were available to the artist at a particular period in time. They begin to build the case that history has shown as technology evolves so too does the art that is produced. From Fresco’s dry-powder pigments to Tempera Painting’s, colored pigments mixed with a water-soluble binder to oils and Acrylics. “The piece you produce tomorrow will be shaped purely and simply by the tools you hold in your hand today”. Makes a lot of sense that the outcome, look, feel, and even style of the work you produce is largely influenced by the tools you employ while creating it. Certainly I felt this to be a good point but nothing profound. It wasn’t until the next statement was read that I really took notice and immediately found the connection to the work I create and more specifically to the tools I employ. “Certain tools make certain results possible. The tools do more than just influence the appearance of the resulting art, they basically set limits on what one can say with their art piece and when particular tools and materials disappear because knowledge of how to make or use them is lost artistic possibilities are lost as well”.

This really hit home for me and inspired me to write today’s journal entry. I began to reflect on what was said and how true the statement was. As you know I am a film shooter and work almost entirely with the color slide film Fujifilm Velvia 50. There was a time when Film was king and digital was the new kid on the block but in the past 10 years that has radically changed. In the heyday of film, stocks like Velvia and other slide films were the cutting edge of technology, known for vivid color, high contrast, sharpness, and fine grain. its easy to see why they became so popular among nature and landscape photographers of the time. However it is true as the statement suggests “The tools do more than just influence the appearance of the resulting art, they basically set limits on what one can say with their art piece”. Though Velvia and other slide films produce very pleasing results, they in fact place limits on the artist and set certain boundaries on the possible outcome of an art piece. For-instance slide film sets very stringent limits on exposure latitude particularly in preserving the highlights but the same can be said regarding shadow detail. In other words, slide film is really only capable of reproducing detail within a 5 stop range. Of course there are other tools that can be employed in conjunction with slide film that will help compress the exposure latitude of the light in a scene, take Grad ND filters for example. However when compared to today’s digital sensors, exposure blending and HDR technologies even with the help of ND Grads, slide film is extremely limiting. Still color slide film produces a very distinct look and feel and was really the genesis of modern digital sensors and is for me a most rewarding and extremely fulfilling tool when it comes to the creation of my art.

Another statement the authors make that I find particularly relates to me and my work is this, “Artists like everyone else have a certain conceptual inertia. A tenancy to keep to their own compass heading even as the world itself veers off in another direction”. This is particularly true in my case as I cling to an analog, “Film Only” method in imprinting the images I create. Though I do convert that analog imprint into a digital representation the final intended incarnation is once again an analog product or a final print to be displayed in the carbon based world, not the digital world of the internet.

I feel that with the passing of the age of film much of the romance in what I do will be lost. Not that one should romanticize over ones own work, rather find romance in the process of its creation. However when I think about the prospect of a completely digital process in my own work, my passion is smothered and my soul turns grey. I was born in the early stages of the digital age, the personal computer, internet, cell phone and social media have all come in my lifetime yet I do not fully embrace the digital renaissance, rather a hybrid of digital and analog. While digital methods employ extraordinary new time saving automation’s and technologies , the process and disciplines of the age of analog are for me the lost leaders of personal artistic growth. They offer evolution in years of experience over the instant gratification brought on by the digital age. Where the choice of ones film, the careful process of loading ones camera or film holders, the process of thinking through a composition and waiting for the right light, the careful metering of light in ones scene, the choice of filter, depth of field, exposure time and waiting to see the final results before heading into the darkroom and print making process have all be skipped over for the most part by the convenience and automation brought on by the digital revolution. A revolution that has brought on laxness and a fix it in post mentality, presets that produce instant treatments and effects, algorithms that stack multiple images together combining exposure and depth of field in a matter of seconds. All of witch take away from predetermination, careful craftsmanship, vision, conceptualization and the romance behind the creative process. After all isn’t that what art is all about, the romance or the love and joy you find in the creative process and with the subject of your art?

And so on to the final statement “When particular tools and materials disappear because knowledge of how to make or use them is lost artistic possibilities are lost as well”. When certain films or all film for that matter, and film camera systems are discontinued and abandoned for digital replacements, artistic possibilities are lost and that my friends will truly be a sad day. For with the advent of the type writer, the art of spoken story telling was drove to the brink of extinction. The paperback replace the story teller and while this brought the story to a larger audience, some of the romance was lost. As physical books give way to tablets, e-books and blogs so too does a little more of the romance die along with the knowledge of them and the process of how to produce them. I don’t mean to pronounce all technological advancements as evil and the enemy of art, certainly the digital revolution has brought on some amazing advancements that complement the process of creation. And certainly there are many that would state to the contrary that the digital revolution has expanded the tool set available to artists and unlocked new frontiers of possibility for creatives. And I really couldn’t argue with them. But for me like many other artists the old tools are still the best tools in our creative process and even a blend of both is welcome. But to loose these old tools completely and with them the knowledge of how to use them, is not only a loss for the creators of the art but a loss for those who are lovers of art as well. And any loss of love, romance, beauty and expression in a world that needs it more than ever is truly a sad thing indeed.

Certificate of Authenticity

For several years now I have been searching for the best method of adding value while protecting and authenticating my limited edition prints that went beyond hand signing and titling. For a wile I was sold on the idea of the National Fine Arts Title Registry which I still believe to be a great method of protecting the value of a print. Its strengths lie in its process of providing a system for inventory and tracking for artists while also providing safe, online records or registry of ownership via a database for art collectors. Where it fell short for me was the quality and craftsmanship of its C.O.A and in providing a serial number that directly linked the print itself to the supporting document. Sure it provided a document with a specific S.N. that was allocated to the limited edition print but how was I to prove it was linked to that print? And furthermore its appearance was more of that of a high school diploma than that of a fine piece of limited edition art.

National-Fine-Art-Registry-Nirvana-1.jpg

I felt that I needed a system that better complemented my work, that represented museum quality, so I delved in further and finally located a product that brought it all together. The Hahnemühle Certificate of Authenticity was the product I had been searching for and from my research it would seem is a top choice of many fine art galleries. Each certificate is made of premium deckle edged mould made paper with a Hahnemühle watermark and fluorescent security fibres. A pair of serialized numbered holograms accompany each certificate and are intended to be adheared to both the certificate and the reverse side of the artwork. The holograms are tamper proof so once they are attached it is impossible to remove them without damaging them. The combination of certificate and hologram assures that each Certificate of Authenticity relates to one particular piece of art. They also supply a COA template if you need some help getting started. Finally they provide an online registry where you may register your limited editions for further protection.

Hahnemühle Certificate of Authenticity and Hologram System

Hahnemühle Certificate of Authenticity and Hologram System

Hahnemühle Certificate of Authenticity and Hologram System on reverse side of print.

Hahnemühle Certificate of Authenticity and Hologram System on reverse side of print.

In summary I am extremely pleased with this product and utilize it on all of my limited edition fine art prints. It provides unique tracking and authentication in an elegant museum quality fashion. Further more as it is widely used by high end professional galleries and artist alike, it has recognition in the art word which translates to value and assurance. For more information on the The Hahnemühle Certificate of Authenticity click the link.

Black and White Film

“Awakening” CCD Scan from 6x6 CM Fujifilm Neopan Acros 100 - Hasselblad 501c

“Awakening” CCD Scan from 6x6 CM Fujifilm Neopan Acros 100 - Hasselblad 501c

I have recently began to experiment with black and white film again. Like most photographers over 40, I got my start shooting with B&W film in high school, digital had yet to be born , and I continued to do so for several years up until 2003 when I purchased my first digital camera, a Pentax K20D. When I began shooting film again in 2012, I moved right into Fujifilm Velvia 50 and 100 color slide film, and have not strayed much since. I did shoot a few rolls of Ilford Delta 100 through my 6x17 panoramic back for my Ebony 4x5 but have mainly stuck with Velvia. I just happen to have fallen in love with the look and feel of Velvia, but after recently purchasing a Hasselblad 501c just before my September 2018 trip to Yellowstone and not having the proper Bay60 ring for my Lee Foundation kit, was sort of stuck without a good way to use my ND Grad Filters. I need Grad NDs to control the exposure in areas of my compositions that exceed the exposure latitude Velvia is capable of and since I didn’t have what I needed to adapt the foundation kit to my Hassy, I decided to do something truly revolutionary. I picked up a roll of now discontinued Fujifilm Acros 100 and a roll of Kodak T Max 100, knowing that the exposure latitudes of these films was more forgiving and along with my newly acquired 501c, Mamiya 7II and 12 rolls of Velvia 50, boarded a plane for Yellowstone.

Hasselblad 501c.jpg

I was only going to be in Yellowstone for 4 days and I wanted to walk away from this trip with enough images to put together a decent collection. This was to be my first study of the Yellowstone Caldera after all, but I also wanted to begin to work more in the 6x6 square format I have been gravitating toward over the past year. After shooting 3 rolls of Velvia in 3 days through the Mamiya, I felt comfortable experimenting with the Hasselblad so I loaded up the A12 back with a roll of Fujifilm Acros 100. On the final morning of my trip I exposed 12 - 6x6 frames in the Midway Geyser Basin, completing the roll of Neopan and packed it in. I felt accomplished and was looking forward to getting the film processed and I was especially looking forward to seeing the results of the 12 exposures made with the 501c. I returned home, sent the film out for processing and patiently waited for its return. I am happy to report that all 4 rolls came back yielding results I am pleased with and I will be sending out several exposures to be scanned by the marvelous James Beck . Its of course easy to see the results of the color slide film at first glance on a light table however negative film is a little tougher, especially when one is used to viewing the world as it appears not inverted. The Neopan negs looked to be exposed correctly and after viewing them quickly via my iPad with colors inverted, more on this in another article, I was assured that I had some images to work with. But before sending the negs out to be professionally scanned I decided to put them on my Epson V700 and see what I could do with them as a preliminary effort. The image you see at the top of this article is the result and I am quite pleased with the outcome. There is of course a few areas I would like to improve upon such as the almost pure white, upper right hand corner of the image and a few other nuances, but all in all I am quite pleased.

Fujifilm lighttable and Velvia 50 color slide film from the Yellowstone Caldera 2018.

Fujifilm lighttable and Velvia 50 color slide film from the Yellowstone Caldera 2018.

So in conclustion what have I learned from this experience? For one I have affirmed my attraction to the 6x6 square format, its very pleasing to my eye and invokes a zen like feeling. I have also decided to continue to work with black and white film as it conveys a completely different feeling than that of color work and while I will still continue to work in color I also want to prepare myself for what some dub as the inevitable end of Fuji Velvia. I also feel that working in black and white pushes you to pay closer attention to tone and form. Its easy to loose sight of these principals and be distracted by vivid color but with the absence of color your are pushed to look much deeper and pay attention to tone and form. It will be several months before I get all the film from this trip scanned and begin work in the digital darkroom but I am looking forward to releasing my first collection of the “Yellowstone Caldera - Study 1”.

Yellowstone Caldera 2018

Midway Geyser Basin, Yellowstone Caldera, captured with iPhone 7, September 4th 2018

Midway Geyser Basin, Yellowstone Caldera, captured with iPhone 7, September 4th 2018


2018 has been a remarkable year for me, and this is no doubt attributed to the amount of travel to new destinations I have experienced. Travel not just for photographic purposes but also for family adventure, although fortunately for my own selfish reasons photography was always at least part of each adventure. The year started off with a road trip in March to visit family in North Carolina and then on to southwest Florida. These early trips were really geared around family but on the horizon I knew an epic journey lay in wait. A journey that would ignite a love affair, and prompt a 2nd visit in a little over a month.

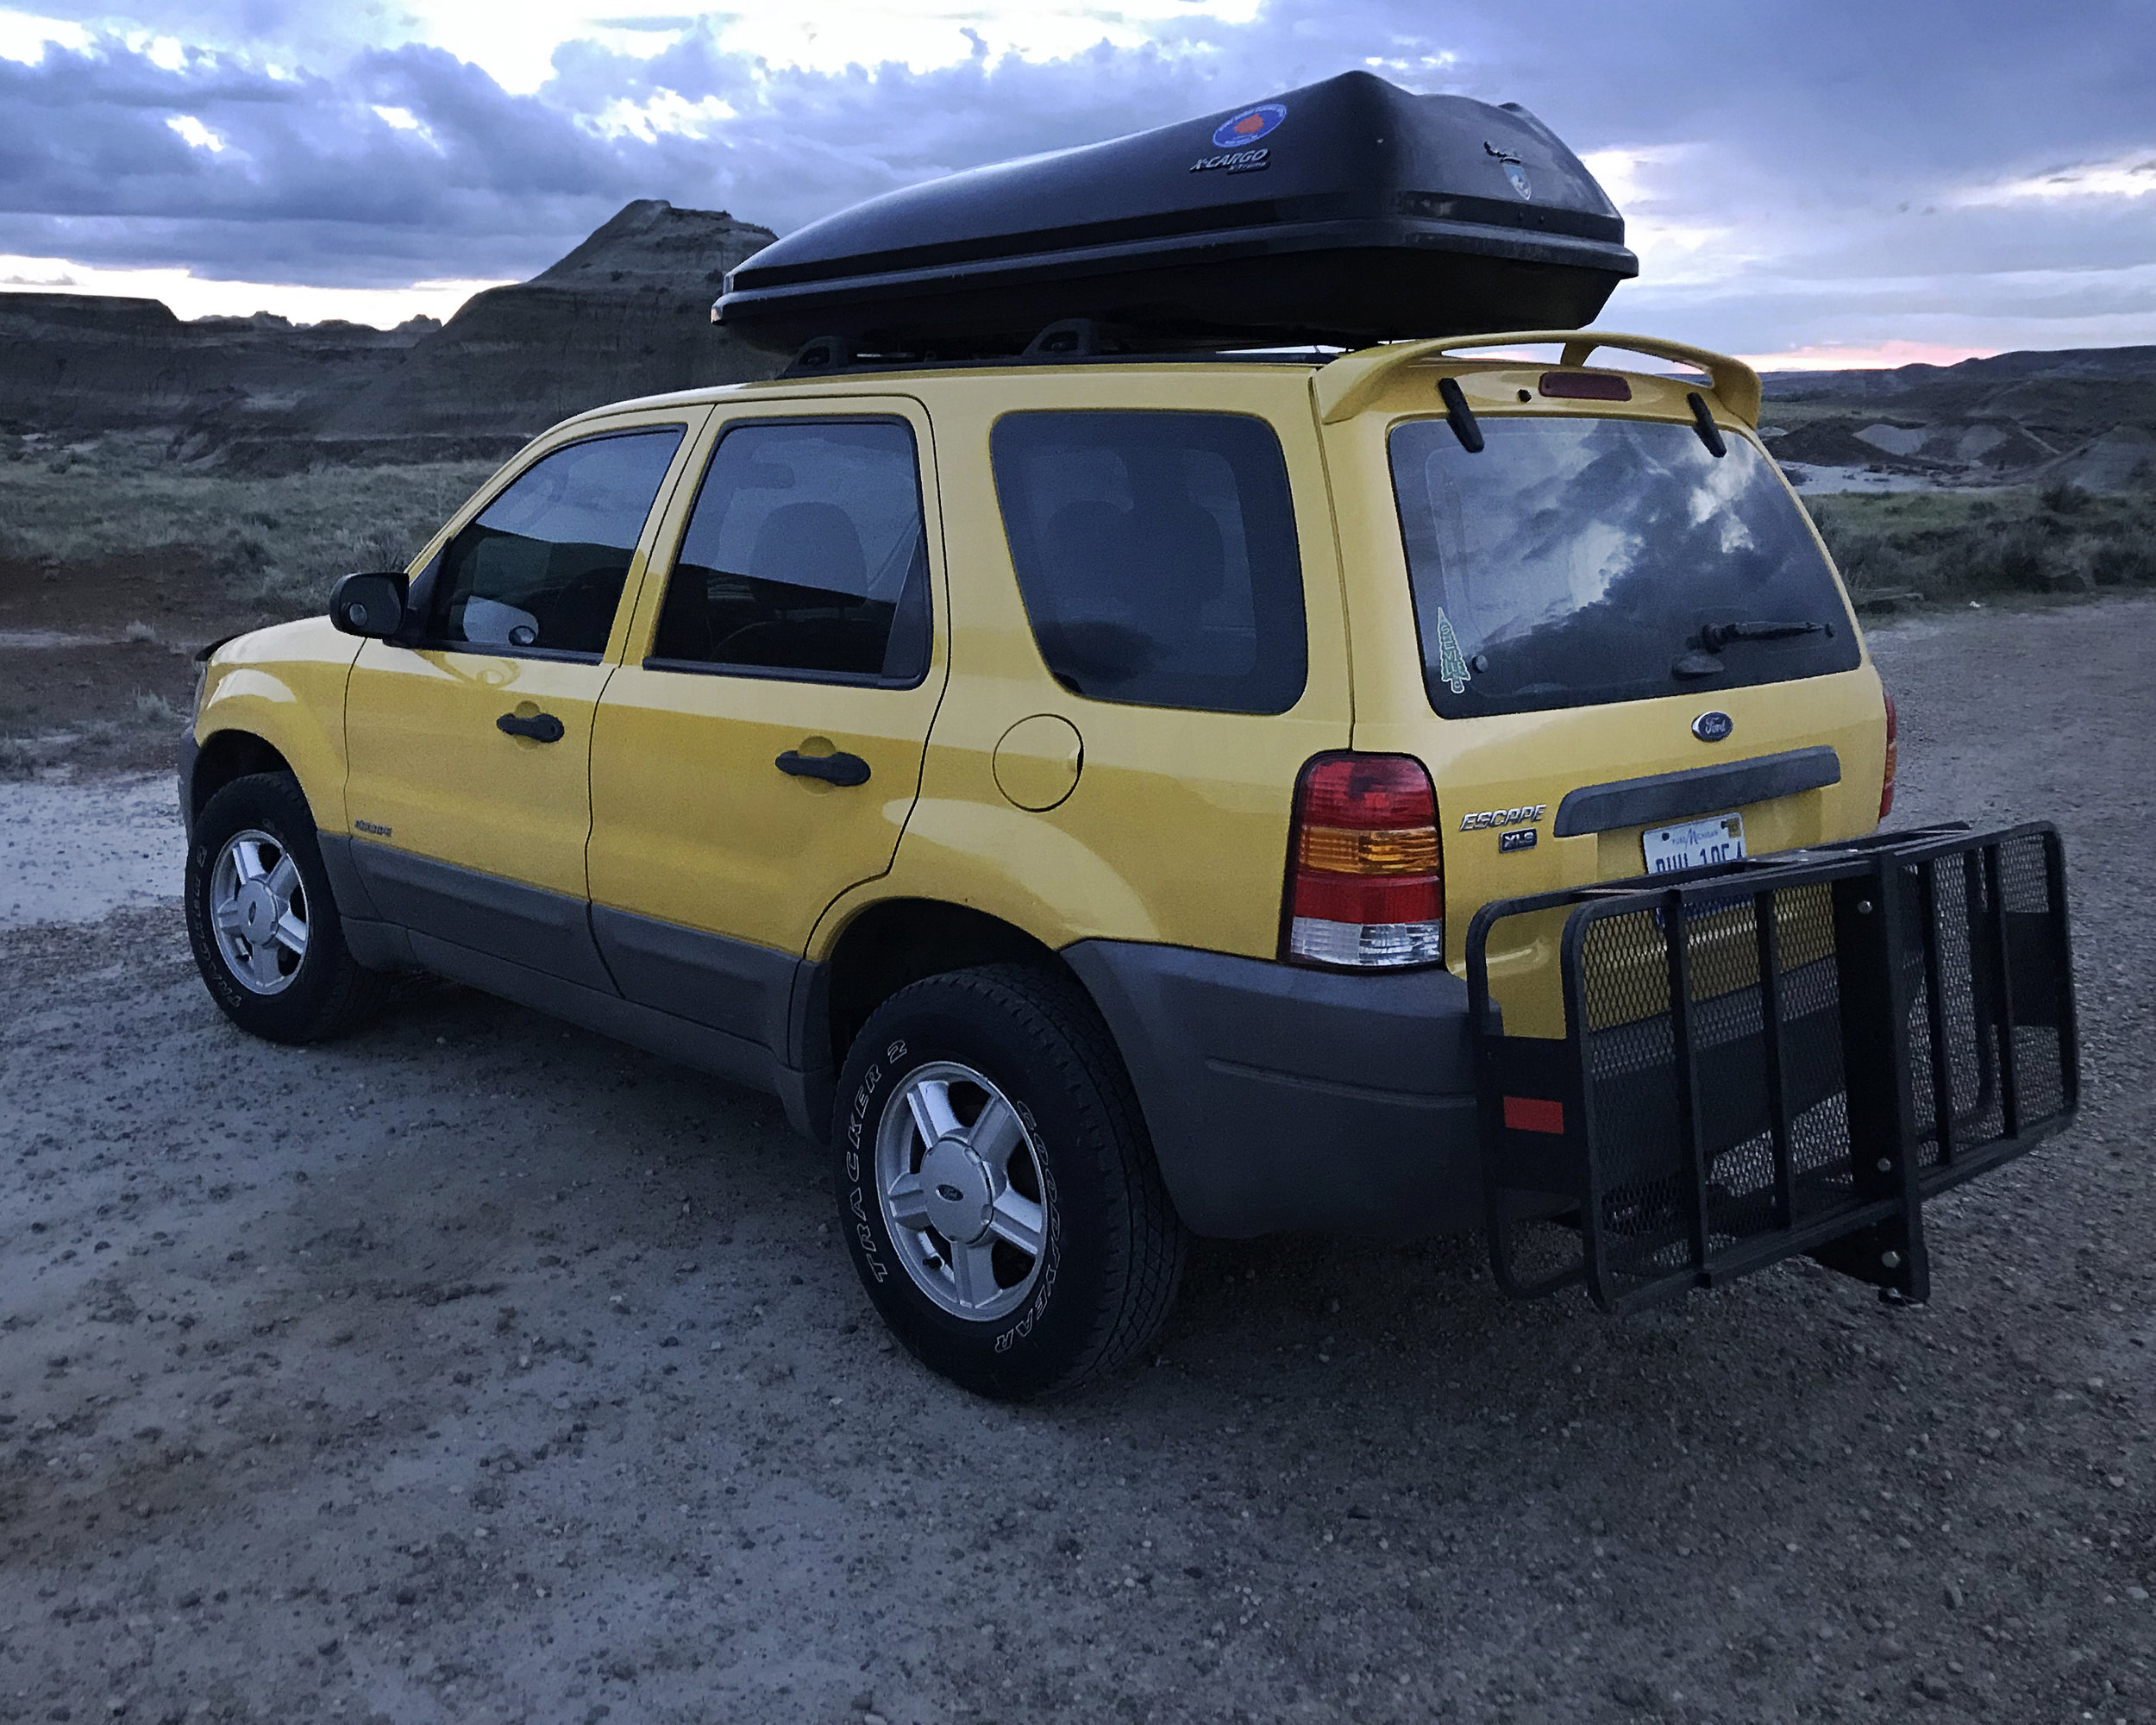
In early January 2018, as the year was just getting underway, I decided that as a family we needed to undertake a great North American road trip. Of course photography was always on the agenda but the central purpose was to visit areas of North America that we had not yet experienced. The area of interest was the Canadian west and more specifically, the Canadian Rockies and the city of Vancouver in British Columbia. The plan was to overland it and camp in Jasper National Park with a few stays in hotels along the way to “clean up”. As I began to plan the trip I discovered an area in Alberta about 2 hours east of Calgary called Dinosaur Provincial Park. The park appealed to me due to the striking resemblance to the Badlands of South Dakota, it’s a spitting image. It was an easy sell to my family as the Royal Tyrrell museum of Paleontology is not far away and every 8 year old loves dinosaurs so to the roster it was added. On July 5th 2018 we packed up our 4wd Ford Escape with all of our camping gear and of course the Mamiya 7II outfit and headed northwest into the great Canadian west. We spent 4 nights in Dinosaur Provincial Park, 6 nights in Jasper National Park, 4 nights in Vancouver B.C. and enjoyed every stretch of road along the way. I broke out the Mamiya in both Dinosaur and Jasper but only managed to expose 2 rolls of film the entire trip. This is due to a few factors one of which was as I stated in the beginning of this post; it was a family trip to unfamiliar landscapes. The other factor was that although both of these landscapes are breathtaking, I was having a hard time making a connection. I found the simplicity of the Canadian Badlands easier to distill down to a simple frame, with its mono tonalities and simple shapes however the Canadian Rockies although extremely beautiful, I found to be overwhelming and complex and this being my first visit I struggled to find a photographic connection.

Camping in Dinosaur Provincial Park, Alberta, Canada 2018.

Camping in Dinosaur Provincial Park, Alberta, Canada 2018.

On July 21st we set out for home, driving down I 5 from Vancouver back into the U.S. and eventually picking up I 90 out of Seattle. We followed 90 through Washington and Idaho arriving in Bozeman Montana on July 23rd. It was that night as we had dinner in Bozeman that we made the decision to add an extra day to the trip and visit the most famous and first of the U.S. National Parks, the fabled Yellowstone. Yellowstone National Park is extremely popular, packed with tourists, well photographed and extremely hyped and was always a place I felt indifferent toward when it came to landscapes I must visit. It was always a place I said I wouldn’t mind seeing but it wasn’t very high on my list due to all the aforementioned reasons. I couldn’t have been more wrong. On July 24th we headed south out of Bozeman MT and entered Yellowstone National Park through West Yellowstone, thus beginning a love affiair with a landscape unlike any other I had ever seen and most likely will see for that matter. Sure the park was packed full of tourists and that was definitely a turn off but what I discovered that day not only changed my mind about the park, it ignited a creative spark inside of me. Before the sun had set that day I had already began to devise a way to revisit the park that very same summer with the sole intention being to delve deeper into a relationship with the life force of the park and begin what I hope will be a long and ongoing study of the Yellowstone Caldera. 

True to my intent I returned to Yellowstone on September 1st 2018, just over a month from my original visit. My father who is also a Artist/photographer flew in as well and we met at Bozeman Yellowstone International Airport. It would be a short trip and we would be departing on September 5th in the AM. I had spent the previous month planning our shoot locations, mapping out the lighting for each location in TPE and securing hotels and a rental car for the trip.  I traveled with 12 rolls of Fuji Velvia 50, one roll of Kodak TMAX 100 and one roll of Fuji Neopan 100, the Mamiya 7II and my newly acquired Hasselblad 501c. I have been gravitating more and more toward the 6x6 square format that the Hasselblad V system produces but have a very uncompleted kit at this point so I opted to shoot B&W neg film and just experiment with the format. I mainly would be shooting color slide film with the Mamiya system and my hope was to walk away with a body of images I could put together to form my first study of the Yellowstone Caldera. We initially set up to troop into the park through the north entrance at Mammoth Hot Springs from Livingston MT, a trip that would take just over an hour to complete. This proved to be very inconvenient as the area of the park I was most interested in focusing on was located another hour and a half south from Mammoth Hot Spring, the upper, midway and lower geyser basins.

On our first day we spent the evening exploring and shooting in the Upper Geyser Basin, just north of Old Faithful. I quickly learned that I would need to shoot strategically and time my exposures around the still steady stream of tourists that we were sharing the narrow boardwalks with that circle the thermal features. As the sun began to set and the light became more and more soft the landscape began to speak to me and a rich and beautiful conversation took place between the landscape and I through the lens of my Mamiya 7II.  I witnessed the life force of the Caldera that evening and managed to make 8 exposures before the light ran out. I was supercharged with energy and passion for the park and as we headed back to the car for our long ride back to Livingston, I was drunk with excitement and thoughts of what images may lay ahead in the days to come.

The ride back to Livingston that night was long and tiresome. Coupled with the mass exodus of park tourists and an accident on the road leading north to Mammoth, the trip took 3 hours to complete. Going to bed just after midnight it was clear that any idea of an early morning shoot the next day was out of the question. We rose late the next morning, found a great little breakfast joint and set out for Mammoth Hot Springs. I had picked a location in the Lower Terraces Area that would receive great directional light from the west at sunset and would also be located very near the north entrance to the park, making the commute back to Livingston much shorted and opening up the possibility that we could be back in the Midway Geyser Basin for sunrise the next morning. I made 7 exposures at the Lower Terraces that evening with the Mamiys 7ii amid troops of last minute tourists that shook the boardwalk like a heard of Bison. I was growing increasingly frustrated with the number and frequency of tourists that even as the sun sank below the horizon, kept coming in waves making it very hard to get a long exposure without incurring vibrations from their footsteps along the shaky boardwalk.

Mammoth Hot Springs, Lower Terraces, The Photographer’s Ephemeris

Mammoth Hot Springs, Lower Terraces, The Photographer’s Ephemeris

So far we had only shot at sunset but that was about to change the following morning. At lunch that day in a small grill in the bordering town of Gardiner we made the decision to abandon our lodging in Livingston and spring for a room at a small lodge right in the town of Gardner. It was certainly much pricier but was a major time saver and would allow us to be at the thermal features in the Caldera within an hour and a half. For the next two days this would prove to be a very wise choice as I knew the morning shoots would not only reduce the likelihood of running into tourist, but also allow for amazing atmospheric conditions set in some of the most amazing living landscapes I have ever witnessed. At 3am on the morning of September 3rd we loaded our rental car with our bags and camera equipment and headed south toward the park, leaving our lodging in Livingston a day early. Our destination was Grand Prismatic, a location that would provide one of the most spectacular and surreal landscapes I have ever had the pleasure to photograph.

Mamiya 7II, Midway Geyser Basin, Yellowstone Caldera 2018

Mamiya 7II, Midway Geyser Basin, Yellowstone Caldera 2018

We arrived at Grand Prismatic and the Midway Geyser Basin just after 5:30am and it was clear to me even in the faint predawn light that we were in for a treat. The air was cold and crisp and all around us great plumes of steam rose up and danced in the air, escaping from the thermal features and Firehole River. The landscape was alive and it occurred to me that we were but very small life forms on the face of a much more significant and sophisticated life force and that the life breath of this force was escaping her core through the surrounding thermal vents, pools and pours of the great Yellowstone Caldera. As the light intensified in those early predawn hours, the landscape shared her majesty with me and spoke to me through the lens of my mamiya 7II. I finished off the roll of Velvia 50 from Mammoth and then loaded and finished another roll and by 9am just as the first group of tourists we shuffling in we had finished. I knew at that moment that Yellowstone was truly one of the most special and unique places on the face of the earth and that I would be making many return trips for years to come as long as I was able.

Fujifilm lighttable and Velvia 50 color slide film from the Yellowstone Caldera 2018.

Fujifilm lighttable and Velvia 50 color slide film from the Yellowstone Caldera 2018.

We made one more early morning trip into the park the next day September 4th, choosing to return to Grand Prismatic and the Midway Geyser basin. That morning I loaded up the Hasselblad 501c with Fuji Neopan 100 B&W film and made 12 exposures at both Grand Prismatic and the Great Fountain Geyser area. The trip was coming to a close and by 6:30 am the next morning I would be aboard a flight back to Northern Michigan and my father back to Waynesville NC. The trip was over, I had completed my first study of the great Yellowstone Caldera. All that remained was to develop the film and begin the 2nd stage of the image making process in the digital darkroom, but I knew it would be several months before I had a chance to work on what I had captured on this visit. Yellowstone had never been high on my list but by chance and through a last minute decision a love affair with the Caldera had begun and I had completed my first study of this breathtaking life force. For anyone who has ever doubted the significant and undeniable connection we humans share with our gracious host Mother Earth, for those who think we can exist without her, to those who think we could never have a disruptive impact on her and those who don’t think we are made entirely of her and her of us, I say visit the Caldera. Witness her breath and life force. Hear her unmistakable voice. Feel her power, majesty and grace in every drop of moisture dancing the early morning air, glistening in every deep blue/green steaming pool, and radiating from this 1,350 square mile living hot spot we know as the Yellowstone Caldera.


On a matter of opinion.

Rorqual-Sonata_Matte_-12_9_14_18.jpg

As it is with any craft, if you truly seek to become a master you will no doubt adopt a mentor, or several, along your path as you strive to learn, grow and develop your own voice. Whether this is through an actual physical relationship or simply through learning from ones work you admire, learning from those who have more experience is the way all species develop and grow as individuals. Fortunately for those of us who are passionate about the craft of photography, there are many masters to learn from! While becoming a master in the craft of photography may be your initial goal as you set out, I think you will find that this title is more of a concept that an actual stature one acquires. As it is with enlightenment, it is not a destination we finally reach but a constant and ongoing journey that progresses as long as we continue to walk the path.

When we are first starting out we seek to soak up as much knowledge as we can from those we admire, those who seem to have all the answers. We tend to take what is prescribed as gospel and implement it in our process, however as we begin to develop I think it is particularly important to learn to trust our own voice and lean less heavily on those who we admire. For those who choose to take on the role of teacher in the form of workshops, e-books and the like, I believe it is truly done so out of pure love of the craft and as a way of communing with and guiding others who share this passion. There is often much to learn from these teachers but again I strongly suggest you don’t ignore your own voice or fail to question the teachings when engaged in the apprenticeship of any mentor.

Photography is an art and as such it is a personal expression that is unique to the artist. Be that as it may it is also a trade and as it is with all trades there are guidelines, rules and tools in place to be used in aiding the creator. More often than not these rules, tools and guidelines will improve the outcome of ones work and the understanding of the process involved, you wouldn’t want to neglect the rules and guidelines of a proper foundation when building a house! That said if you find a better means to an end than what is prescribed by your mentor I say go for it. Take musical composition for example. Learning to play the guitar takes great effort, practice and understanding, however it is possible to create the same musical phrases, tones and compositions through the use of a digital compositional program such as cuebase. As long as you understand the concepts and have a clear vision for how and what you want your final composition to sound like, the guitar and cuebase are both just tools. The argument could be made that to truly learn and understand the concepts behind a particular discipline, one should not adapt to using any form of shortcuts to achieve the same outcome. Fearing that the use of an accelerated, alternate route will result in not truly understanding the process at work. Certainly I think this can be true for instance when relying on your camera to determine exposure through selecting an Aperture or Shutter Priority auto exposure setting. If we rely on the camera we never truly grasp the process of determining the correct exposure for ourselves. It is much more advantageous to take the time to truly understand and determine exposure manually and only after doing so apply AP or Tv when it suits a select situation. This is often the case with many automated actions and tools we have available to us in our tool bag as photographers. A few good examples would be HDR software, Lightroom Presets, and image manipulating software such as Nik Software and the like. To often all that is achieved is over processed, over the top, loud imagery that confuses the eye and disrupts the mind. However there are tool sets that although may appear as automated quick fix solutions on the surface, are actually very complex and precise tools that when truly understood and used correctly can not only vastly improve your images, but also provide extremely precise control over your edit workflow which will result in a more refined and well tuned product.

One particular tool set I have in mind is the TK Action Panel and when it comes to the subject of tonal adjustment in the digital darkroom, this tool set is not only a very fine complement to the standard tools provided within Photoshop, it is the most precise way to make fine tuned and localized tonal adjustments I have encountered. You may be wondering what this has to do with the headline “On a matter of opinion” or with seeking the knowledge of a well respected mentor, well I am about to get to that. I have always been one to research to death a topic or subject I am interested in. When it came to the subject of tonal adjustments I stumbled upon a tool set that revolved around non destructive editing techniques derived from the use of luminosity masks. Through my searching I learned the benefits of making adjustments to my images in Photoshop on luminosity mask layers for localized control and applications. When one applies an adjustment to a luminosity layer such as a curves, levels, hue, saturation, or sharpening adjustment, it is applied over the top of and completely separate from the original raw image. Hench none destructive and reversible image editing. This of course is huge but it gets even better. I learned that Luminosity masks map the luminance of each pixel as a grayscale value in the mask. Because they are based on pixel-level data, their tones perfectly match the image beneath and, as a result, are completely self-feathering. Any adjustment through these masks blends seamlessly into the image with no visible edges or borders. Here was a way to apply none destructive adjustments to my images but more importantly apply precise and localized tonal adjustments to further refine my work and achieve the look and feel I desired.

What the TK Action panel provides is a set of masks or targeted  selection areas that allow for precise manipulation of targeting specific tones in the image. Once the editor selects a specific tone in their work they would like to adjust a mask that only targets that particular tonal range say “highlights” is created. This can be done in several ways by choosing to create either a curves adjustment layer mask, a levels layer adjustment mask or a selection channel of a specific tone that can then be altered via a burn and dodge adjustment layer. Furthermore once the luminance mask for a specific tonal range has been created you are able to further localize the adjustment as you see fit to specific areas of the selected tonal range within the image, as again it is a mask you are working with on a luminance channel. So lets say I have an image of a cherry orchard in winter. In this image there are dark trees in a line along the top of my image accompanied by dark trees in my foreground all nested in a field covered in white snow and I wish to make a tonal adjustment to only a certain section of the trees. All of the trees are of the same tonal value so when I select a standard curves adjustment layer in Photoshop a luminosity mask is created and I am able to make a curves adjustment to the darks tonal range in my image, the trouble is this adjustment will also effect the foreground trees as they are again of the same darks tonal value. Of course this is a masked layers so I am able to then paint out the adjustment I made globally to the darks tone on my foreground trees, bringing their values back to a light darks tone. The eye now travels through the image to the area of the greatest amount of contrast and since my image is comprised mostly of very light tones, the snow, the very dark area of trees in the top 3rd of my image is where the eye will tent to go, mission accomplished! This works great however my mask painting is somewhat sloppy as it is generalized to the area of the foreground and not localized to a specific tonal mask that matches my foreground trees exactly so there will be areas of  the edit that will stand out as the brush tool is circular and not so precise when compared to a perfectly applied luminance mask of a specific tonal range.

If I apply the same edit principals but incorporate the TK action set, I am able to create a precise mask, mapped specifically to a desired tonal range, make my tonal adjustment via curves, levels or burn and dodge and then precisely paint the specific pixels on the luminosity mask so as to mask the darkening of the foreground trees in such a way where there is no bleed over on any other tonal area of the image.  A sloppy mask becomes absolutely precise! This is the true power and genius of the TK Luminosity Mask Actions. The mask is created precisely to the tonal range in witch you wish to work and there is no sloppy spill over in any other tonal areas whatsoever.

Screen grab of the TK Actions Tools Set in Action. Precise mask created on the Darks Tonal Range. The area with the lightest tonal range will be affected in this edit and the area in the dark tonal ranges will not.

Screen grab of the TK Actions Tools Set in Action. Precise mask created on the Darks Tonal Range. The area with the lightest tonal range will be affected in this edit and the area in the dark tonal ranges will not.


Back to the topic and point of this post. I recently reached out to a fellow photographer of whom I highly respect and admire for his work and the passion he has for the art of photography and for the passion he instills in me. He not only produces great work but is also a workshop leader and teacher and has produced several e-books on various photography related topics. I have purchased several and have looked to him for advice and as a mentor along my journey on the path of an image-maker. I hold him in high regard and have seldom thought to question his advice and experience. Recently I have re-learned that no one person is all knowing or omnipotent. In a brief email to this photographer which was really directed at inquiring about the hand full of 6x6 square format system options available to the film photographer and what prompted his choice to go with the system he chose. I briefly mentioned his new e-book which I had purchased, which was on the topic of the levels adjustment tool for tonal adjustments in Photoshop and that I was enjoying the read. I then mentioned the TK actions toolset and how I have been using it for several years and that I thought it worked very well and applied the same principals he outlines in his new book. I suggested that he have a look at it as he may find it of interest. I then moved on to ask my real question which was again related to a 6x6 square format system hoping for an answer as to why he went with the system he did. He has always gotten back to with within at least a week but this time I received no response.

Well about three weeks later I was perusing his blog and I came upon a recent article titled “Don’t Automate It”. He does in fact preface this post with a disclaimer that all his posts are based on his point of view alone “I don't for one minute assume that I am right all the time, and any views I express here are simply my own”. I am OK with that; it takes courage to admit that although you strongly believe you are correct you may in fact not be looking at the picture from all angles. In this article he basically states that he recently released a new e-book on the topic of Photoshop curves and how to really get to know them,. This is the very book I purchased, read and complemented him on. He then goes on to state that “I'm not a big fan of automated tools and I tend to keep this side of my photo editing to a minimum”. Fair enough! But then he goes on to target the TK Actions panel I suggested he look up in my email several weeks prior to this blog post which is when I began to think to myself “awful coincidental considering I just suggested he have a look at the tool set”. In a nutshell he goes on to say “while I think it's a great thing - it's only a great thing in the right hands. If you are still learning about how to adjust tones in a picture and specifically where you want to adjust them, then I would be very careful in adopting automated tool kits like this”. Fair enough again, however based on my experience with the TK Actions tool set, the only automation this tool set preforms is when creating a tonal specific selection to be applied to a luminosity mask and that’s it! Again that is a extremely precise selection based on a user determined tonal range in witch one wishes to effect. The actual curves, levels or dodge and burn tonal adjustments are made completely manually. So again the power of this tool set is for creating very specific and precise selections based on desired tonal range for the purposes of precise, localized tonal adjustments, which leads me to believe he didn’t actually examine the tool set fully and arrived at his point of view without the full grasp of what the tool set actual is.

 You may be able to tell that I was a bit chapped by this post and even arrived at the conclusion that he was discounting this tool set to protect his interests in his own e-book. Perhaps this is true and perhaps not. Perhaps its all coincidental and perhaps I misinterpreted his intentions for the post altogether. However to circle back around to the true point of this long-winded post, trust in your own voice. Do not value the words and thoughts of those you hold in high esteem as gospel. Seek the truth on your own. Do your research well. Take the teachings of  your mentors into consideration but find and value your own results and conclusions. Walk your own path and keep an open mind as there are many ways to reach the same destination. And as I said before its really not about the destination but about the journey.  


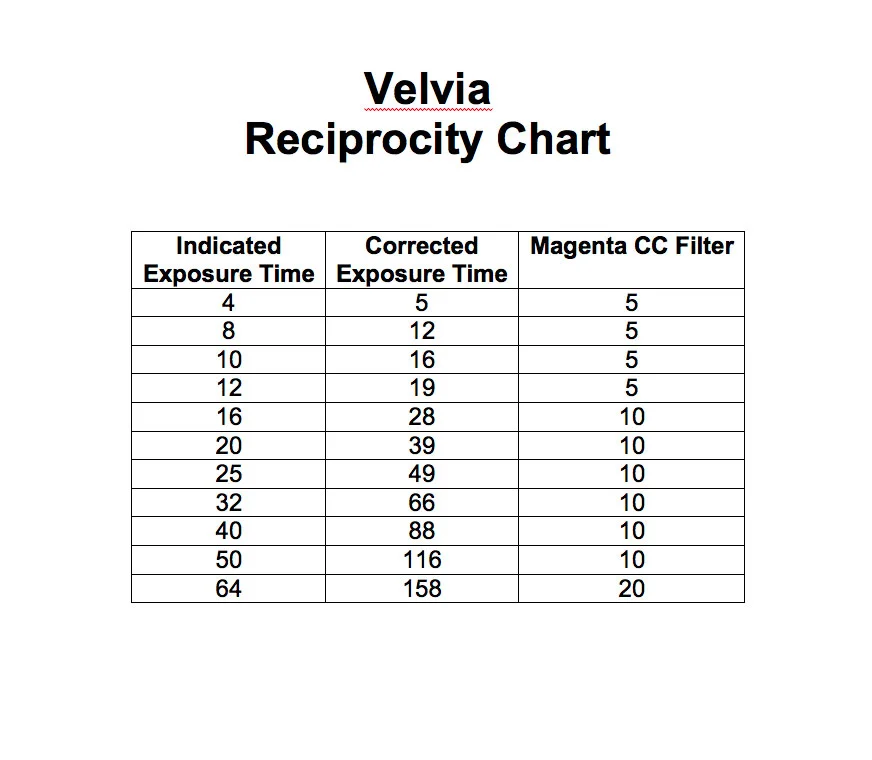
Velvia and Ektar Reciprocity Charts

As mentioned in episode 16 of The Art Of Natural Beauty, below I have provided a copy of the charts I use to determine proper exposure times, based on the reciprocity failure of the given films I use. You can simply right click and save these charts to print out and keep in your camera bag as I do.

Just a brief recap on what reciprocity is and the resulting breakdown of the law of reciprocity, known as reciprocity failure. Reciprocity is a law, or formula, that implies that aperture and shutter speed are an inversely proportional relationship between the intensity and duration of light that determines the reaction of light-sensitive material. As you decrease the size of your aperture, f/5.6 to f/16, you are letting in less light and thus you need to increase your shutter speed to allow the light to expose your film for a longer duration, in order to get the correct exposure.

Reciprocity failure occurs when the normal rules of reciprocity no longer apply. This happens when your shutter speed increases beyond the ability to compensate or counter with aperture. When the normal reciprocity time of a given film is exceeded a breakdown in the relationship occurs and therefor must be compensated by adding extra time to the indicated expose time provided by your light meter.  When less light is available, the silver halide crystals in the film are not evenly struck by photons of light, and the density of the resulting exposure is lowered. Each film is different and some are more forgiving than others. 

Below as I have stated are two charts for correcting for reciprocity failure in Fuji Velvia and Kodak Ektar 100 films. As the charts suggest, each film is different, however by following the indicated vs corrected exposure times listed, you can correct the exposure and achieve the desired outcome nedded for proper exposure.

Velvia Reciprocity Chart.jpg
Kodak Ektar 100_Reciprocity Chart.jpg

4x5 Camera Hack - Filter Placement.

I wanted to share with you a hack I discovered that will aid in the placement of grad filters when using a view camera system. Often precise filter placement can be a bit tricky on a view camera, especially when you' re first getting started with the system. This camera hack should help make the process much easier and precise. 


The Importance Of Conservation

In this episode of The Art Of Natural Beauty, I talk about my feeling on the importance of conservation and taking the initiative to promote conservation. I hope you enjoy!

In this episode, I talk about my feeling on the importance of conservation and taking the initiative to promote conservation. I hope you enjoy! As mentioned, below are a few links to some important conservation organizations that you may want to join and contribute to.

Copper Harbor & MN North Shore Trip Film Review

Here is a video review of the three rolls of 120 film I shot wile on my July 2017 trip to CopperHarbor, MI and the North Shore of Lake Superior in MN. Its a first impression account on the images I captured and my reaction to reviewing them. I hope you injoy!

In this video I review 3 rolls of 120 film from my recent trip to Copper Harbor and the North Shore of Lake Superior in MN. Its the first time I have recorded a film review and there was a bit of a learning curve.

Nirvana And My Workflow

I have been wanting to create a series of video tutorials with a high level overview of my digital darkroom workflow and techniques for quite some time. In this video segment titled "Nirvana And My Workflow" I attempt to provide a general glimpse into my processes for taking an image from RAW scan to final piece. My goal was to generate interest in this series as well as beta test how I would begin to produce it. I hope you enjoy!


Mistakes, Discovery, and Zen

When doubt sets in realize its only a feeling created by the mind and not actual truth.


"Journey" Presque Isle River, Porcupine Mountains Wilderness State Park, Michigan

"Journey" Presque Isle River, Porcupine Mountains Wilderness State Park, Michigan

September 30th 2013,  Presque Isle River, Porcupine Mountains Wilderness State Park, Michigan. Journey is born on FujiFilm Velvia 50 surrounded by doubt and frustration. There is a morel in here, one I seem to continue to relearn. Journey is the outcome of my first attempted exposure on a trip to the Porcupine Mountains Wilderness State Park. Sometimes we need to just trust and have faith and not let thought and confusing take hold. I made a total of 5 exposures of this composition on this trip and the first was to end up Journey. Take a look at this video journal from October 1st 2013 and you will see what I'm talking about. Not only is Journey the story of the river, but its also the story of an image. One that ended with beauty!


A Whole New Format

In 2012 I set down my D700 and entered into the time honored tradition of large format photography. My reasons for doing so are addressed in "Coming Into My Own" a blog post from late 2016. Wile I can not say I have completely mastered the craft, I am confident and pleased with my progression over the past few years. Working with film and with a view camera system has helped me to slow down and really consider whether or not I make an exposure or if I wait till another time when all the elements are right. It has been a rewarding journey down this path, however I have decided to alter this course to a degree. A course correction that I began late in 2016. One of the deciding factors for me was that while I was deliberately slowing down my process to create a better product, I was also not amounting much of a portfolio. Another factor was that as I age, the weight of my pack made it harder for me to carry on longer treks and I began to look for a solution that would still conform to my standards and ideals yet allow for more flexibility with less weight.  

Ebony 4x5, Otter Creek, Honor Michigan

Ebony 4x5, Otter Creek, Honor Michigan

After quite a bit of research I decided to pick up a Mamiya 7ii outfit and began a new chapter in my journey as a photographer. The Mamiya 7ii is a medium format range finder systemknow for being one of the sharpest on the market. As with my ebony the Mamiya also requires the ability to visualize the final image before making an exposure. With a rangefinder system you do not actully look through the lens, but instead a rangefinder window on the camera body or in the case of the 43mm, 65mm and 210mm, through a viewfinder mounted on the hot shoe atop the camera body. So in this regard you are seeing a approximate framing of your composition, not the actual composition you will see once the film has been processed.

Mamiya 7ii, Sleeping Bear Dunes, Empire Michigan

Mamiya 7ii, Sleeping Bear Dunes, Empire Michigan

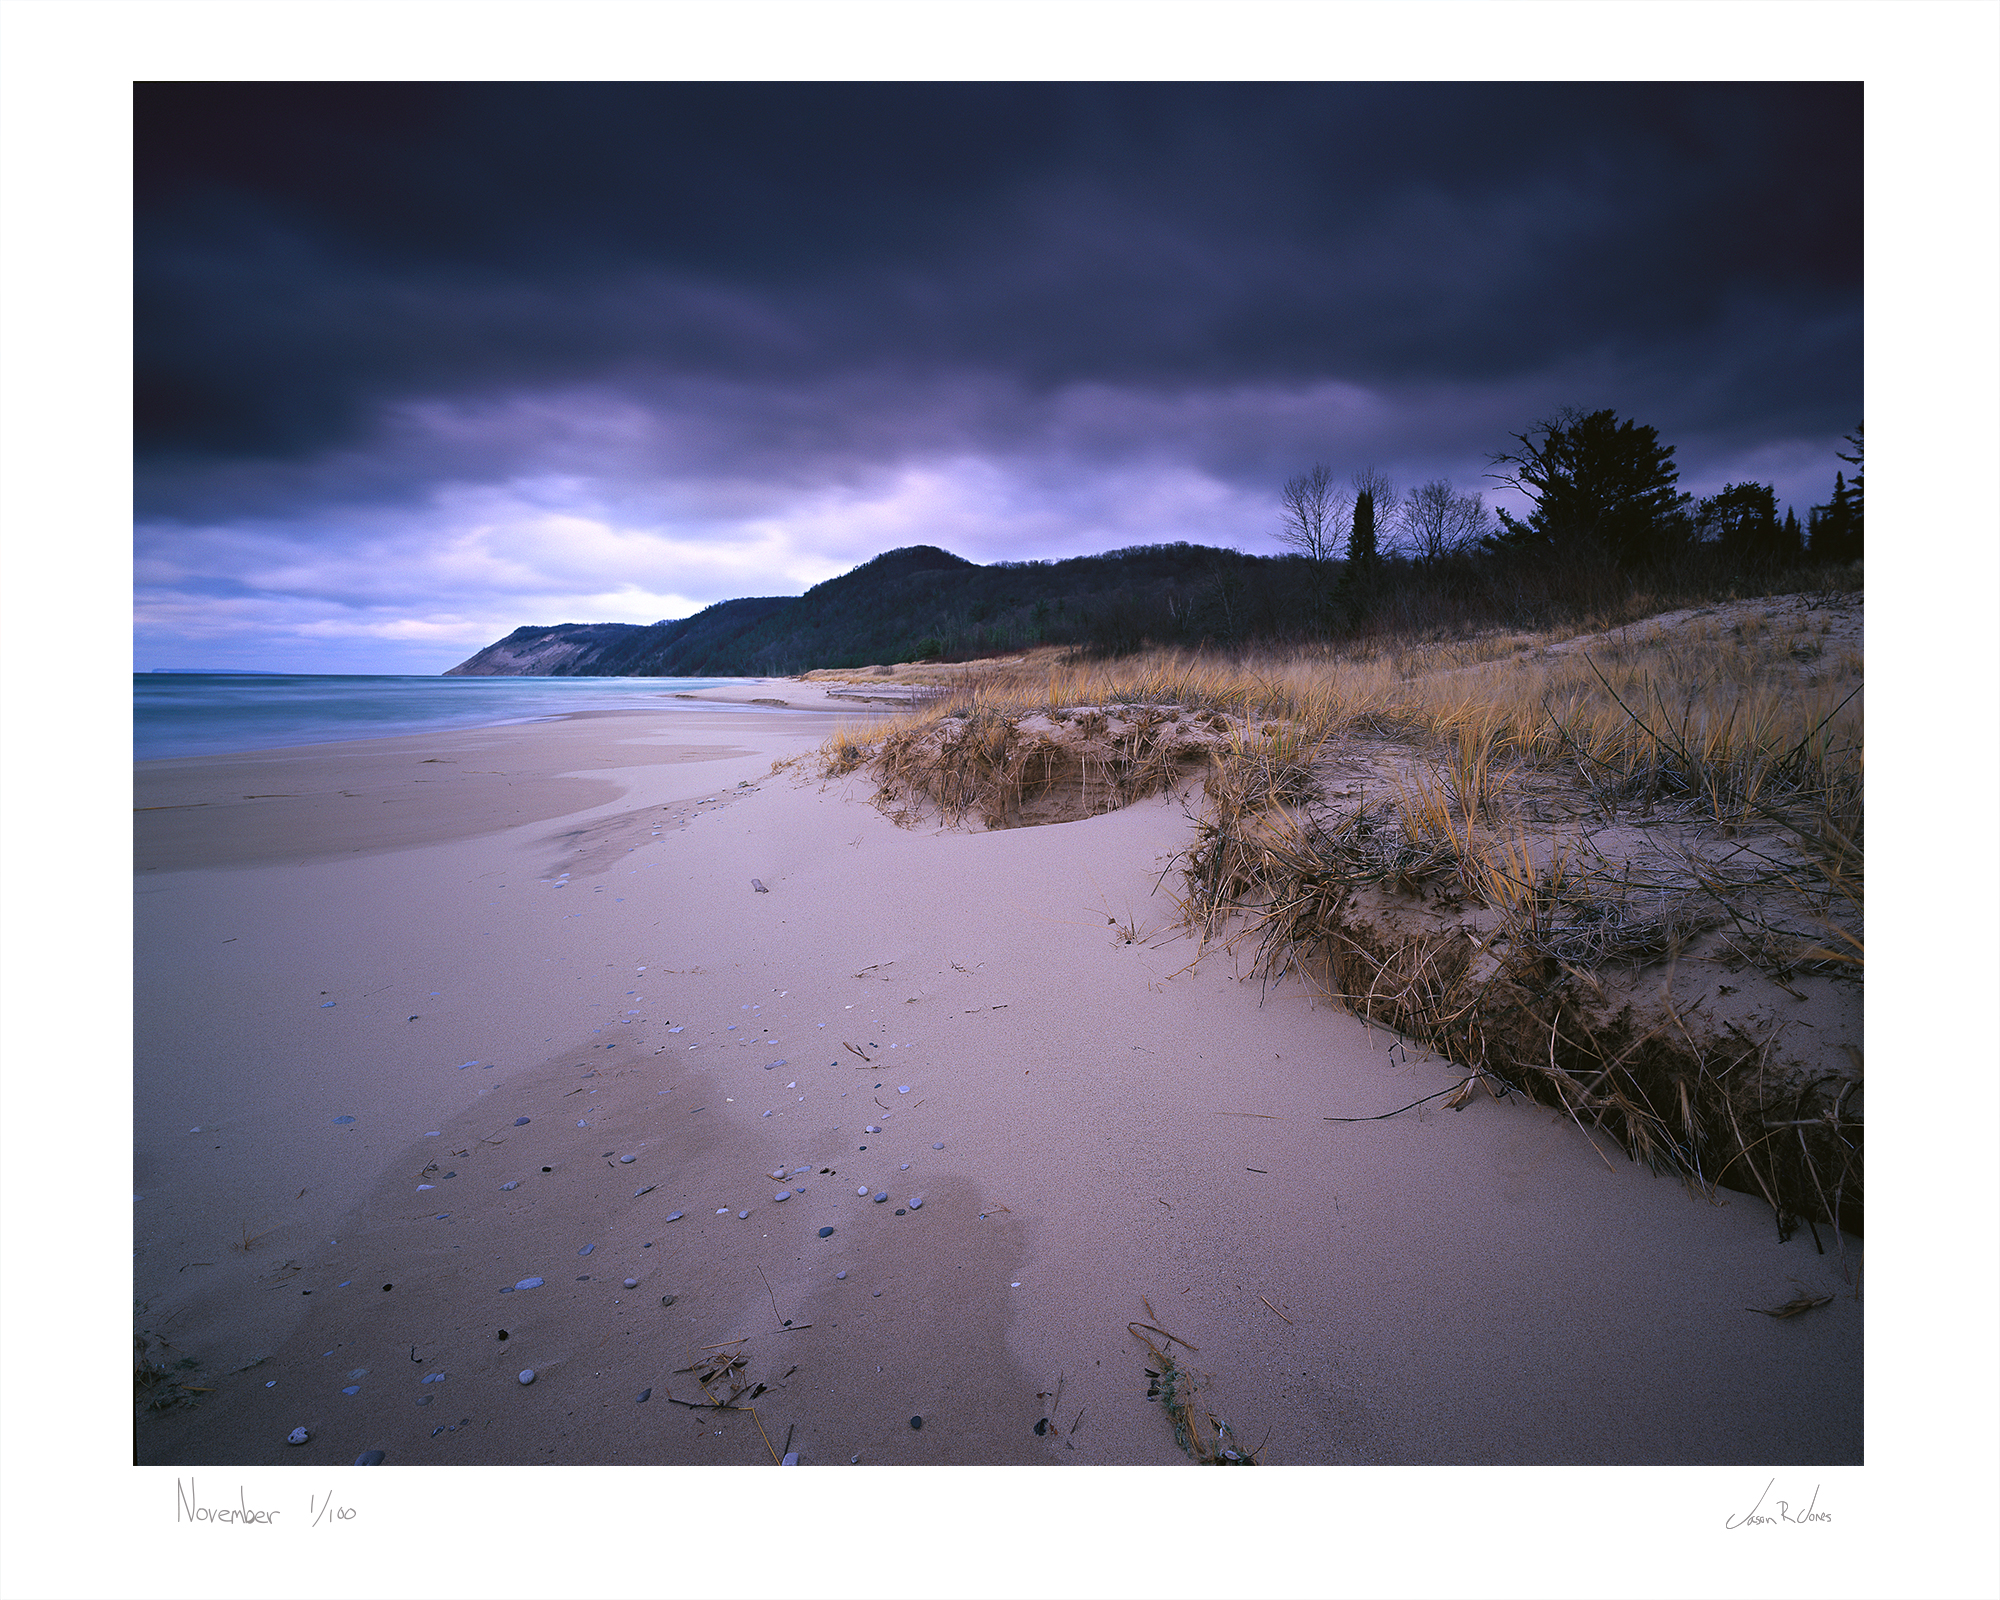
The system has yielded a dramatic reduction in the weight and size of my pack and the images I have captured, tell me that I made the right decision. I will continue to make images with my ebony 4x5 system, however I can say with confidence that the Mamiya 7ii will be my primary outfit moving forward. Especially as I travel to far off destinations. I am excited to work with this new system more in the coming months and years and will continue to learn and develop my abilities as I go. Below are three Images I made in November and December of 2016 on the first two rolls of velvia 50, 120 film, I ran through the Mamiya. Hope you enjoy them as much as I enjoied making them.

"November Sky" Otter Creek, Sleeping Bear Dunes National Lakeshore, Honor Michigan

"November Sky" Otter Creek, Sleeping Bear Dunes National Lakeshore, Honor Michigan

"Life In Slow Motion" Sleeping Bear Dunes National Lakeshore, Empire Michigan

"Life In Slow Motion" Sleeping Bear Dunes National Lakeshore, Empire Michigan

"Hypnagogic" Sleeping Bear Dunes National Lakeshore, Honor Michigan

"Hypnagogic" Sleeping Bear Dunes National Lakeshore, Honor Michigan