Nirvana And My Workflow

I have been wanting to create a series of video tutorials with a high level overview of my digital darkroom workflow and techniques for quite some time. In this video segment titled "Nirvana And My Workflow" I attempt to provide a general glimpse into my processes for taking an image from RAW scan to final piece. My goal was to generate interest in this series as well as beta test how I would begin to produce it. I hope you enjoy!


Mistakes, Discovery, and Zen

When doubt sets in realize its only a feeling created by the mind and not actual truth.


"Journey" Presque Isle River, Porcupine Mountains Wilderness State Park, Michigan

"Journey" Presque Isle River, Porcupine Mountains Wilderness State Park, Michigan

September 30th 2013,  Presque Isle River, Porcupine Mountains Wilderness State Park, Michigan. Journey is born on FujiFilm Velvia 50 surrounded by doubt and frustration. There is a morel in here, one I seem to continue to relearn. Journey is the outcome of my first attempted exposure on a trip to the Porcupine Mountains Wilderness State Park. Sometimes we need to just trust and have faith and not let thought and confusing take hold. I made a total of 5 exposures of this composition on this trip and the first was to end up Journey. Take a look at this video journal from October 1st 2013 and you will see what I'm talking about. Not only is Journey the story of the river, but its also the story of an image. One that ended with beauty!


A Whole New Format

In 2012 I set down my D700 and entered into the time honored tradition of large format photography. My reasons for doing so are addressed in "Coming Into My Own" a blog post from late 2016. Wile I can not say I have completely mastered the craft, I am confident and pleased with my progression over the past few years. Working with film and with a view camera system has helped me to slow down and really consider whether or not I make an exposure or if I wait till another time when all the elements are right. It has been a rewarding journey down this path, however I have decided to alter this course to a degree. A course correction that I began late in 2016. One of the deciding factors for me was that while I was deliberately slowing down my process to create a better product, I was also not amounting much of a portfolio. Another factor was that as I age, the weight of my pack made it harder for me to carry on longer treks and I began to look for a solution that would still conform to my standards and ideals yet allow for more flexibility with less weight.  

Ebony 4x5, Otter Creek, Honor Michigan

Ebony 4x5, Otter Creek, Honor Michigan

After quite a bit of research I decided to pick up a Mamiya 7ii outfit and began a new chapter in my journey as a photographer. The Mamiya 7ii is a medium format range finder systemknow for being one of the sharpest on the market. As with my ebony the Mamiya also requires the ability to visualize the final image before making an exposure. With a rangefinder system you do not actully look through the lens, but instead a rangefinder window on the camera body or in the case of the 43mm, 65mm and 210mm, through a viewfinder mounted on the hot shoe atop the camera body. So in this regard you are seeing a approximate framing of your composition, not the actual composition you will see once the film has been processed.

Mamiya 7ii, Sleeping Bear Dunes, Empire Michigan

Mamiya 7ii, Sleeping Bear Dunes, Empire Michigan

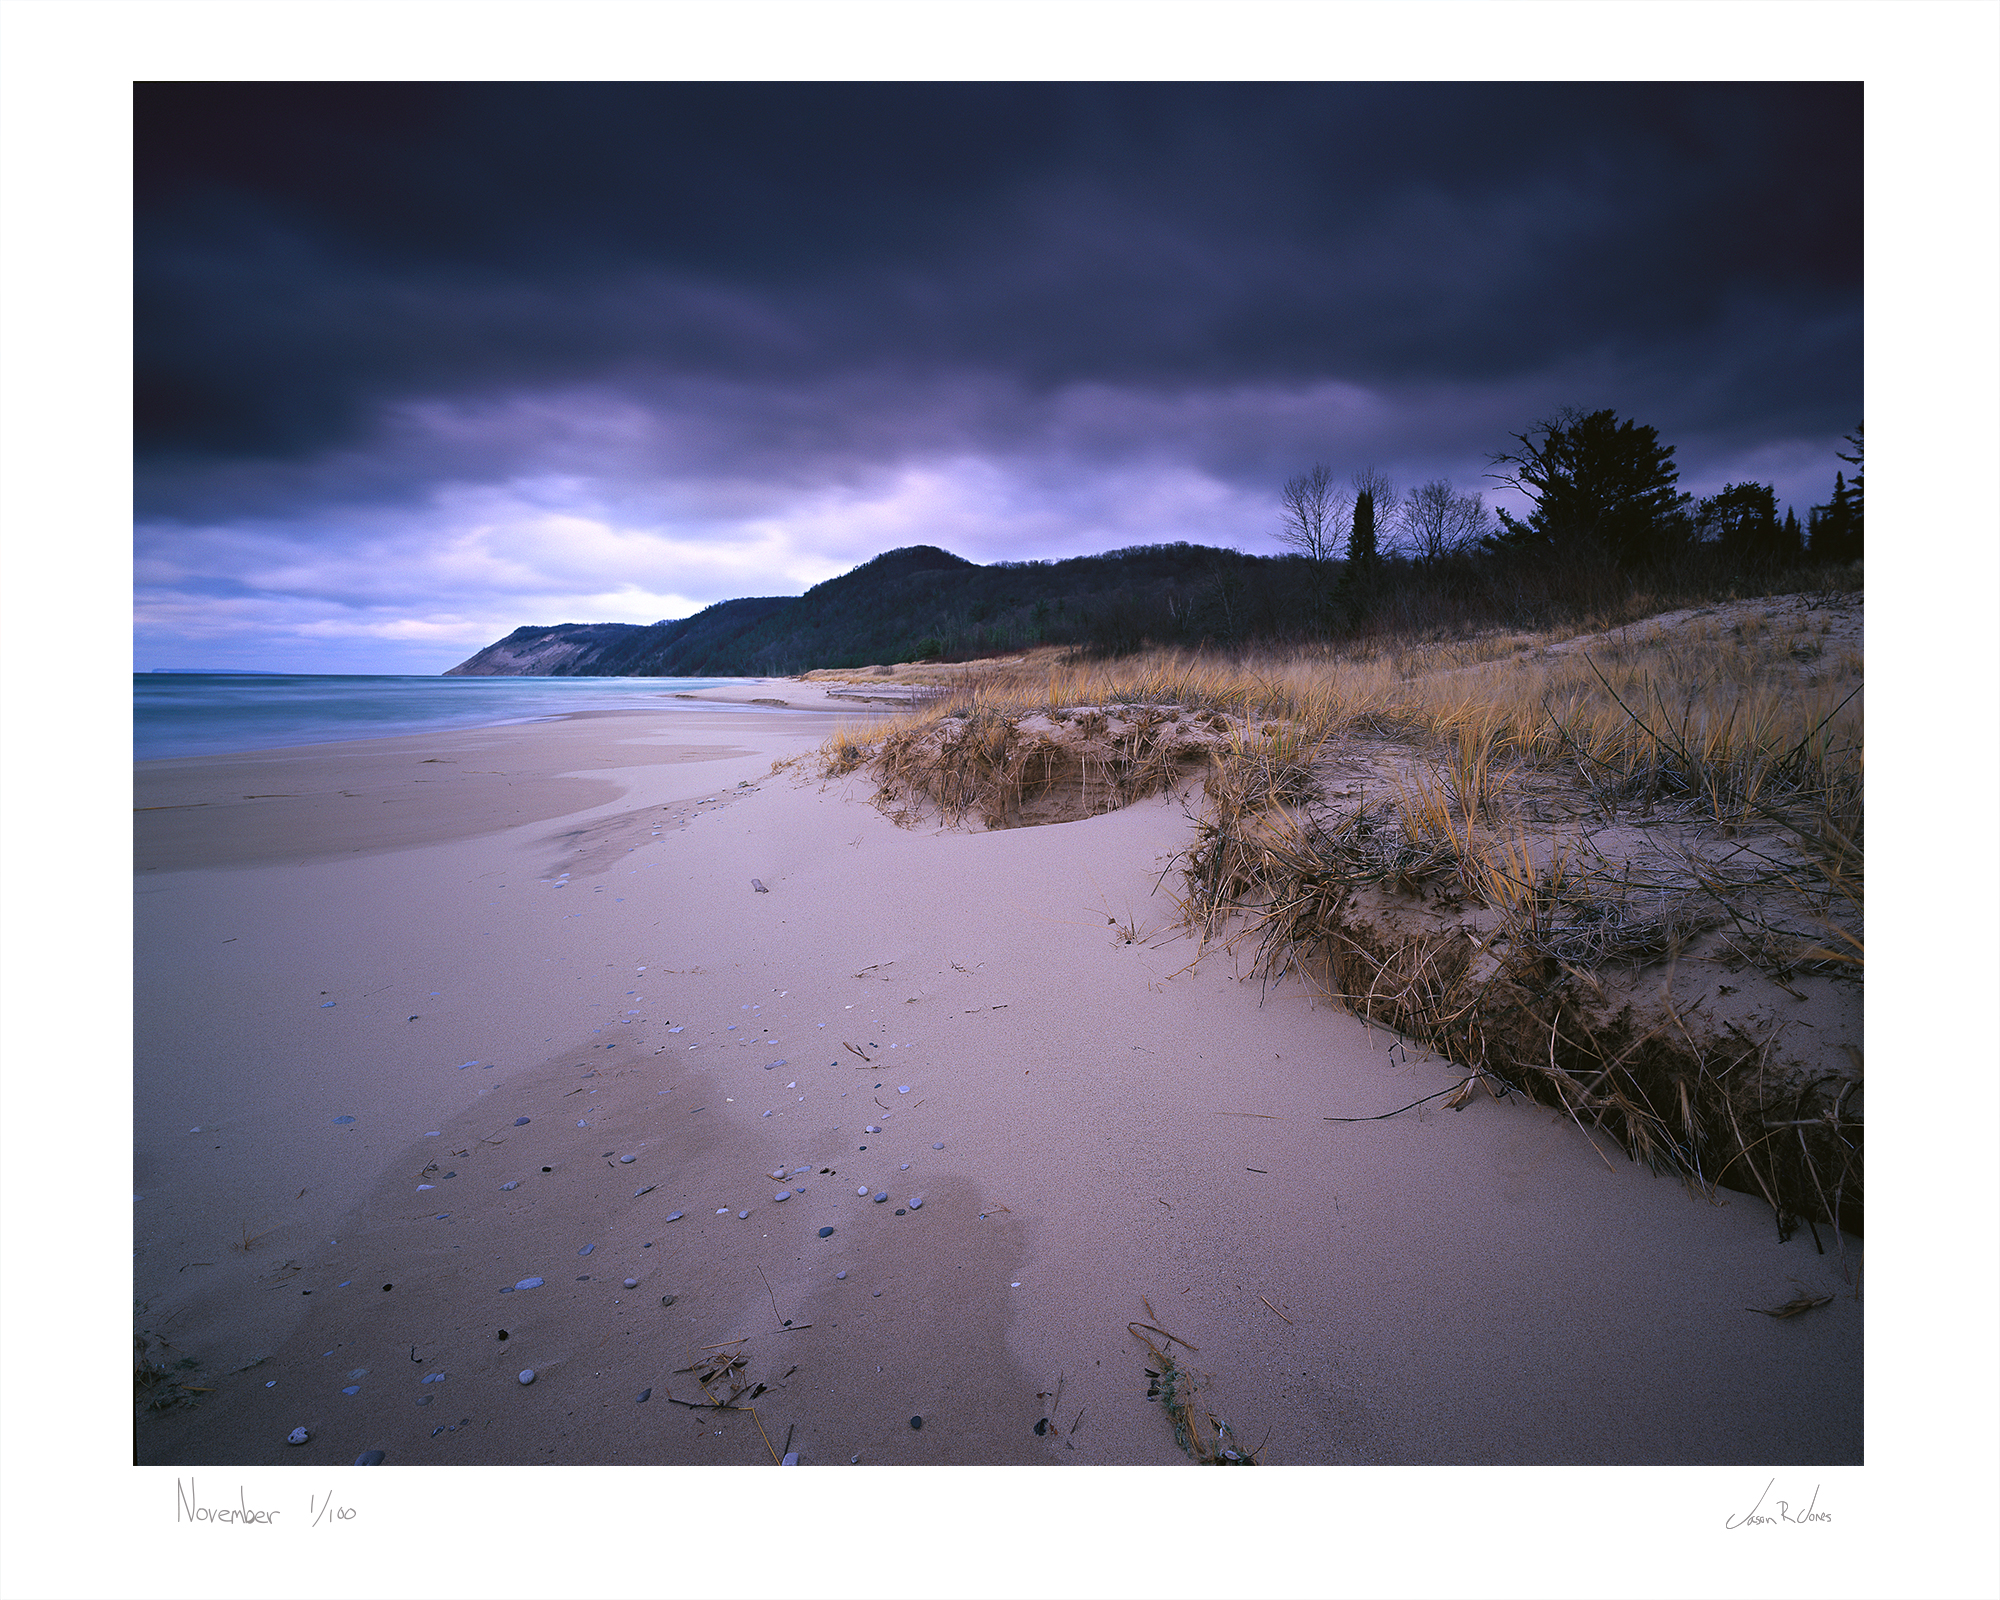
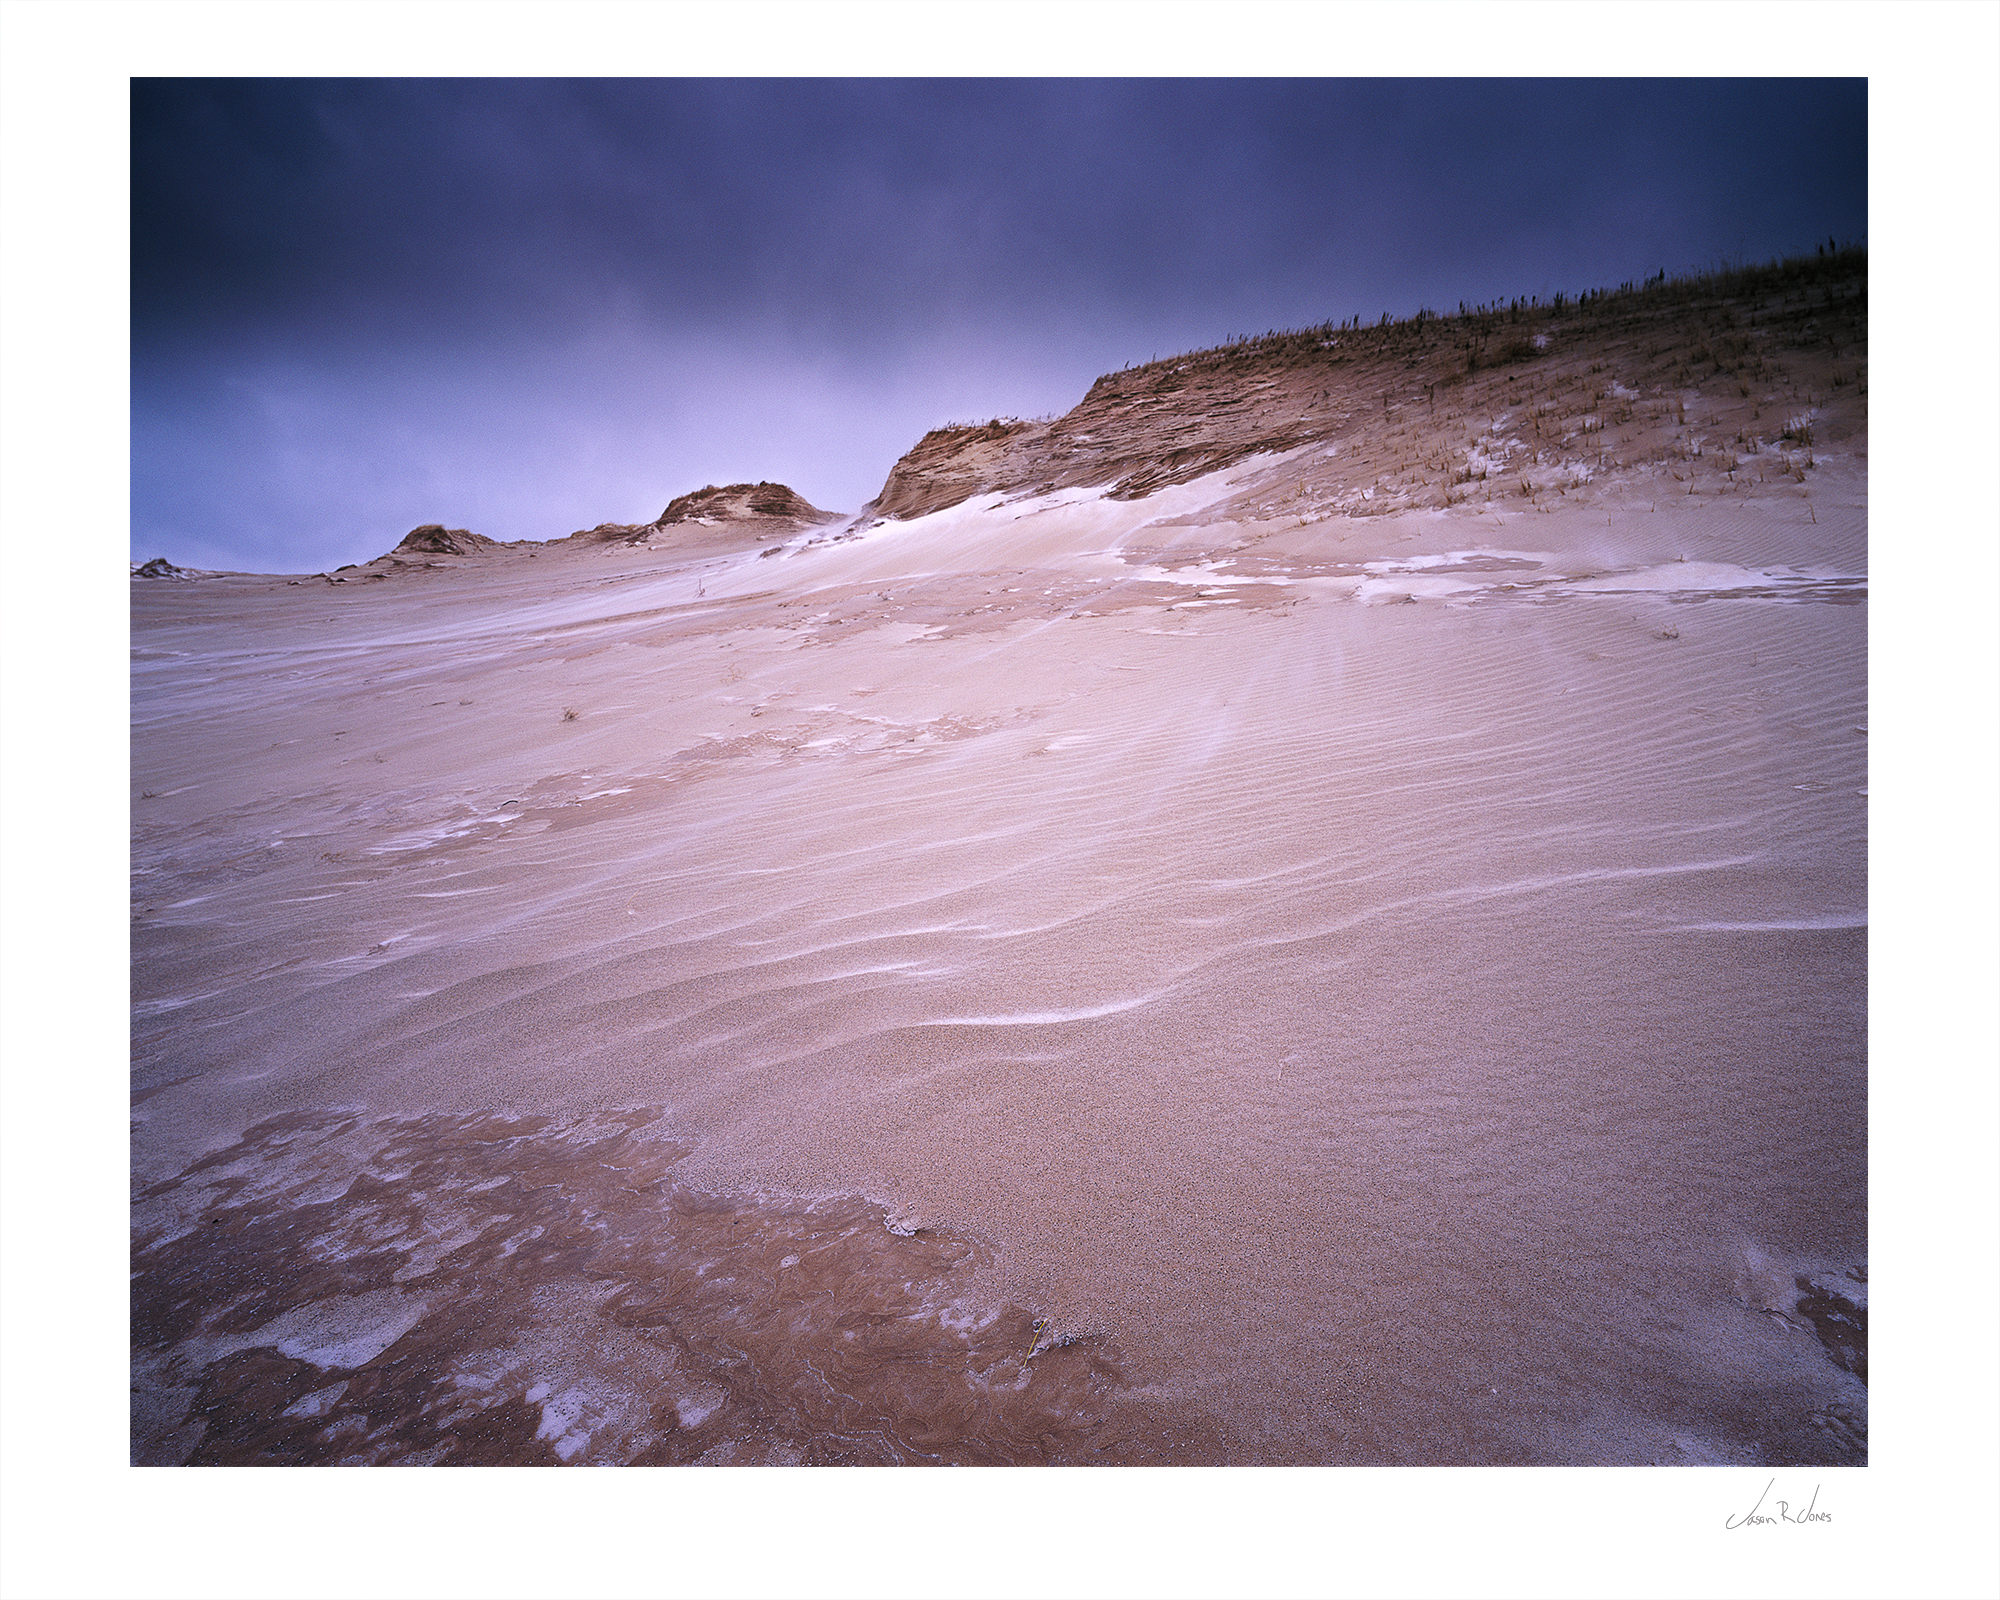
The system has yielded a dramatic reduction in the weight and size of my pack and the images I have captured, tell me that I made the right decision. I will continue to make images with my ebony 4x5 system, however I can say with confidence that the Mamiya 7ii will be my primary outfit moving forward. Especially as I travel to far off destinations. I am excited to work with this new system more in the coming months and years and will continue to learn and develop my abilities as I go. Below are three Images I made in November and December of 2016 on the first two rolls of velvia 50, 120 film, I ran through the Mamiya. Hope you enjoy them as much as I enjoied making them.

"November Sky" Otter Creek, Sleeping Bear Dunes National Lakeshore, Honor Michigan

"November Sky" Otter Creek, Sleeping Bear Dunes National Lakeshore, Honor Michigan

"Life In Slow Motion" Sleeping Bear Dunes National Lakeshore, Empire Michigan

"Life In Slow Motion" Sleeping Bear Dunes National Lakeshore, Empire Michigan

"Hypnagogic" Sleeping Bear Dunes National Lakeshore, Honor Michigan

"Hypnagogic" Sleeping Bear Dunes National Lakeshore, Honor Michigan

My Gear Bag Ebony 4x5

Large format systems tent to be on the heavier side when it comes to current technology trends in photographic equipment. This means you need a serious pack when it comes to carrying all of your gear into the field. Wile there are a few companies making packs designed for this type of load, more options now than when I purchased the Whitney, there still isn't really a pack designed specifically for a large format system on the market. I wanted the comfort and design of a backpacking system and the Gregory Whitney 95 was the largest pack I could find. As the name suggests this is a 95 liter pack designed to carry loads up to 70lbs. What makes this pack great is the custom fit suspension (CFS) comprised of dual aluminum stays bolstered by a supportive cross stay. Three sizes S,M,L with adjustments made to fit your torso and waist sizes. Weighing in at 6lbs the Whitney 95 is a versatile pack with an expandable spin-drift collar, giving you a lot of extra volume. There are three access points to the main compartment and plenty of extra pockets for essentials. This pack is also hydration bladder compatible and it has an integrated sleeve and tube ports that connect to you solder straps. All in all its been a great pack and fits my needs when carrying my 4x5 system. For my actual camera system I use a F-Stop Gear large ICU that fits safely inside the main compartment. 

Gregory Whitney 95

Gregory Whitney 95

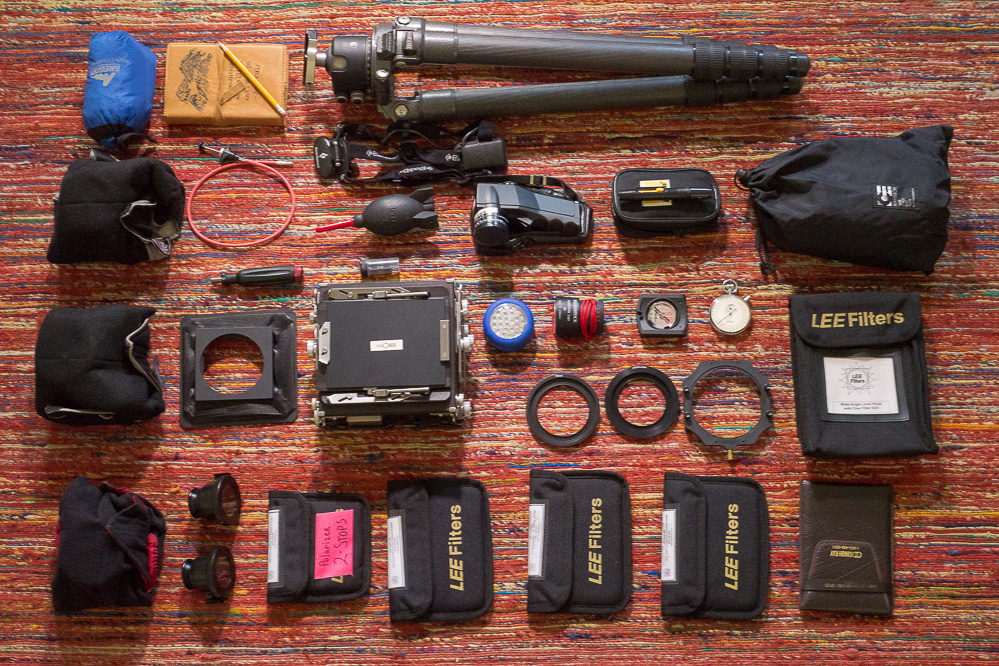
Inside the Whitney are all the components you see pictured below. My camera body an Ebony SV45TE and 3 lenses,  Schneider 90mm f/8 Super Angulon,  Schneider 120mm f/5.6 Super Symmar, and Rodenstock Apo-Sironar-S 210mm f/5.6. All great lenses however the f/8 aperture on the Super Angulon can prove difficult to use when lighting conditions are not adequate. I carry two sets of bellows, one is a standard and the other is a wide angle, both shipped with the camera body. Four 4x6 100mm neutral density grad filters and LEE100mm filter adapter kit. ND filters are the LEE 2 stop hard, LEE 2 stop soft, LEE 3 stop hard and the Daryl Benson Reverse ND Grad from Singh Ray.  I also have a LEE Filters VH-95 Bellowed Video Hood, which comes in handy as a lens hood with 2 slots for ND filters and a 95mm filter thread I use for attaching my Heliopan 95mm Circular Polarizer. This helps when it comes to different size filter threads as the LEE adapter is much less expensive than buying several polarizers. I carry two view finders, one for each format I shoot, my 4x5 and my 6x17 roll film back. If I could recommend a tool for visualizing and composing it would be one of these view finders. They are small and can be taken along when scouting a location and they force you to close one eye and see in 2d which is extremely helpful as a photograph is a 2d representation of the subject photographed.  I also carry a Rodenstock 4x Lupe,  stop watch, compass, led headlamp and puck light, lens cleaning kit,  Giottos rocket blower,  2 cable release,  journal and pencil, rain cover, dark cloth and a Pentax digital spot meter. Lastly is my tripod a Gitzo Systematic with a Really Right Stuff bh-55

Ebony 4x5 system

Ebony 4x5 system

All in all its a heavy kit but all items are essential for large format photography. If you have any questions relating to this post please drop me a line under the contact page located in the menu bar above. Also check out my posts related to loading large format film holders and an introduction to the view camera here on my blog.

Loading 4x5 Film Holders

When I first started to shoot 4×5 one of the questions I had was how to load my newly purchased film holders with my film. I wanted to put together a short tutorial on this subject as it really is the first important step in shooting large format. Some of the tools I use in the process are the Harrison original changing tent by Camera Essentials, The Rocket Blower by Giottos  and my preference in sheet film holders the Fidelity Elite or the Lisco Regal II. As always if you have any questions shoot my an email on the contact page.